Set up DNS for your Domain using the DigitalOcean Control Panel
Table of Contents:
Setting up DNS for your Domain
Create required DNS records for your domain
Adding DNS entries for Mailgun to help with mail delivery
Create email.mailgun.org CNAME record
Add SPF and DKIM TXT records
-
The last step in our guide is to get DNS configured for our domain so when we type in:
Setting up DNS for your Domain
http://yourdomain.com
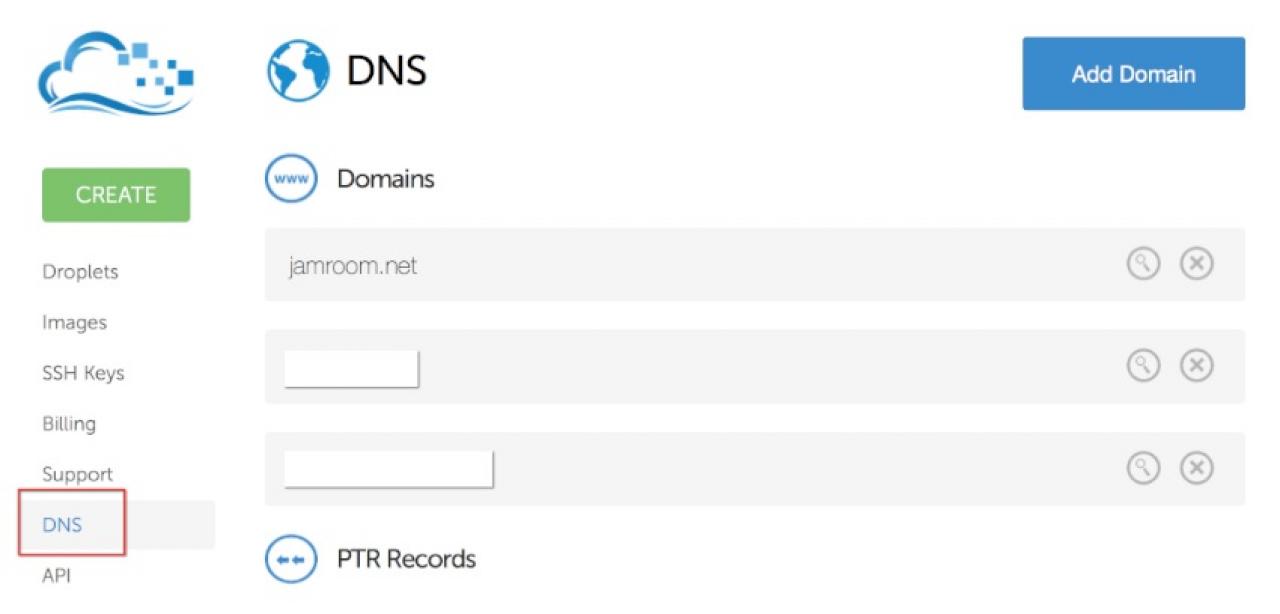
The request will actually go to your new server. To setup DNS for our new droplet, head into the DigitalOcean control panel and click on the "DNS" section in the left hand menu: -
-
Then click on the big "Add Domain" button at the top right hand side of the screen:
-
-
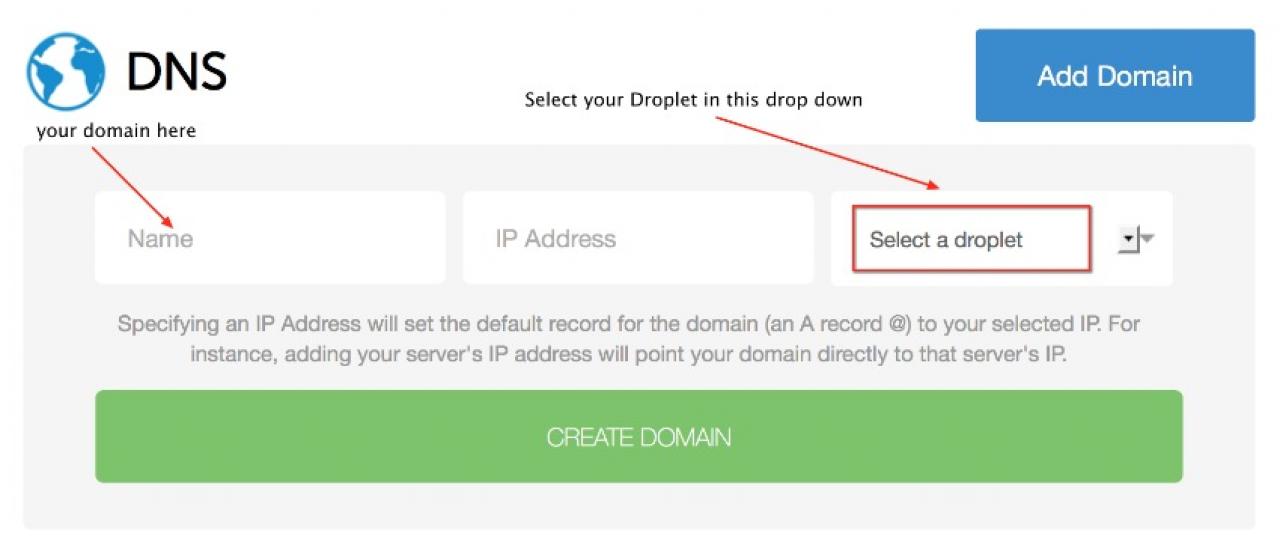
And enter your domain name WITHOUT the www - so if your domain is:
jamroom.net
You would enter:
jamroom.net
NOT
www.jamroom.net
It is just the "naked" domain.
Select the new Droplet you've created from the drop down menu and you will see the IP Address get added in automatically.
Press the big green "Create Domain" button and your domain will be added to the Control Panel. -
Now that your domain has been created in DigitalOcean, the next step is to setup the DNS records that are required to make things works.
Create required DNS records for your domain
Unlike the other sections of this guide, I'm going to reference the DigitalOcean DNS setup guide here:
https://www.digitalocean.com/community/articles/how-to-set-up-a-host-name-with-digitalocean
As you will see it is fairly long and does a good job walking you through each of the records you need to create to get your domain pointed to your DigitalOcean droplet.
-
Now that you have your basic domain entries setup in DNS, the next step is to add some specific records to our DNS that is used for Email delivery (mx records), as well as add a couple of TXT DNS records that help prevent spam.
Adding DNS entries for Mailgun to help with mail delivery
So the first step is to log into your Mailgun control panel again, and click on your domain that you are configuring. You should see something like the following: -
Mailgun needs TXT, CNAME and MX entries in your DNS
-
Our first entry is going to be to create a "CNAME" DNS entry for "email" - this will be used by Mailgun to track opens and log other info that can be seen in the "Tracking" section of your Mailgun Control Panel.
Create email.mailgun.org CNAME record
[/i]This entry is optional - you can skip it if you do not plan to use Jamroom's Newsletter module[/i]
So back in the DigitalOcean control panel, click on "DNS" in the left hand menu, then click on the small magnifying glass icon to the right of your domain you want to add the records to.
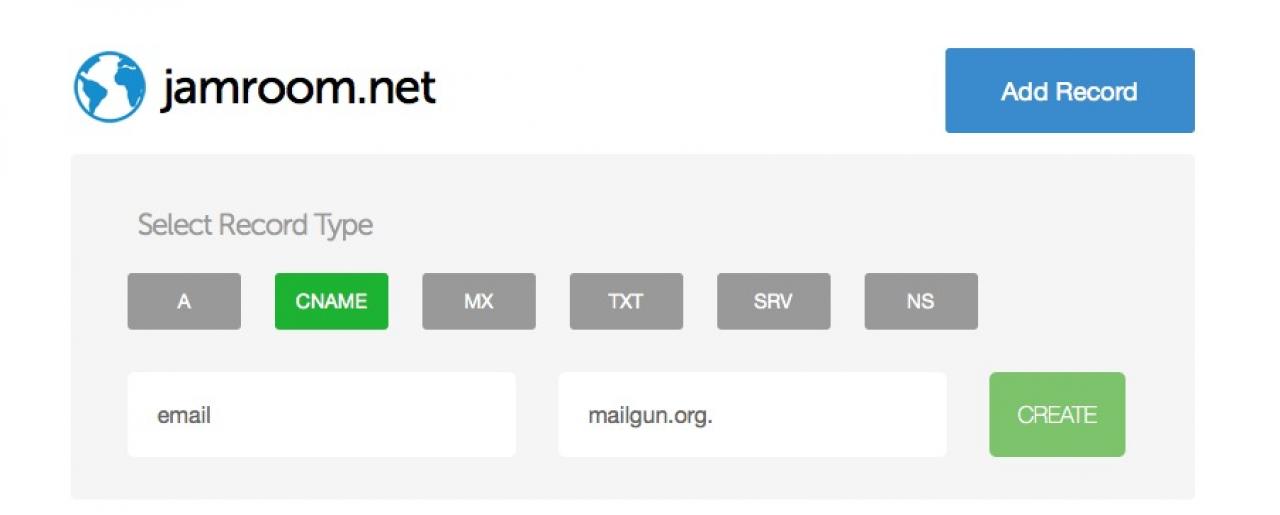
Once you are on the DNS records screen for your domain, click on the big blue "Add Record" button in the upper right and then click on "CNAME" for the type of record: -
-
In the first field enter the word "email", and in the second field enter "mailgun.org." - don't leave out the period after .org - that is required, then click on the green "Create" button to create the new record.
-
Our next step is to add both SPF (Sender Policy Framework):
Add SPF and DKIM TXT records
http://en.wikipedia.org/wiki/Sender_Policy_Framework
and DKIM (DomainKeys Identified Mail):
http://en.wikipedia.org/wiki/DKIM
records to your DNS setup - these records are used by the SMTP server to help "verify" that the email you are sending has not been spoofed. Without these records your delivery rate to your users will be much, much lower, so these records really are required to ensure your emails are delivered.
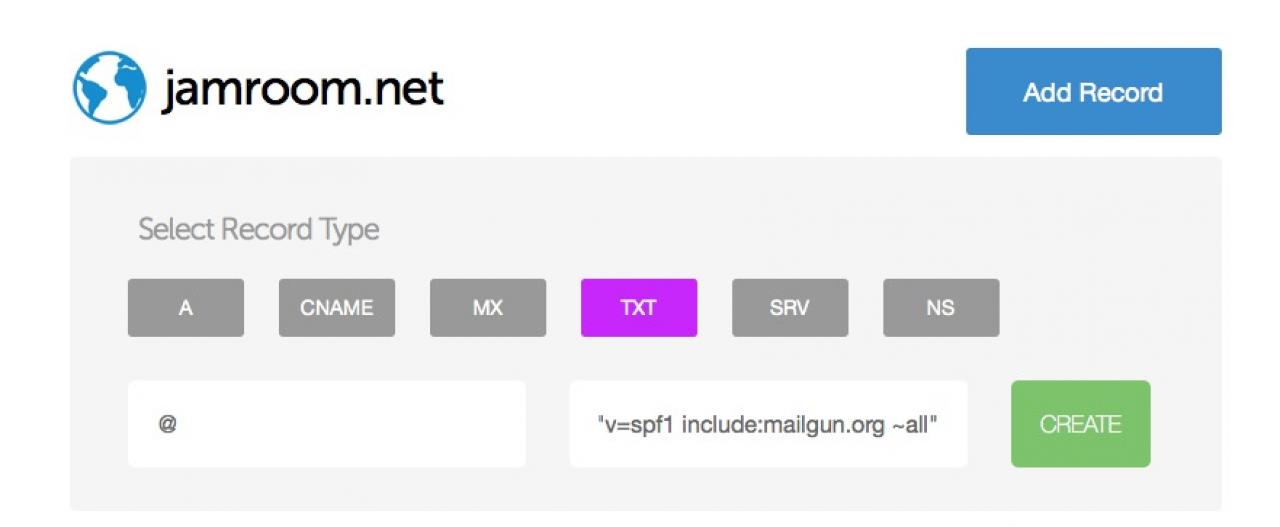
First up, let's add our SPF record. Click on "Create Record" again from the DNS records list for your domain, then click on "TXT" in the "Select Record Type" area, and enter the following: -
Don't forget the quotes around the value!
-
The record should be entered as:
@ - that is the "at" sign
and
"v=spf1 include:mailgun.org ~all"
Once you have entered those values, click on the green Create button to save the record.
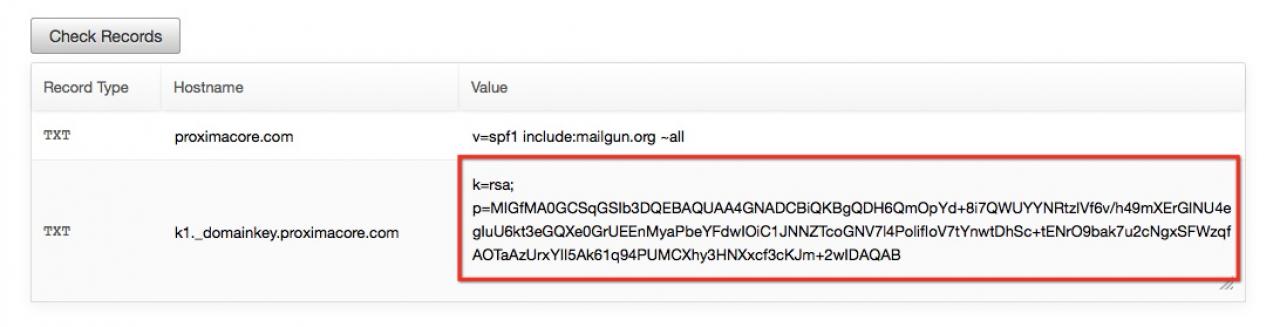
Next up we are going to to do the same thing for the DKIM record. Log back into your Mailgun control panel, and when viewing your domain you will see a very long TXT record that you need to copy: -
copy that entire long string so it can be pasted into the DigitalOcean DNS section
-
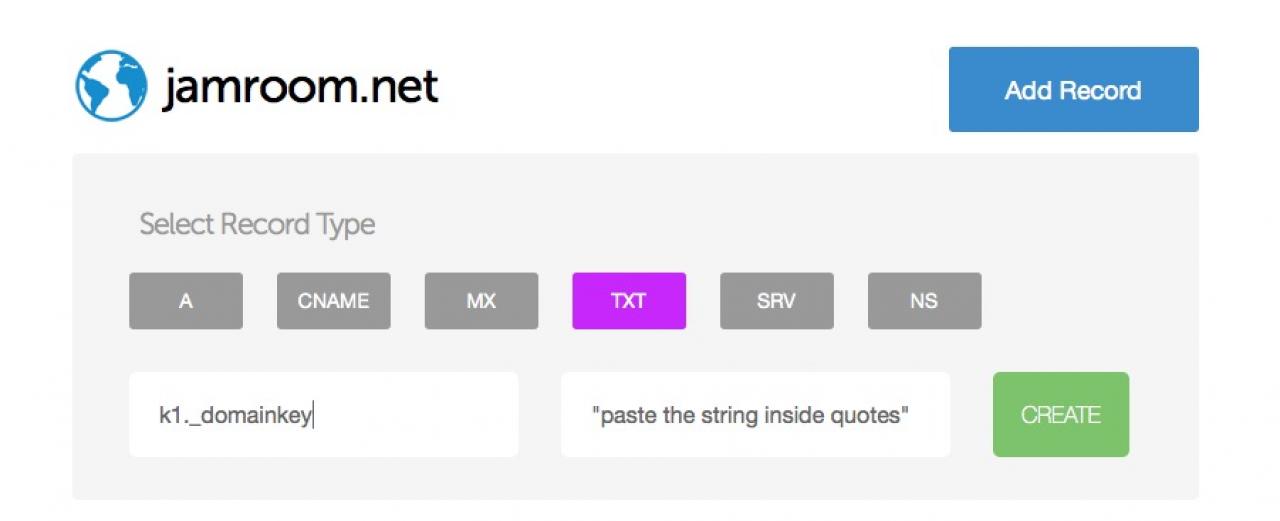
Now head back to the DigitalOcean control panel and create another TXT record for your domain:
-
Make sure that long string gets pasted INSIDE DOUBLE QUOTES!
-
Enter k1._domainkey (note that per comments below it appears this could also be smtp._domainkey) in the "Enter Name" field, and the long DKIM value you copied into the "Enter Text" field and don't forget to add double quotes around the value!
Click on the green "Create" button to save the record to your DNS.