Set up Postfix with Mailgun for reliable e-mail delivery
Table of Contents:
Install Postfix
Signup for a free Mailgun account
Configuring Postfix to use Mailgun as a relay host
-
The next step in our guide is to get Postfix installed - Postfix an STMP/Email server that is used for delivering email. It is NOT a POP3/IMAP server, so it's not something you will use to get email into your mail client.
Install Postfix
As the root user, install postfix:
apt-get install postfix
This will install the postfix Mail server, with it's config files located in /etc/postfix.
-
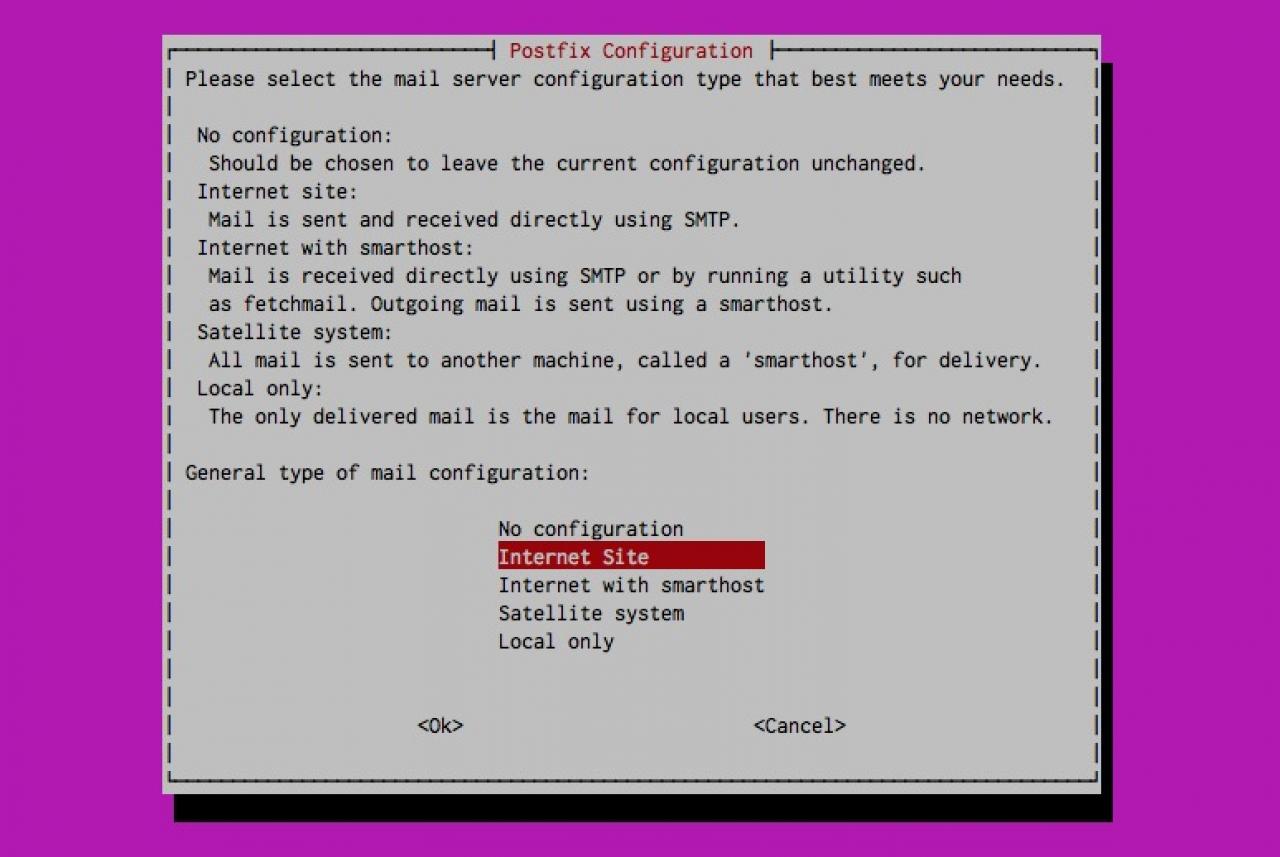
Choose "Internet Site" and enter, then enter your domain name on the followup screen.
-
The next step is to get setup with a free Mailgun account. What is Mailgun? From the Mailgun website:
Signup for a free Mailgun account
"Mailgun is a set of powerful APIs that allow you to send, receive and track email effortlessly.
Think of Postfix as the mailbox at your house - when you want to send a letter (email) to someone else, you put it in the mailbox (Postfix). Then the mail is picked up by the mail carrier (Mailgun) and delivered.
Mailgun is optional - you can send and receive email directly using Postfix, however I would highly recommend using Mailgun as your delivery service, as they will get your email delivered to a higher percentage of your customers than delivering on your own.
The first 10,000 emails each month via Mailgun are free - after that it is just 50 cents for every 1,000. You can signup for an account here:
http://www.mailgun.com/
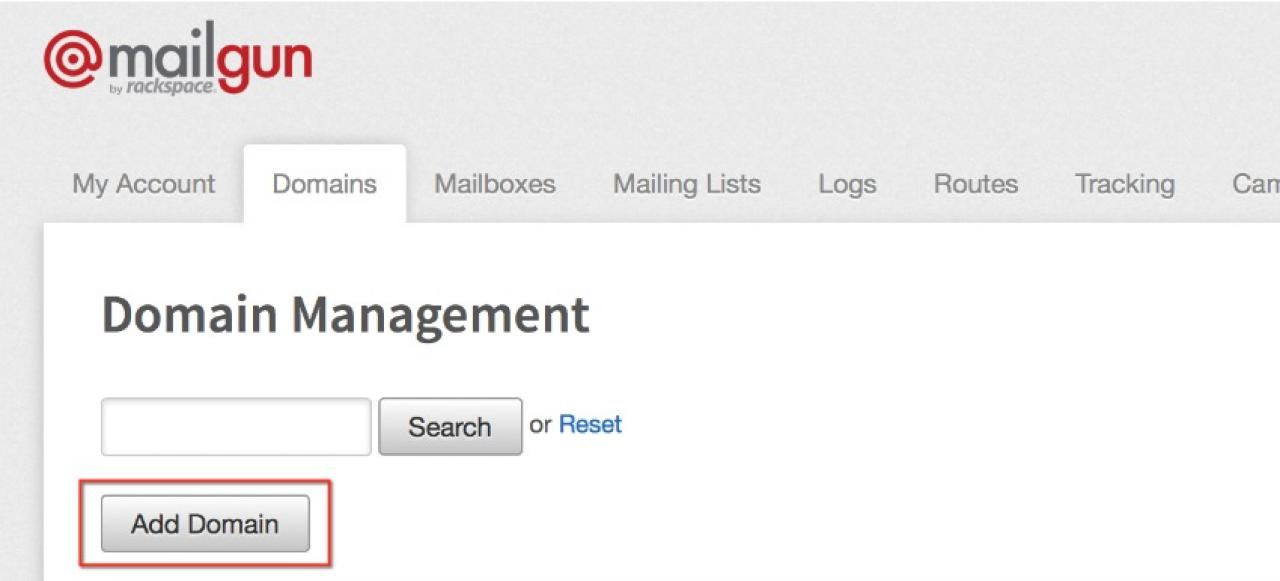
Once signed up, go to your Mailgun Control Panel:
https://mailgun.com/cp
and click on the "domains" tab then the big "Add Domain" button: -
-
Enter your domain name on the form that comes up and press the dark gray "Create Domain" button at the bottom of the form.
This will create your domain in Mailgun.
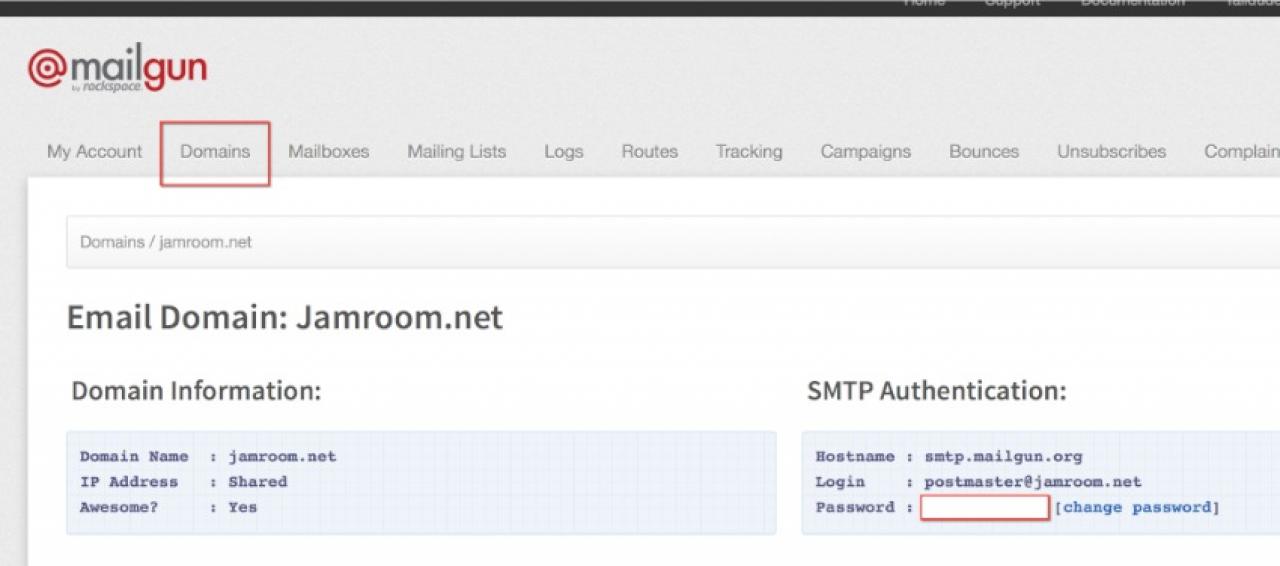
Next, click on the "Domains" tab again, and then click on your new domain in the domains list. This will take you into the details page for your new domain, and should look something like the following: -
-
On this screen you can find your SMTP password - this is the password we are going to need when configuring Postfix to send our email through Mailgun.
Configuring Postfix to use Mailgun as a relay host
So with the new password in hand, head back to your new Droplet and let's edit the Postfix main.cf file:
nano /etc/postfix/main.cf
and add the following to the bottom of the file:
relayhost = smtp.mailgun.org
smtp_sasl_auth_enable = yes
smtp_sasl_password_maps = static:postmaster@jamroom.net:password
smtp_sasl_security_options = noanonymous
Replace:
- jamroom.net with YOUR DOMAIN name
- password with the password you just grabbed from the Mailgun control panel.
Save your changes and restart postfix:
service postfix restart
That's it - your Postfix will now send all email out through Mailgun.