Merging Module and Skin Updates
Table of Contents:
Options for alterations
#1) Download the .tpl files
#2) Use the built in editor in the ACP to alter the TEMPLATES.
Using compare to update a cloned skin
-
Code changes.
Jamroom is designed to be customized. This section looks at the methods available to merge the changes we have made with the new core changes of modules and skins. -
There are a couple of methods available to you to allow you to alter Jamroom to make it do what you need it to do:
Options for alterations
#1) Download the .tpl files of your skin and alter them on your local computer with a development tool like Dreamweaver, PHP Storm, a text editor, etc. Then re-upload your altered templates to your site.
#2) Use the built in editor in the ACP of your site to change the code via the TEMPLATES tab.
-
If you are using this method, then you would use a version control system to keep track of changes to the code. The teams preference for a version control system is GIT but you could use whatever you like or are already using.
#1) Download the .tpl files
When a new version of a module or skin is released in the Marketplace, the previous version will be saved in its own versioned "release" directory.
This will mean you can end up with many different versions of the same module or skin (but only one version is every "active" at any time).
-
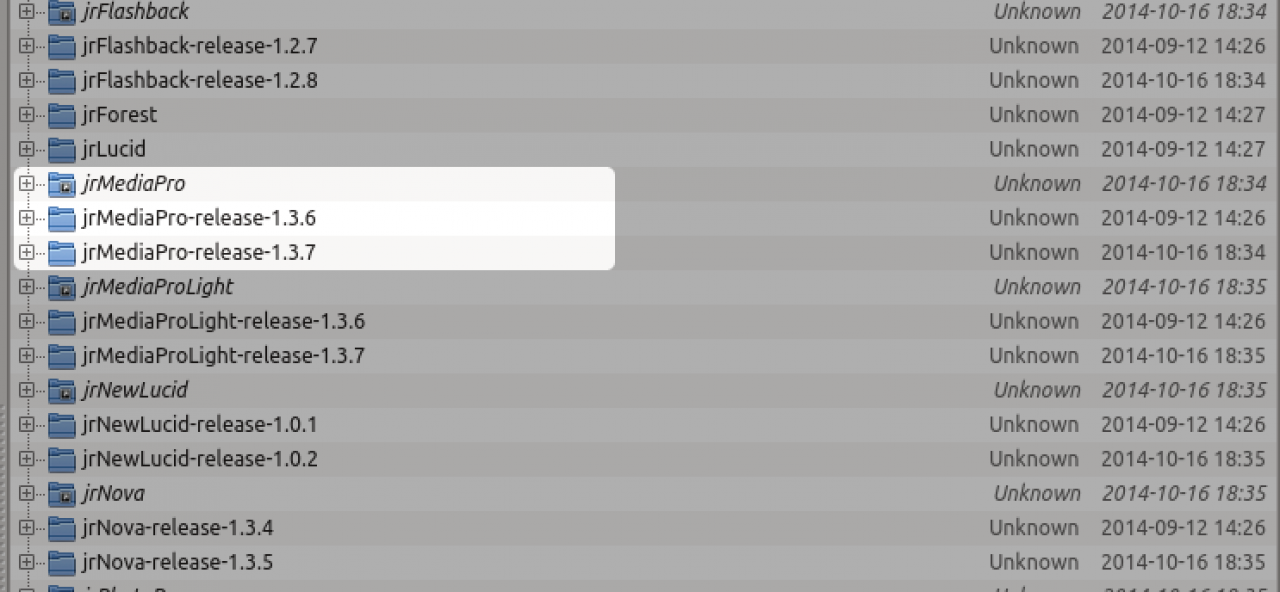
screenshot of all the versions of MediaPro skin on the server
-
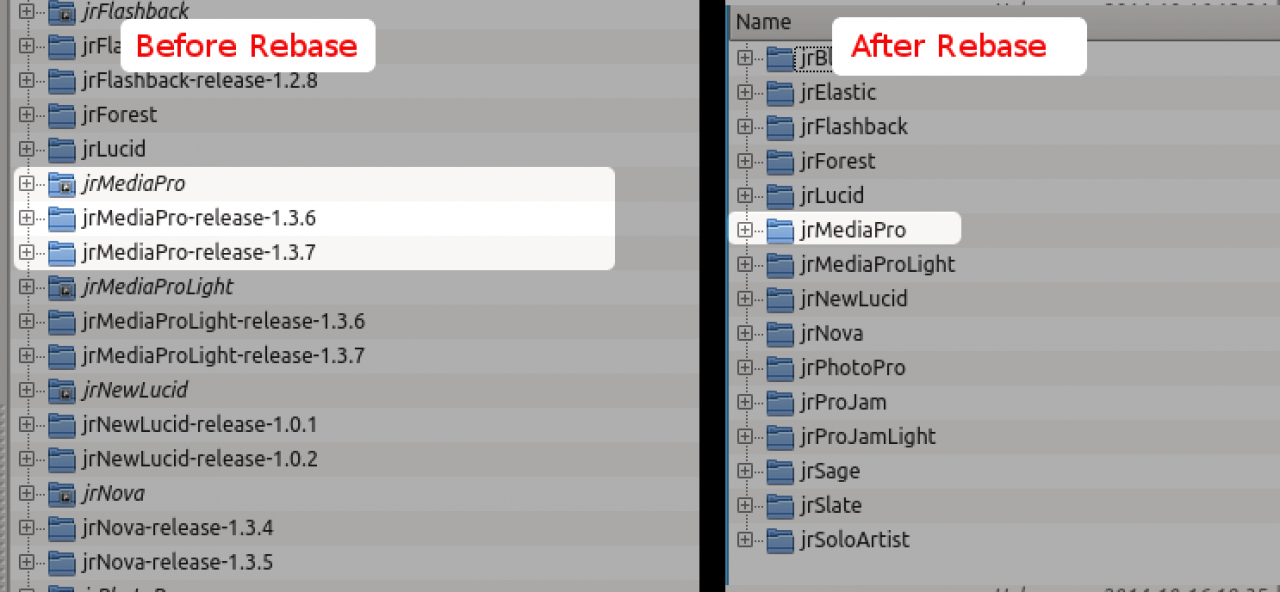
In the above screenshot, you can see 3 directories that have jrMediaPro in the name.
The first 'jrMediaPro' entry is actually a symlink that points to the newest version of the jrMediaPro skin (in it's own "release" directory).
If your using a version control system, then this structure will not help you understand what has changed. We need a way to bring the latest version back to its main directory before we download to our version control system on our local computer.
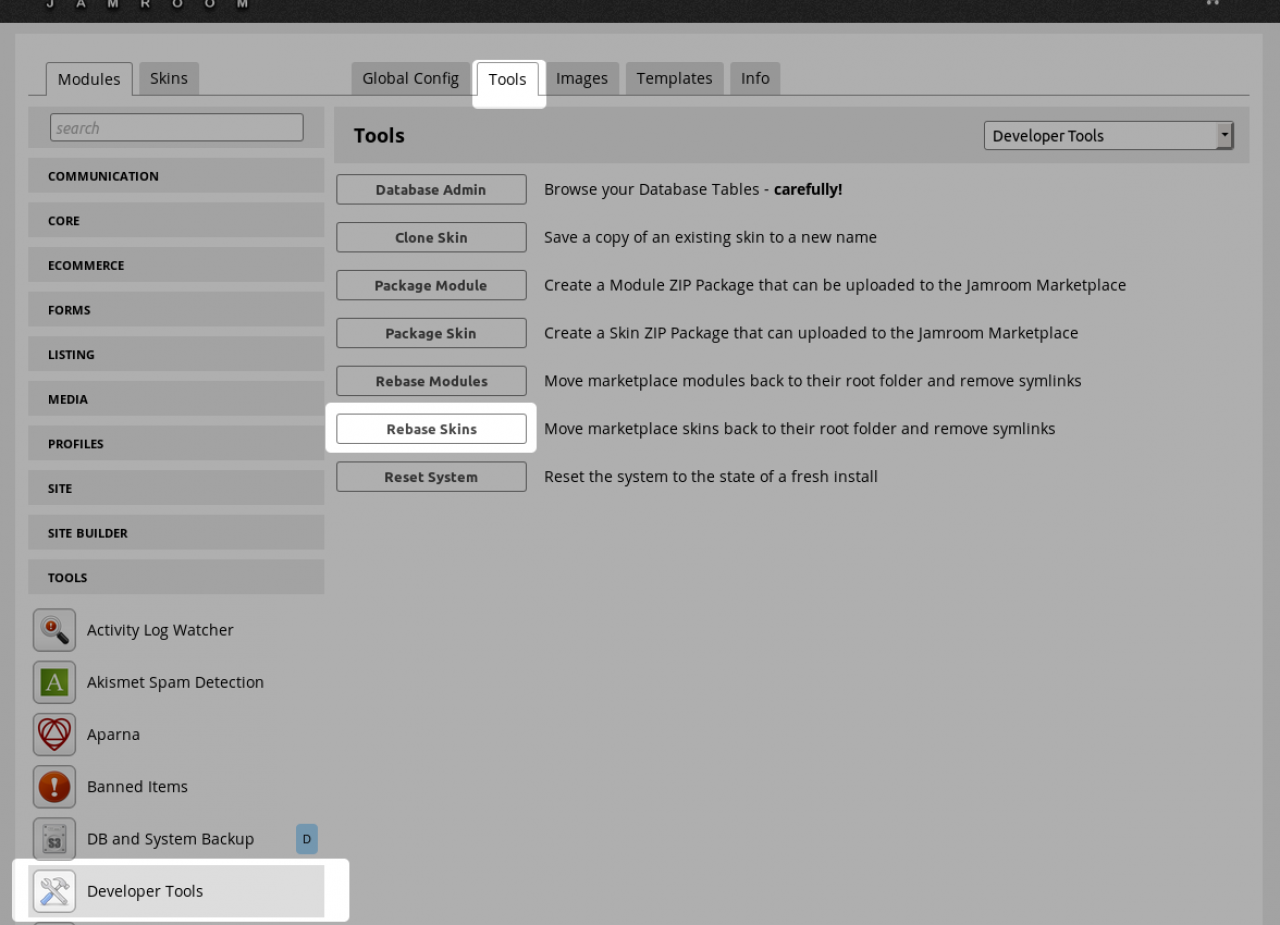
So for that we use the Developer Tools module. -
screenshot of the Rebase Skins button in the Developer Tools module.
-
The Rebase Skins tool takes the latest version of the module and copies it back to its base url folder.
-
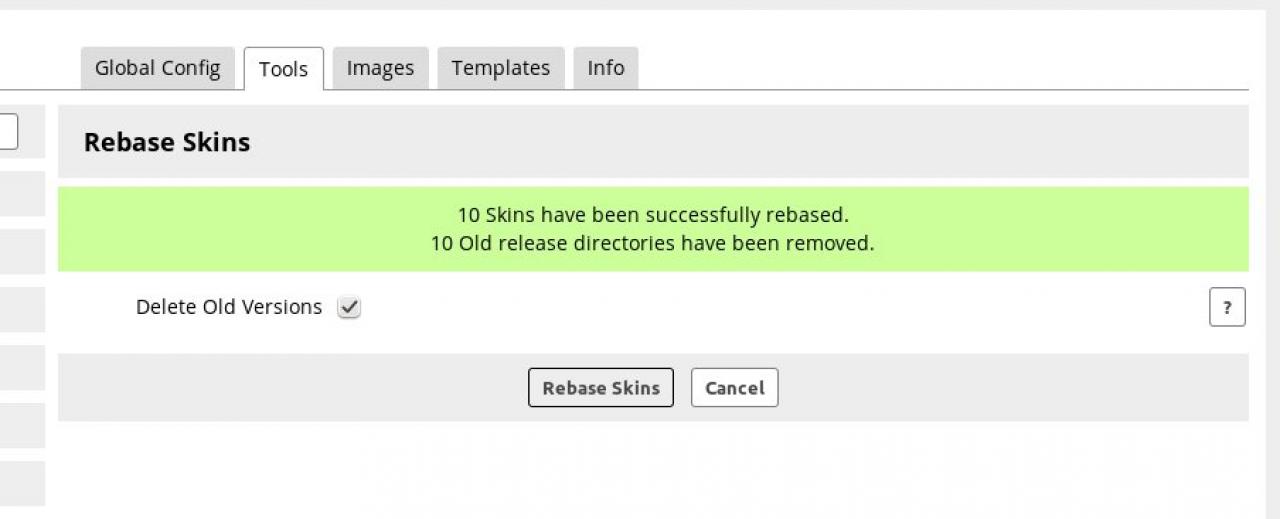
screenshot of the success screen for rebase skins tool.
-
After skin rebasing there will only be one version of the module, the latest version.
now when you download it to your development environment, only what has changed will show up in your version control system. -
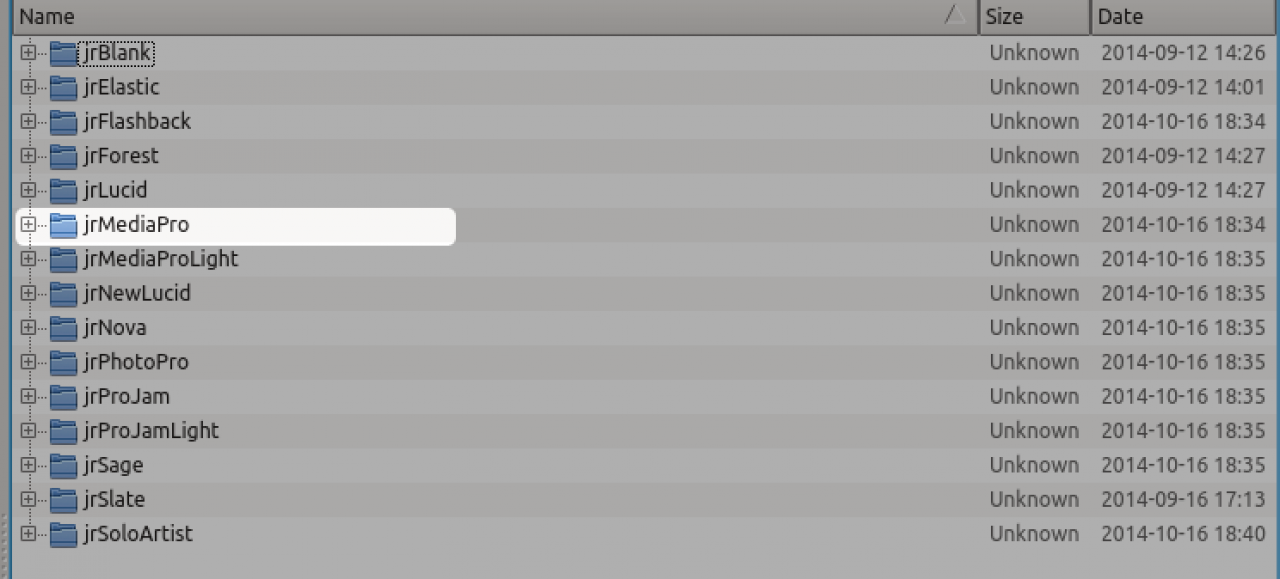
Screenshot of the servers skins directory after the rebase skins tool has run.
-
screenshot before and after rebase
-
If you are using this, then you would alter the templates to get them how you like them then when an update comes in you could use the COMPARE button to compare how your changes line up with the new updates, then make the alterations necessary.
#2) Use the built in editor in the ACP to alter the TEMPLATES.
-
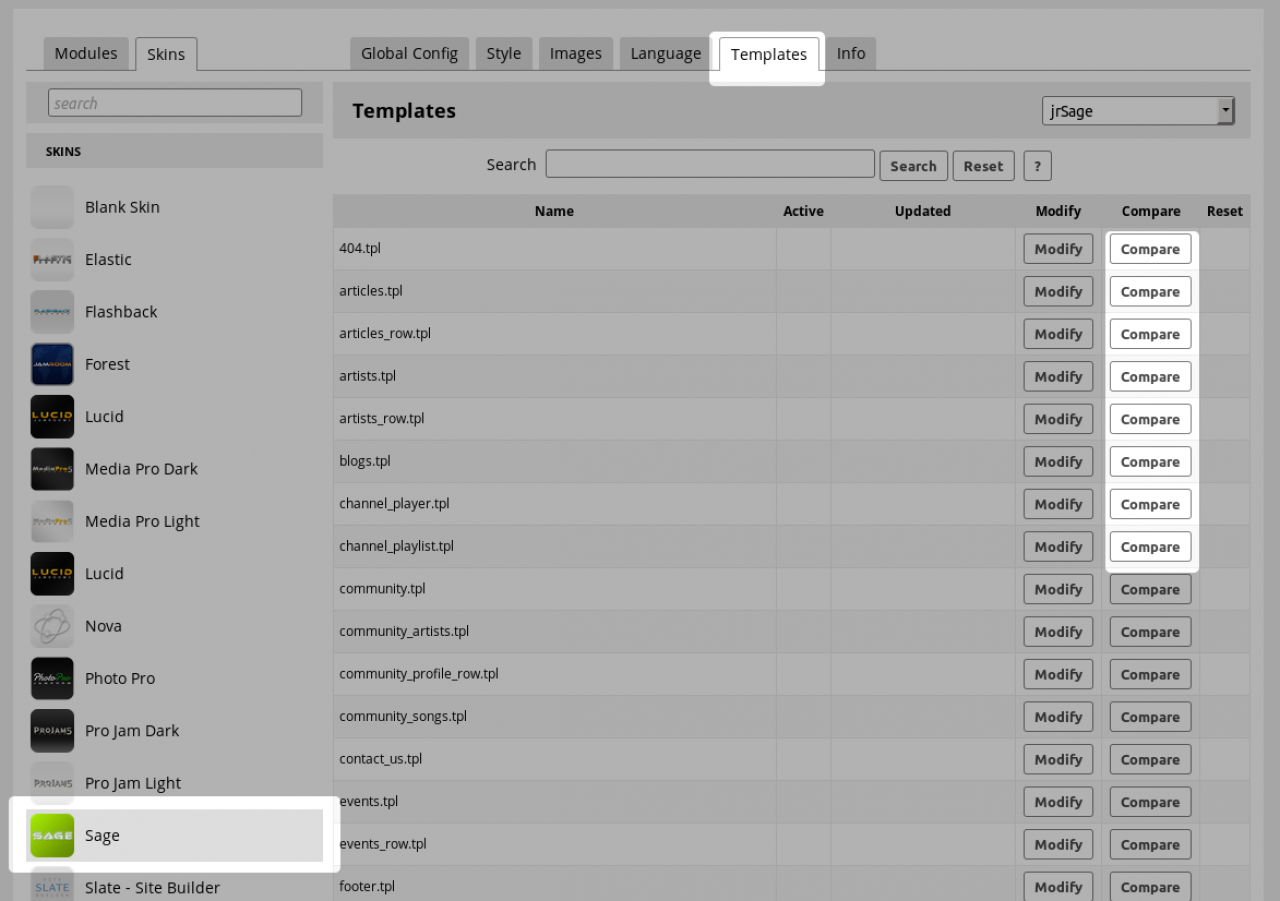
If you have cloned a skin and an update has come out for that skin which you want to include in your cloned skin too, then the first thing your going to want to know is "What Changed?".
Using compare to update a cloned skin
You can use the COMPARE button to do that.
The COMPARE button is on the TEMPLATES tab of the skin you want to know about.
so in this example we have cloned the jrSage skin when it was at version 1.2.7 and version 1.2.8 has just come out. We want to know what changed. -
screenshot of the TEMPLATES tab on the sage skin.
-
So we locate the file we are interested in, in this case header.tpl and click on the COMPARE button.
-
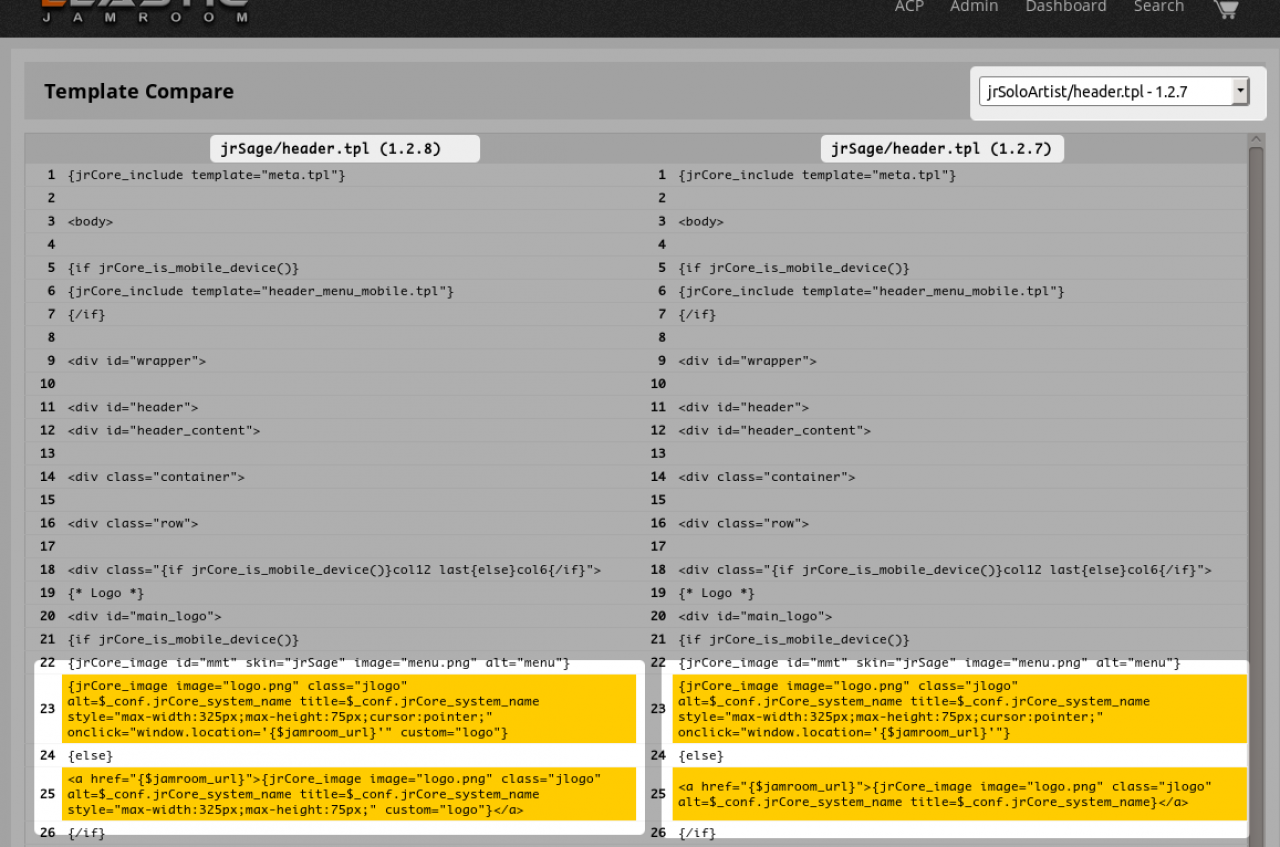
screenshot of the compare dialog with 2 versions of header.tpl displayed
-
In the above screenshot you can see the differences between header.tpl in version 1.2.8 and header.tpl in version 1.2.7.
Once you know what the differences are, then you can choose whether you want to include that new code into your cloned skin or not.
Using the selector that is highlighted in the top right of the screen, you can also compare to the same file in other skins. So in the case where you have cloned jrSage, you could compare its header to your version to know what needs to be added in to your cloned skin.