HowTo: Make the site visible to Members Only
Table of Contents:
Overview
First create the welcome page with Site Builder
Create the Login/Signup box
(optional) turn the login/signup into tabs
Add your welcome text
Finished YOUR-SITE.com/welcome page
Setup the redirect to send all non-logged in users to the /welcome page
Thats it.
-
Some communities want their sites to only be visible to their members. This HowTo shows a simple way to set that up.
Overview
We're going to use Site Builder to construct the page that will be shown to anybody who is not logged in. This page will contain the login and signup form.
Non logged in users will only be able to see this page. -
There are some options for site privacy also at this location:
ACP -> MODULES -> USERS -> USERS -> GLOBAL CONFIG -> SITE SETTINGS -> SITE PRIVACY
Listed below is a different method, if you just want your top page and signup pages visible, you can use this option instead. For more flexibility, continue reading. -
The first thing we want to do is to create a 'Welcome' page with Site Builder to show to logged out users.
First create the welcome page with Site Builder
For this page, we don't want to have a menu item linking to it, so we just go directly to the URL we want to use.
In the address bar of your site, open:
YOUR-SITE.com/welcome
-
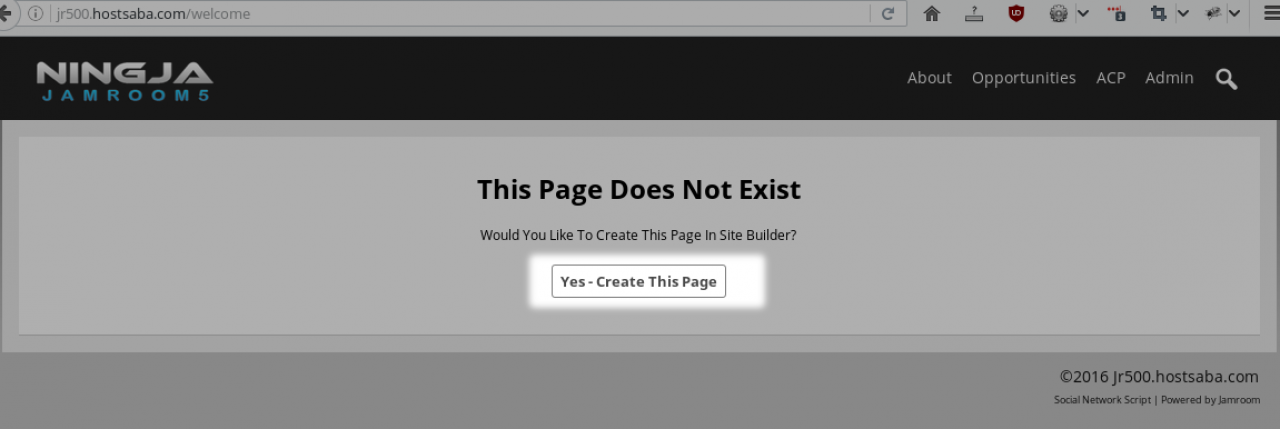
screenshot of the "Create This Page" notice shown by the Site Builder system
-
We don't have to use the URL 'welcome', anything would work.
The above screenshot shows what we would see on the YOUR-SITE.com/welcome screen if the site builder system is active. Click the "Yes - Create This Page" to add a page to this URL.
( Only the admin user can use the Site Builder system, so make sure you are logged in as the Admin User while doing this) -
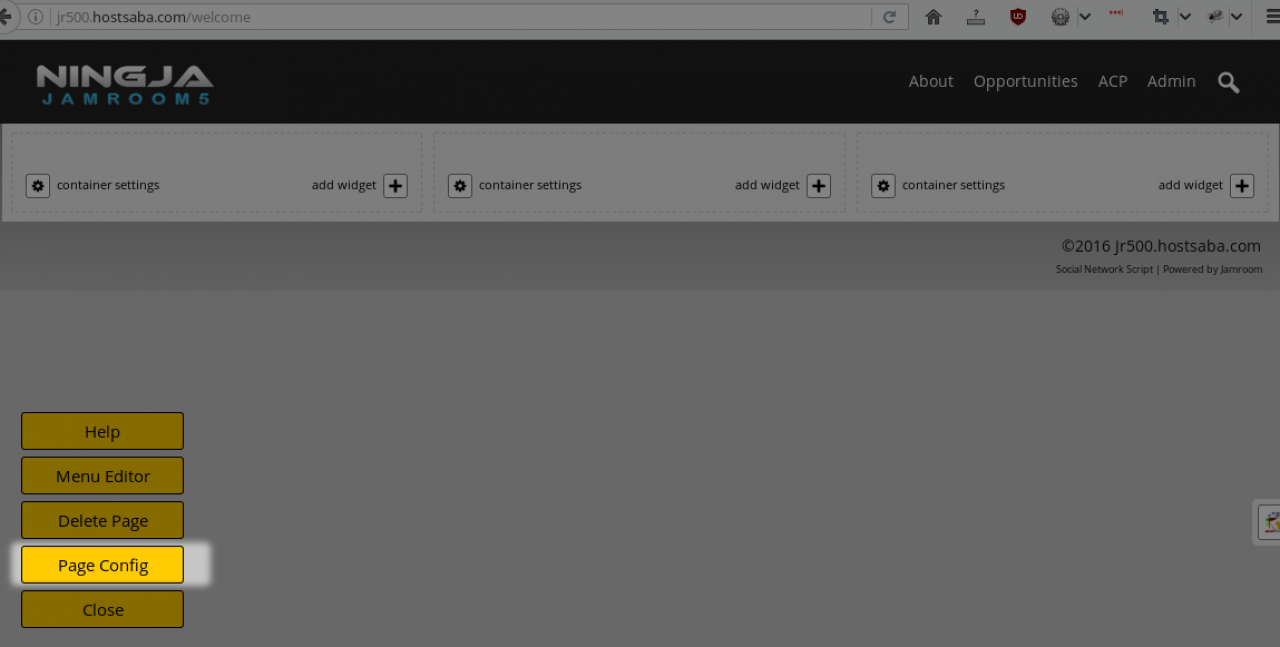
screenshot of the Site Builder 'Page Config' button to change the page layout
-
You can have whatever page layout you like, but for the purposes of this page, I think a two column layout of width 8 and width 4 will probably work well.
We can put the details of the site you want the new members to see in the width 8 column and the signup/login box in the width 4 section.
So open the Page Config section and delete the existing 3 column layout and add an 8|4 column page layout then save. -
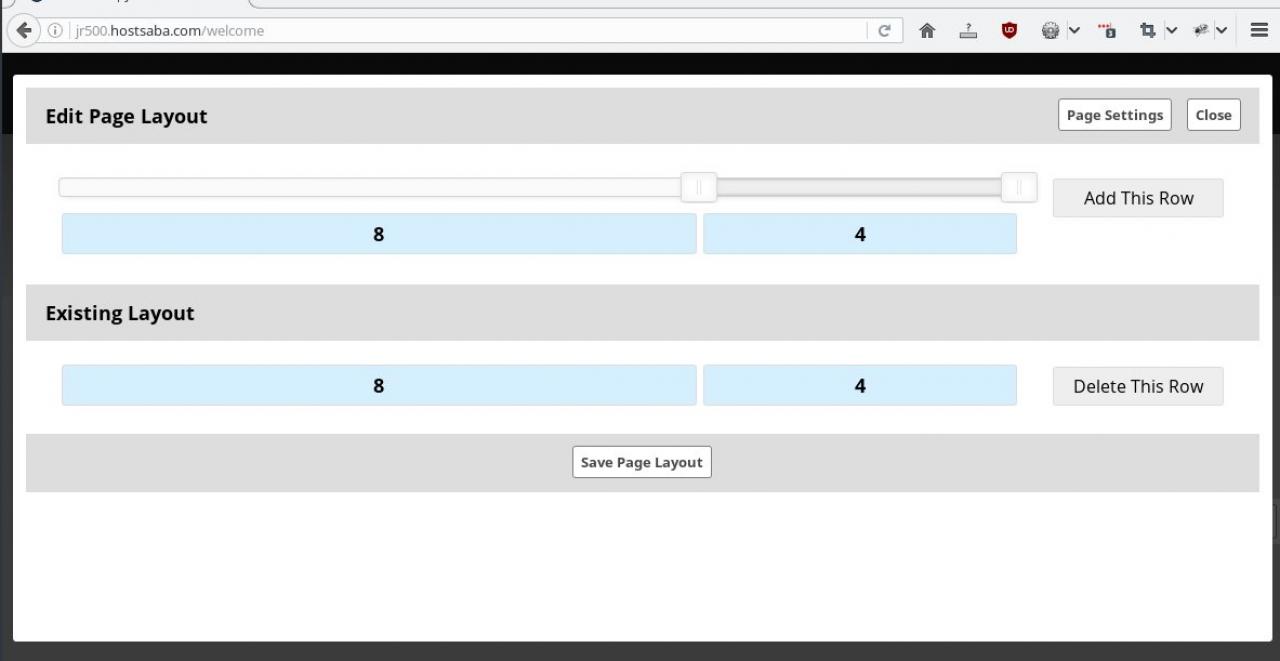
screenshot of the Page Layout editor setup with a single row of two columns
-
In the smaller column, click the "Add Widget +" button to add a widget to that location.
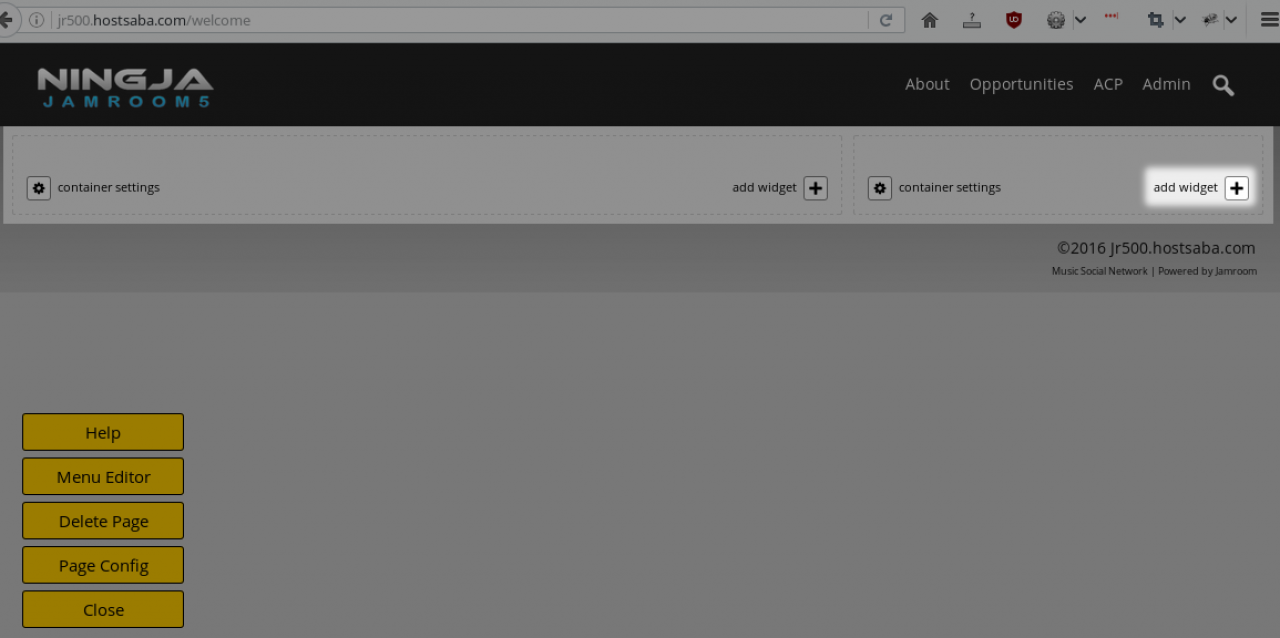
Create the Login/Signup box
-
screenshot of the 'Add Widget +' button in the right most column
-
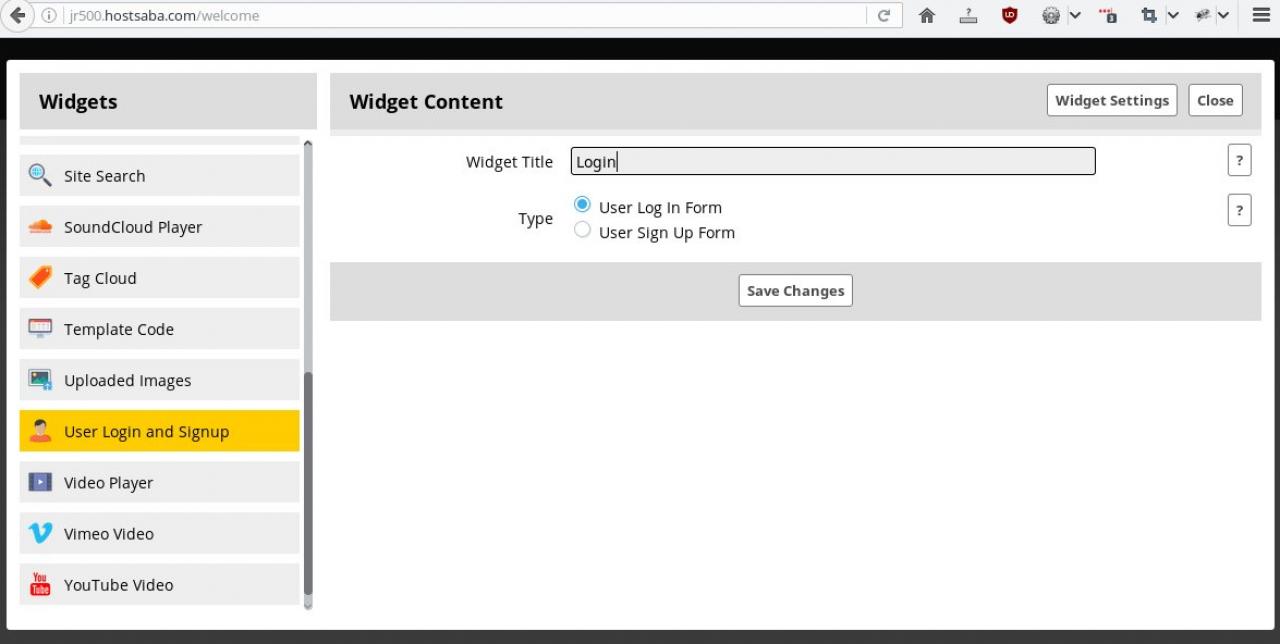
In the dialog that opens, locate the "User Login and Signup" widget from the list.
Add the "Widget Title" of Login and select the 'User Log In Form' from the 2 choices.
Then Save Changes -
screenshot of the Login widget setting
-
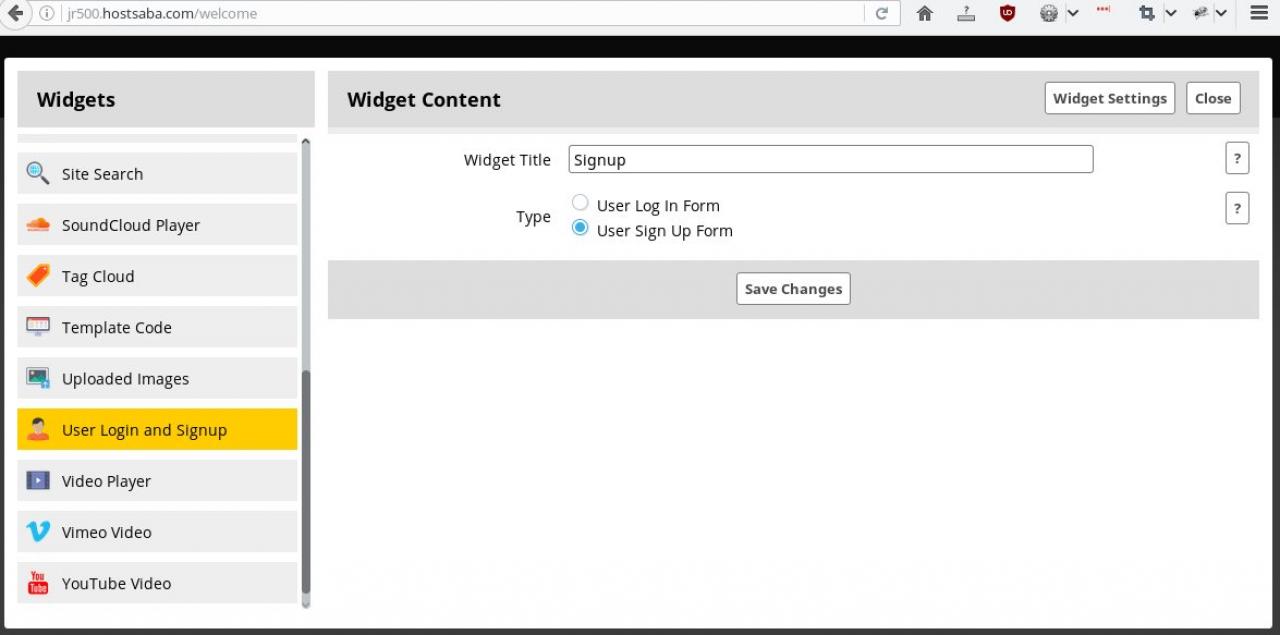
Next, we want to repeat the process and add the Signup box, so click the "Add Widget +" button just like before to add another widget to that same section.
-
screenshot of the Signup widget being added to the page
-
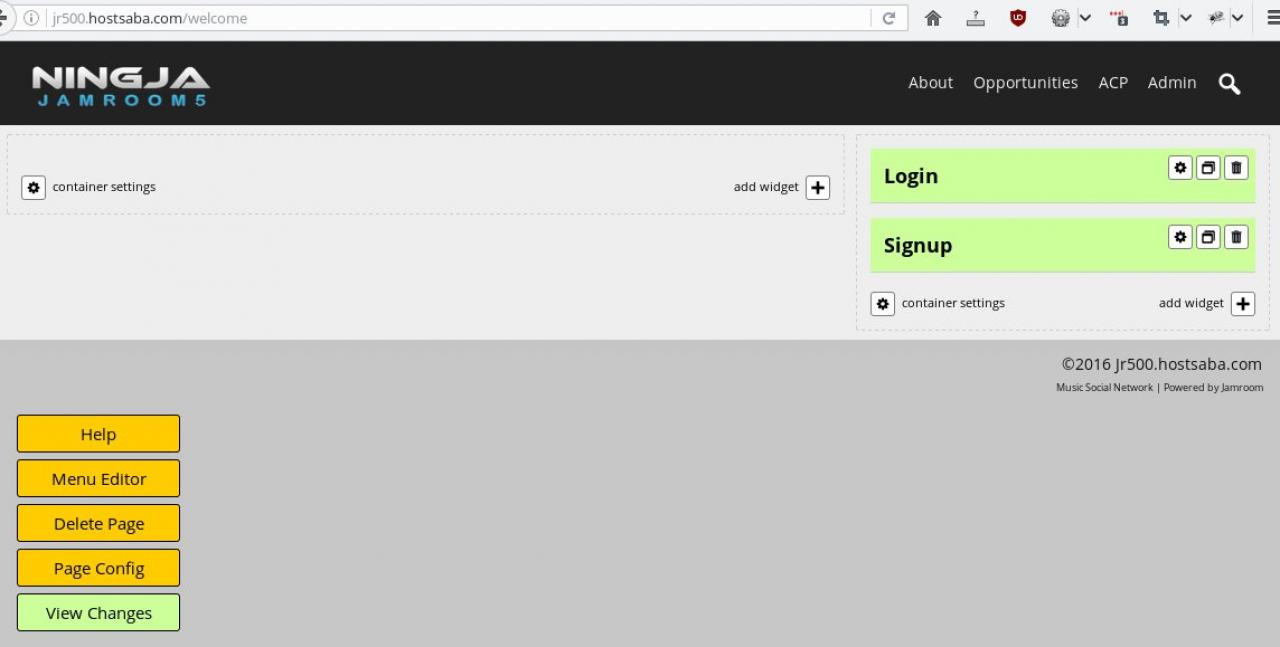
Your page will now look like this:
-
screenshot of the welcome page with 2 widgets added.
-
Click the green View Changes button shown on the bottom left of the screen to refresh the page and see the output of the widgets.
-
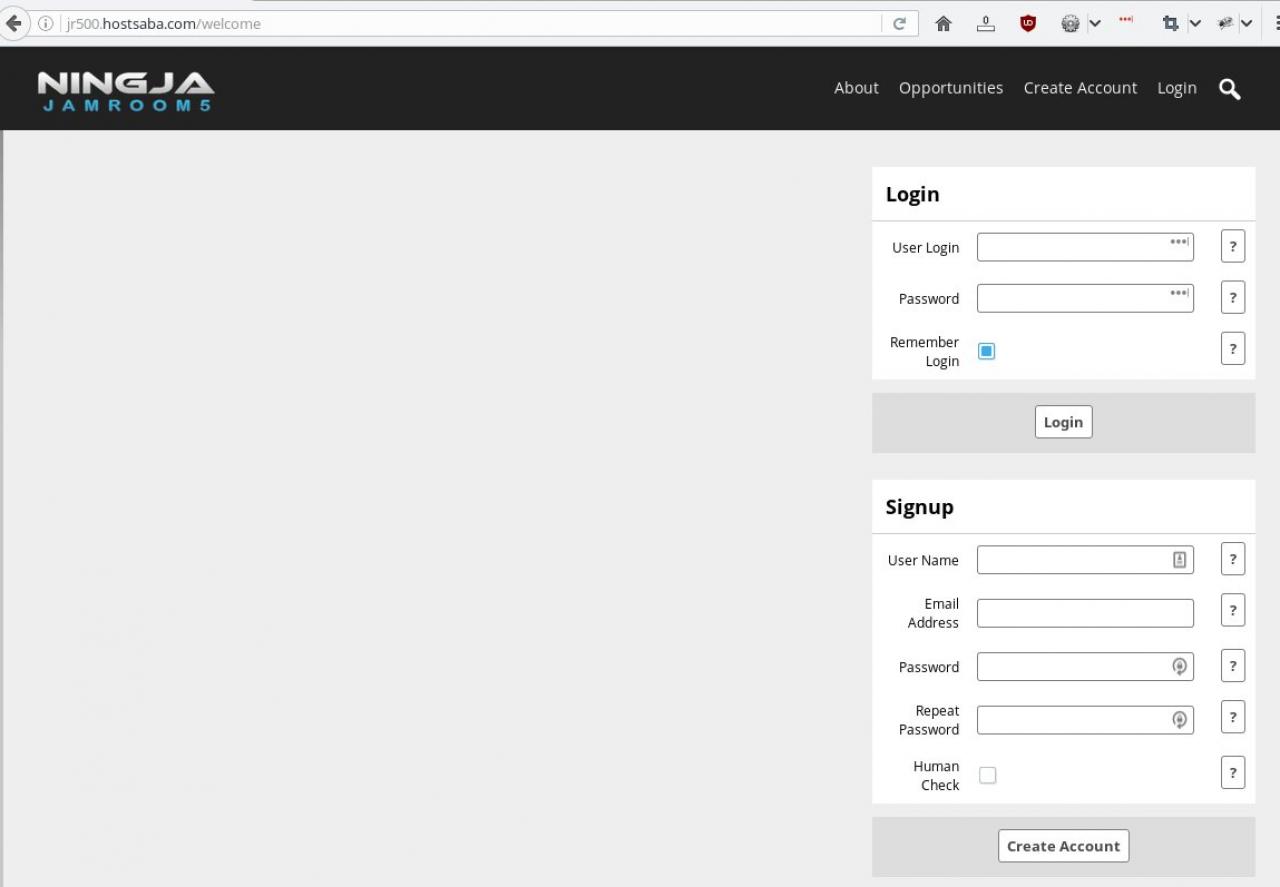
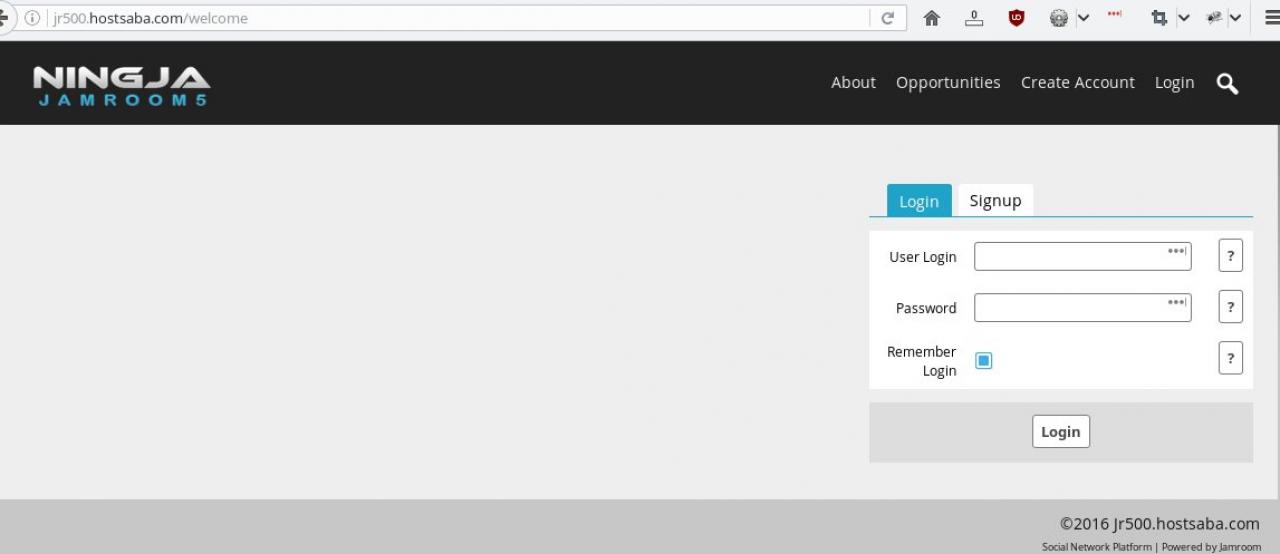
The Login box and the Signup box won't show to logged in users, so you will just see a placeholder text since you are logged in as the admin.
You could log out and see what they look like if you desired. -
screenshot of the login and signup boxes as seen by a logged out user
-
This is an optional step to do if you think it looks better.
(optional) turn the login/signup into tabs
We can have both the login and the signup visible on the page at the same time as is shown in the screenshot above, or we can turn that section into a tabbed section and show them as one behind the other with tab navigation.
Lets look at what that looks like now. -
Screenshot of the Site Builder interface with the "Container Settings" button highlighted
-
Click the "Container Settings" on the container holding the Login and Signup widgets.
The "Container Layout" option will be set to "Stacked - widget output is stacked vertically inside the container"
Change that to "Tabbed - each widget is located on its own tab inside the container".
Click SAVE CHANGES then VIEW CHANGES. The page will now look like this to the logged out user. -
screenshot of the Login and Signup widgets displaying in tabbed layout
-
Add another widget to the box on the left this time. Use the "HTML Editor" widget which is selected by default.
Add your welcome text
If the Editor Embedded Media module and the Editor Image Upload module are active in your system you can add images and videos as well as text via the "HTML Editor" widget, so be sure to checkout the details on how those modules work.
Lets add a title and some text to let new users know what our site is about. -
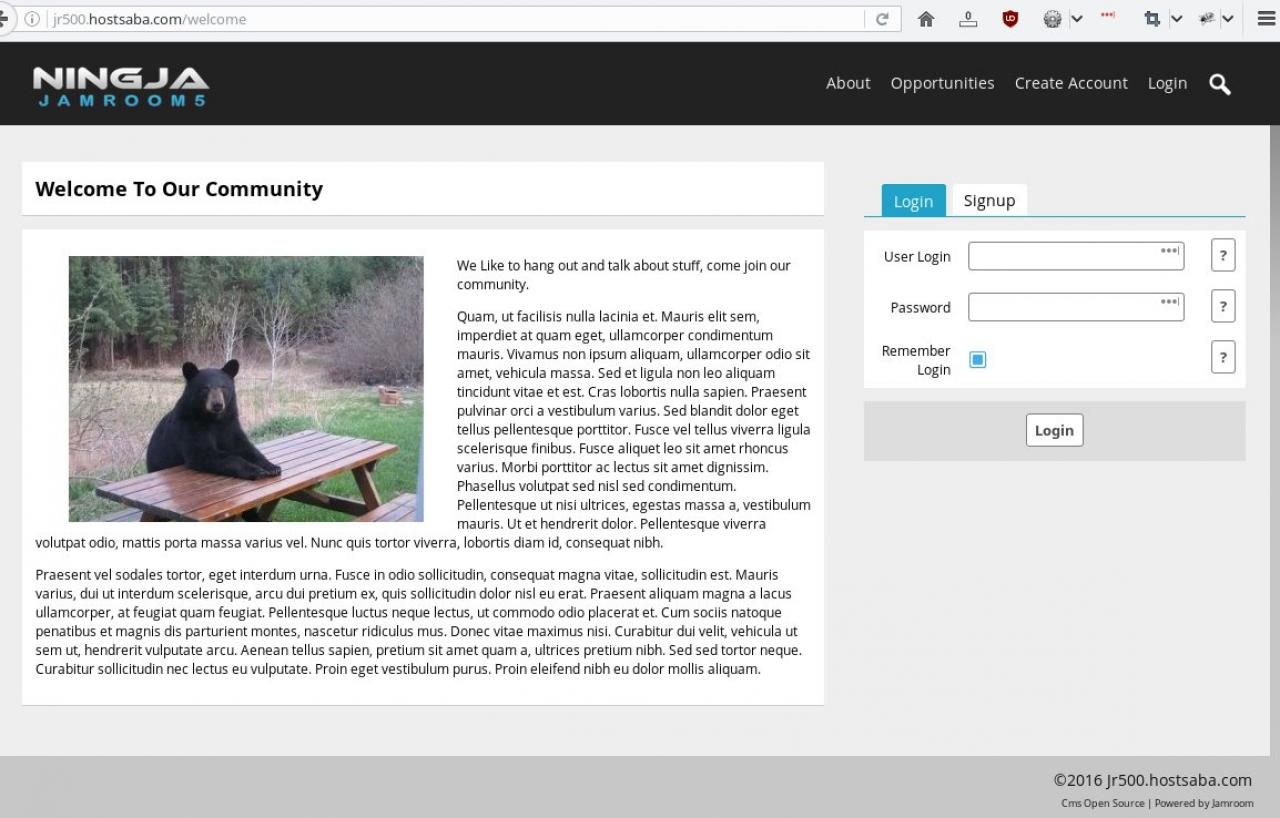
This is what the finished page will look like. Of course you can make yours as fancy as you would like.
Finished YOUR-SITE.com/welcome page
-
screenshot of the finished Site Builder page on the /welcome url
-
The next step is to add a small bit of code to the skin we are using that redirects all non-logged in users to the /welcome page.
Setup the redirect to send all non-logged in users to the /welcome page
There are a couple of ways to do this, however for this example I'll stick to just one to keep it simple.
Navigate to the ACP, then to:
ACP -> SKINS -> (the skin you are using) -> TEMPLATES -> header.tpl -> MODIFY
The top of that file will look something like this:
{jrCore_include template="meta.tpl"} <body> -
We want to add our redirect code in just after that include for meta.tpl, so insert it so it looks like this
{jrCore_include template="meta.tpl"} {$allowed = array('/welcome', '/user/login', '/user/signup', '/user/forgot')} {if !jrUser_is_logged_in() && !in_array($_post._uri, $allowed)} {jrCore_location("{$jamroom_url}/welcome")} {/if} <body> -
The code that we added, in English, reads like this "If the user is not logged in, AND the destination URL is not in our list of allowed urls, then redirect them to the /welcome page".
Click SAVE CHANGES to save that code that you just entered.
IMPORTANT ( because people often forget ): Now you need to make your changes ACTIVE!
After you have clicked SAVE CHANGES, click CANCEL, or just click on the TEMPLATES tab again to go back to the list of templates.
Check the check checkbox in the 'Active' column and the header.tpl row, scroll down to the bottom of the page and click SAVE CHANGES to activate your template alterations. -
Reset the caches so your changes become active immediately:
ACP -> MODULES -> CORE -> SYSTEM CORE -> TOOLS -> RESET CACHES -
Now when you log out, the only page you will be able to see is that welcome page.
Thats it.