The Image System
Table of Contents:
Overview
Getting Images Into the system
* via the /img folder in a skin
* via the /img folder in a module
* via the image over-ride in the ACP on a modules IMAGES tab
* via the "Additional Images" upload system in the ACP
* via the image upload button on a modules form
For Developers
Function jrCore_image
Function jrImage_display
-
Jamroom contains a powerful system for manipulating the images in the system.
Overview
Here we will look at all the locations images can be entered into the system and how you can manipulate images that exist in the system to give your site the look you are after. -
There are a few ways to get images into the system.
Getting Images Into the system
* via the /img folder in a skin
* via the /img folder in a module
* via the image over-ride in the ACP on a modules IMAGES tab
* via the image over-ride in the ACP on the skins IMAGES tab
* via the "Additional Images" upload system in the ACP
* via the image upload button on a modules form, eg:the gallery form.
Lets take a look at these locations now: -
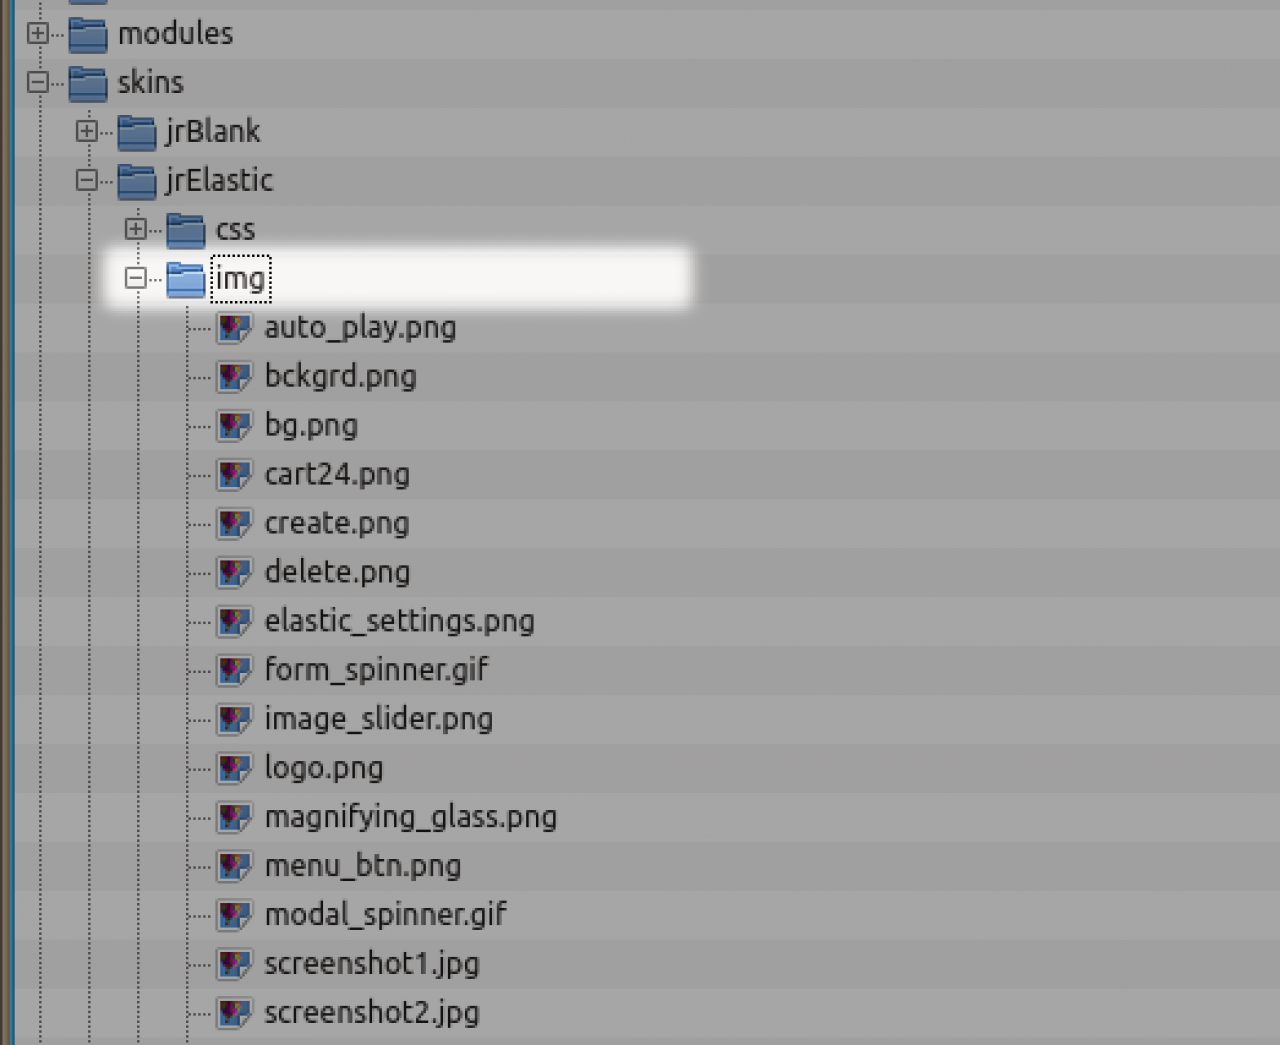
Inside every skin that is created for Jamroom you will find a folder named /img.
* via the /img folder in a skin
/img is a special folder that allows any image in there to be picked up by the system and over-ridden by the admin users.
Skin designers can put images into any folder they like but if they choose to use /img then the admin users will gain this extra functionality. -
screenshot of the /img folder in the jrElastic skin.
-
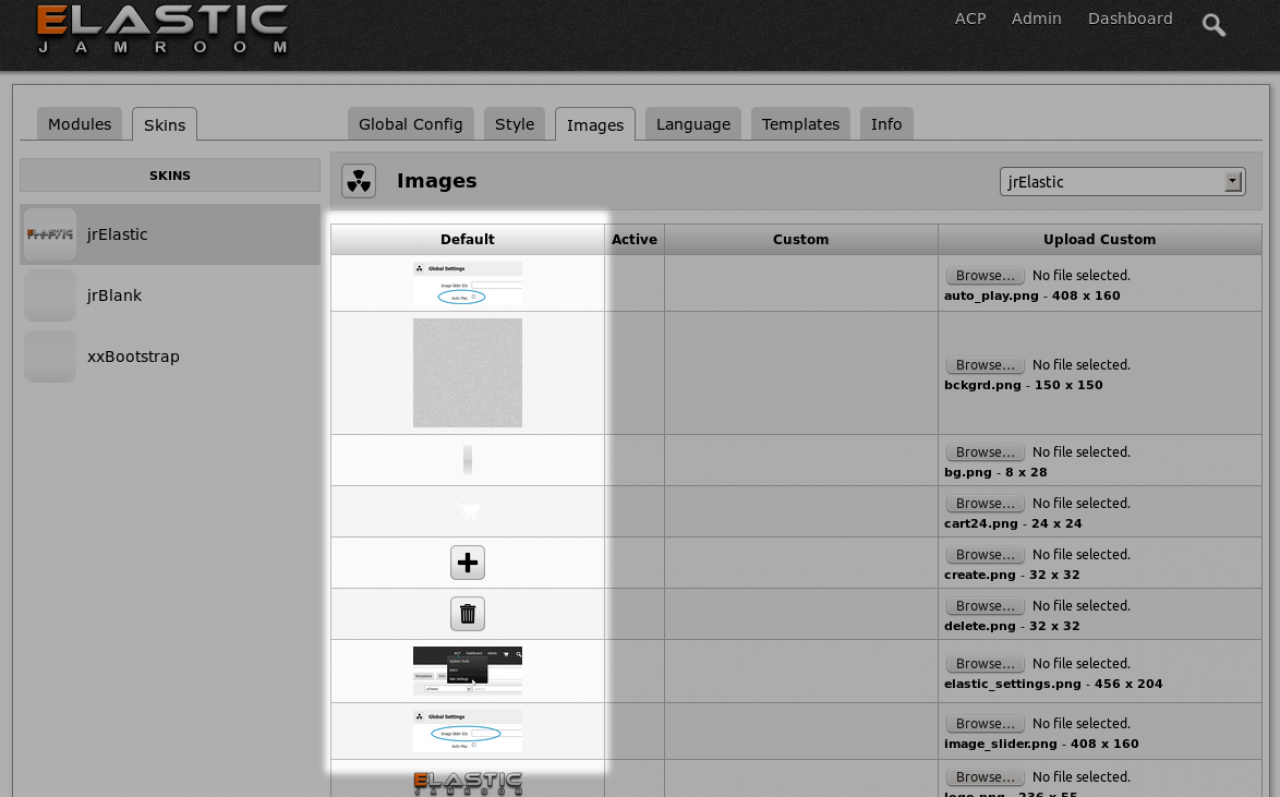
When the skin developer makes the decision to use the /img folder, the admin user will see those images on the IMAGES tab of that skin in the ACP.
-
screenshot of the IMAGES tab on the elastic skin. Visible are all the images in the /img folder of the jrElastic skin.
-
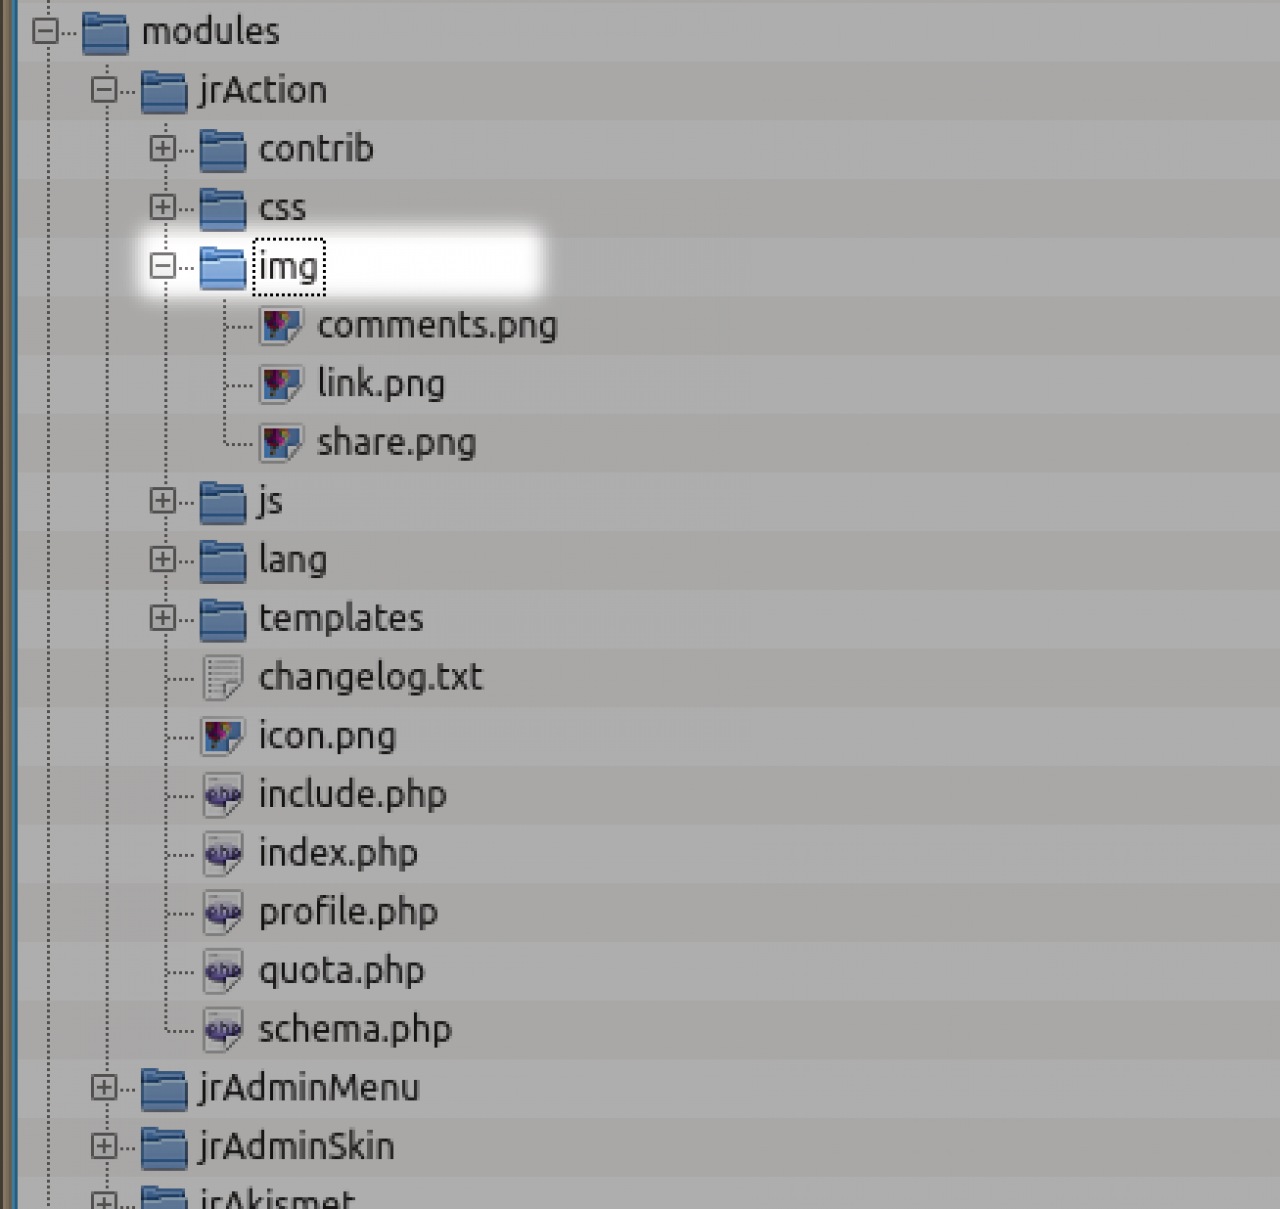
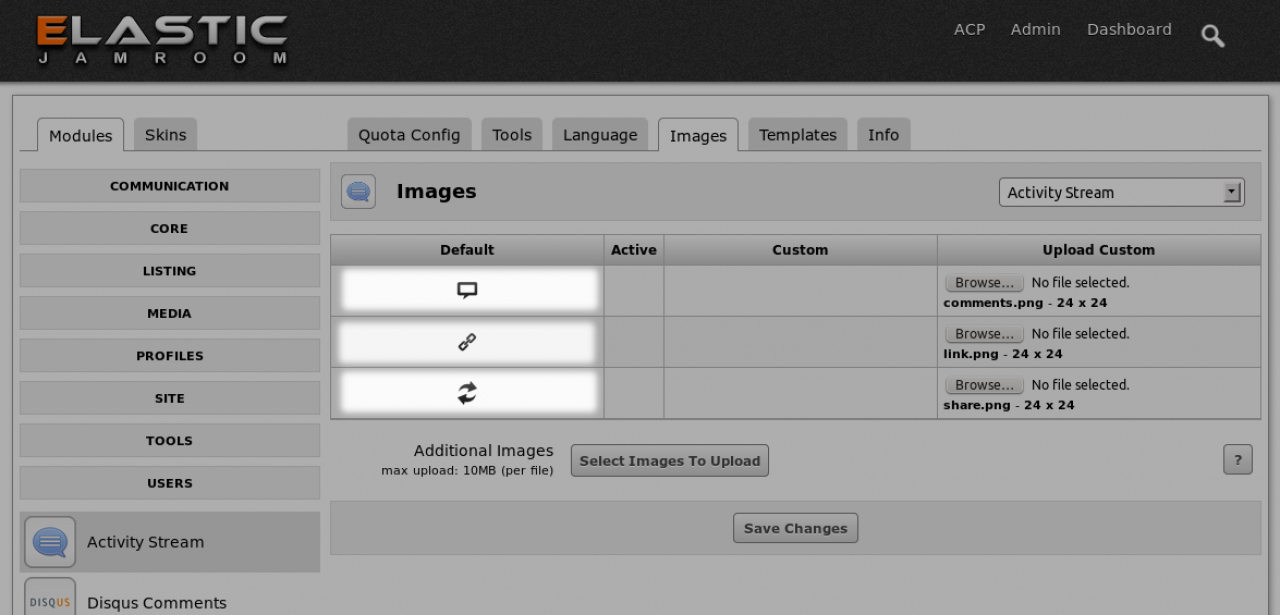
Just like the skins, the /img folder in modules also provides the same functionality.
* via the /img folder in a module
Any image that is placed in the /img folder of a module is made available to the admin to over-ride via the ACP. -
screenshot of the /img folder of a module.
-
screenshot of the module IMAGES tab in the ACP. It correlates to the /img folder pictured above.
-
From the IMAGES tab on either the modules or the skins, the admin user is able to over-ride the default images of the site without having to alter the skins themselves.
* via the image over-ride in the ACP on a modules IMAGES tab
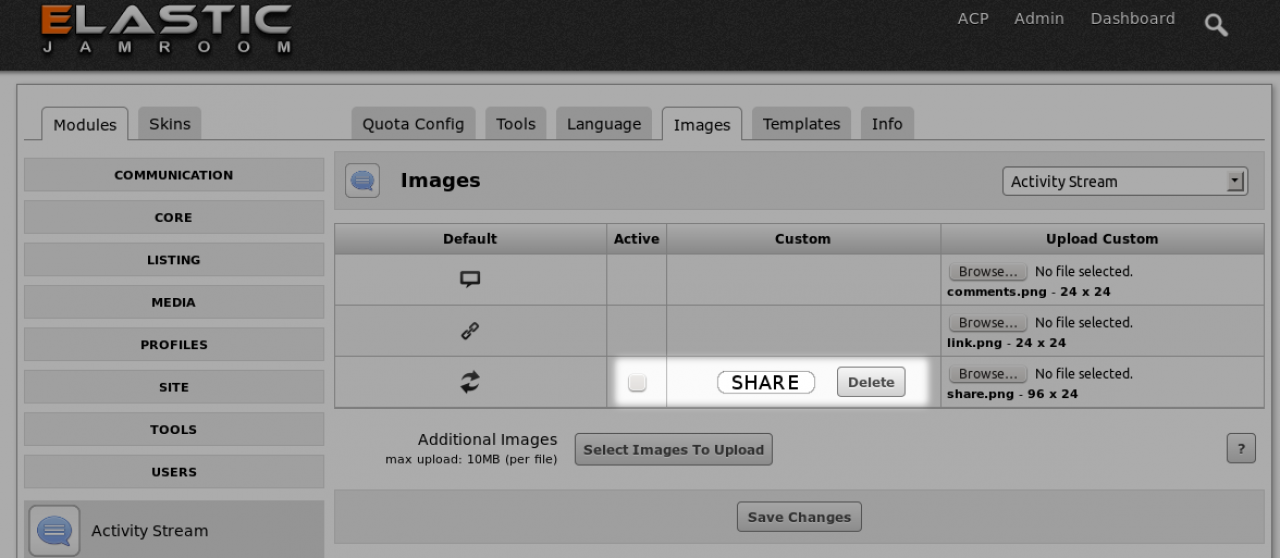
From the IMAGES tab the admin user can click the BROWSE button inline with any image they want to override and select a new file from their pc to upload to the system. -
screenshot of an image uploaded ready to be used to override the default module image.
-
checking the checkbox to mark the override as active, then saving the changes will see that image used in all places where the original image was.
-
DEVELOPERS whenever the urge to use this URLhits you, STOP!.
$img_url = '/modules/YOUR-MODULE/img/filename.png';
The url you want is:
$murl = jrCore_get_module_url('jrImage');
$img_url = '/' . $murl . '/img/module/YOUR-MODULE/filename.png'
This will allow any images uploaded to the IMAGES tab of your modules to work. -
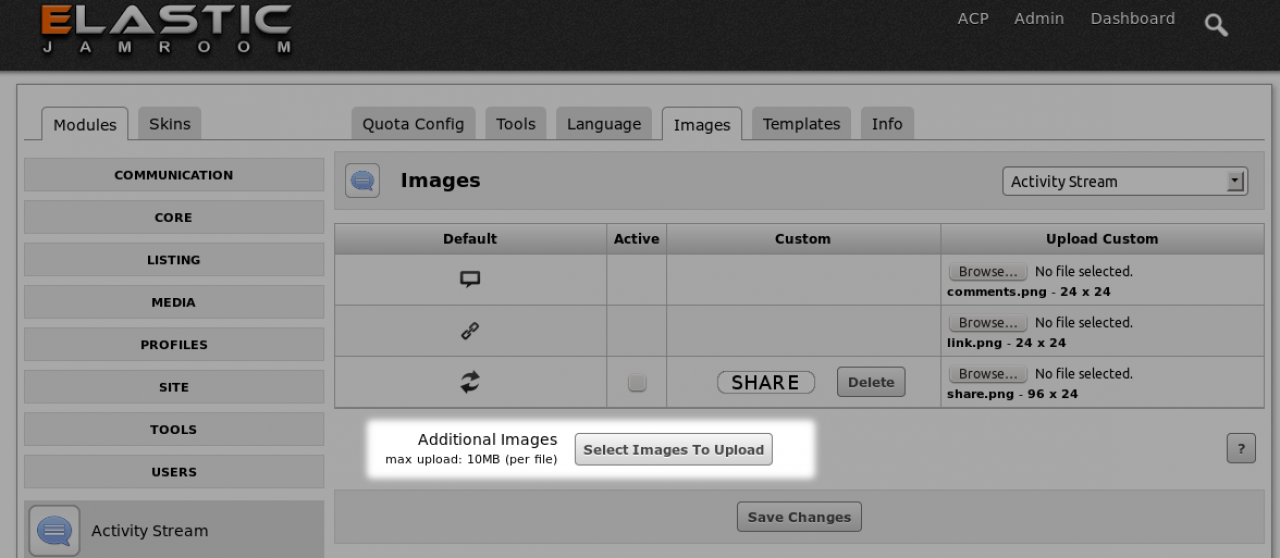
All of the locations where you can override existing images of either a skin or a module will also have another button that looks like this:
* via the "Additional Images" upload system in the ACP
-
screenshot of the additional images section with the "Select Images To Upload" button visible.
-
You can use this button to upload multiple extra images to the location where you currently are.
In this example we are on the IMAGES tab of the 'Activity Stream' (jrAction module).
Any images uploaded will be associated with this location. -
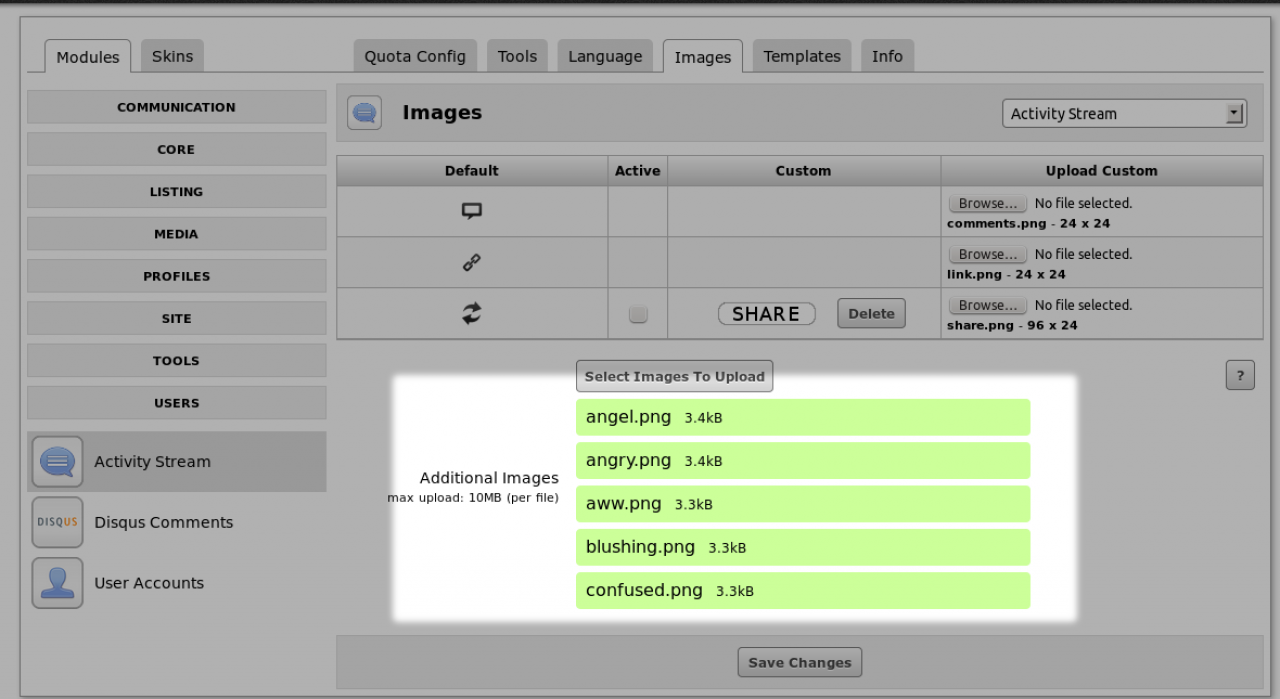
screenshot of multiple images being uploaded in one go.
-
Clicking "Save Changes" will enter these new images into the system.
Once the images are entered into the system you can use them in your templates.
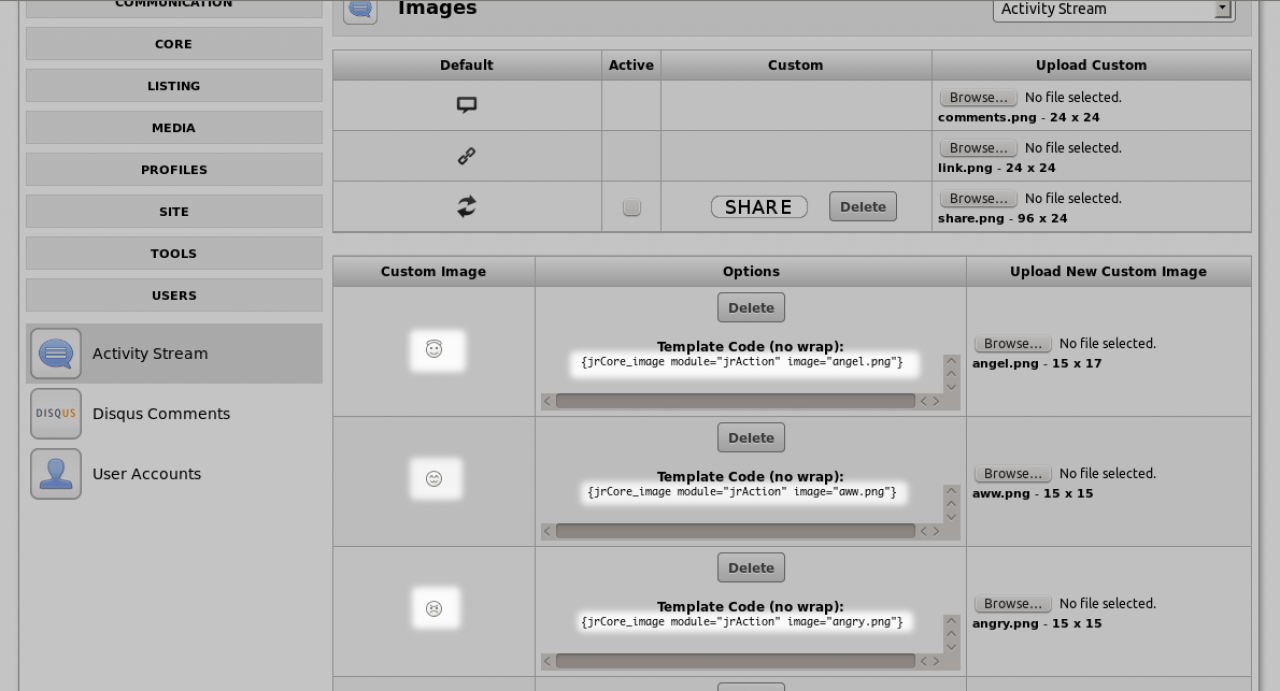
The Options column will show you the template code to use to get the image you just uploaded. -
screenshot of the uploaded images and the code to use to get them out in the templates.
-
All of the images above are related to the skin design.
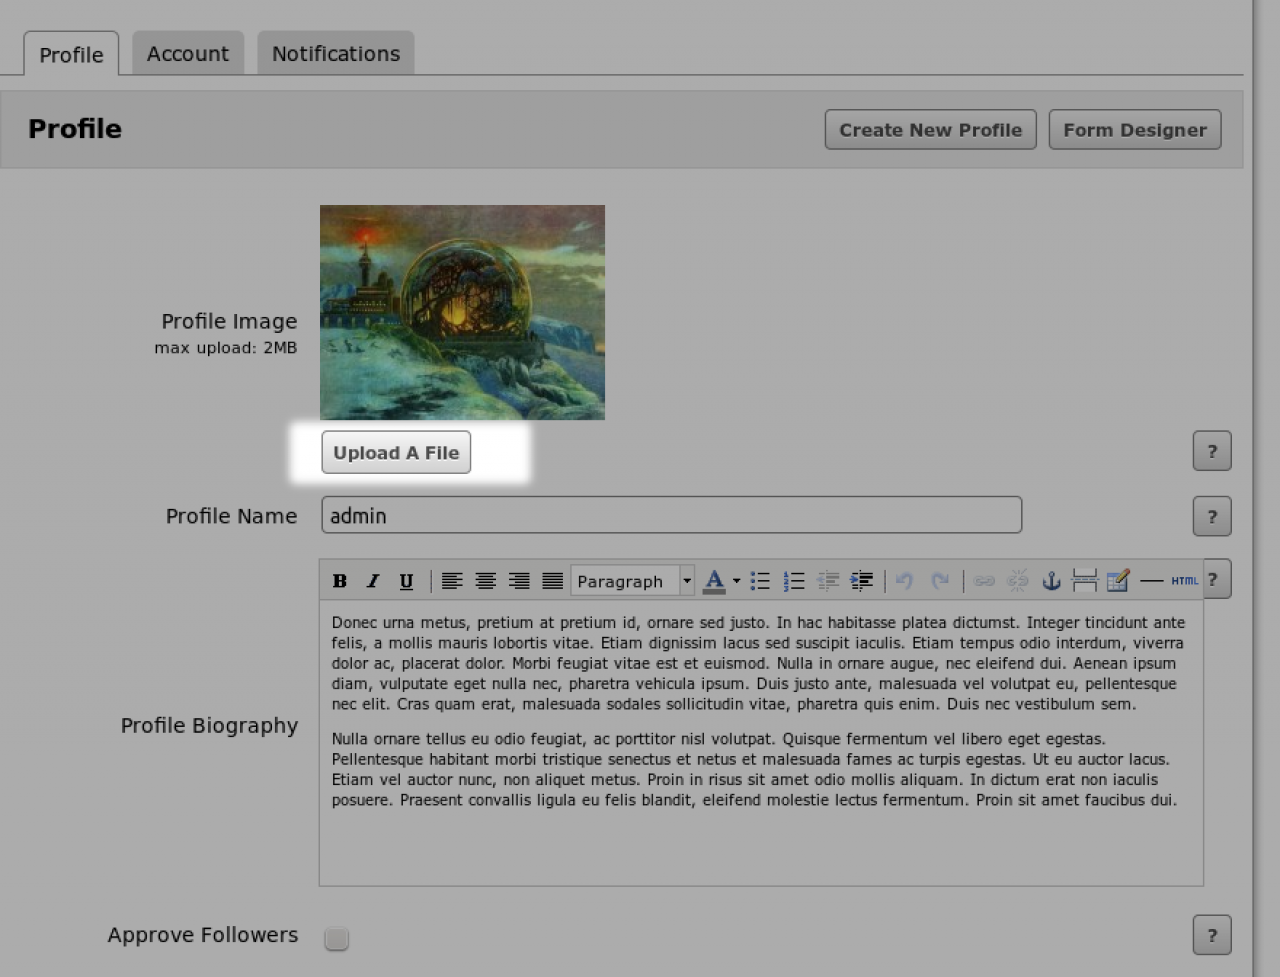
* via the image upload button on a modules form
These types of images are used to setup your site. But what about images that are uploaded by users and associated with content.....?
These are slightly different, but still get access to all the power of the image system. They can be manipulated and resized in the same way as any of the images to date can be.
Lets take a look at an example from the profile module (jrProfile). -
screenshot of image upload on an item.
-
Images associated with a particular item are uploaded in the same way as any other image on the site, however the way they are retrieved is slightly different.
With the images from the skin and the images from the ACP we retrieved the image into the templates with the following code
{jrCore_image module="jrAction" image="angel.png"} -
however with images that are stored in the datastore along with the rest of the items details we use a different piece of code.
To retrieve an image that belongs to an item, we need to pass in the items details too.
For example:
//for profile_id #5 {jrCore_module_function function="jrImage_display" module="jrProfile" type="profile_image" item_id="5"} //or dynamically in a loop {jrCore_module_function function="jrImage_display" module="jrProfile" type="profile_image" item_id=$item._item_id} -
using this syntax lets Jamroom know to look for the image from the datastore instead of the file system.
-
On top of the locations above that may be used by the site admins to change images, one thing you'll want to be aware of is the variable available to you to link to images from your CSS files.
For Developers
Take a look in elastic to see how its done. Particularly the header background image.
The url to that looks like this:
background:#333 url("{$jrElastic_img_url}/bckgrd.png"); -
That {$jrElastic_img_url} is replaced with a link to the image modules url that determines if the admin user has used the ACP to over-ride the image or not.
You can also use:
background:#333 url("{$jamroom_url}/skins/jrElastic/img/bckgrd.png"); -
but this will not allow over-rides to work. If the admin changes the image in the ACP and your CSS code is coded like the second example, the background image will not change.
-
Hopefully its obvious that {$jrElastic_img_url} is for the jrElastic skin. If your skin is called nnBreakdance then that url would be {$nnBreakdance_img_url}.
-
jrCore_image
FunctionjrCore_imageparametertypedefaultrequireddescriptionmodulestring-offan active module name. if not provided the image is looked for in the skin.imagestring-onthe name of the image to displayheightint-offthe height of the imagewidthint-offthe width of the imagealtstring-offthe string to use in the alt="" tag on the imagetitlestring-the string to use in the title="" tag on the imageclassstring-the classes to attach to the generated image htmlstylestring-any inline css styling you want to addAs explained above the jrCore_image function is for images that relate to the skin rather than user provided content.
You can add extra parameters to the base call to extend how the image is output. These other extensions include things like, giving the image a title, giving the image an alt tag, giving the image height and width attributes along with adding class names. -
jrImage_display
FunctionjrImage_displayparametertypedefaultrequireddescriptionsizestring/int128offimage size - must be one of: 24, xxsmall, 40, xsmall, 56, 72, small, 96, icon96, 128, icon, 196, medium, 256, large, 320, larger, 384, xlarge, 512, xxlarge, 800, xxxlarge, 1280. There is also an 'original' option to show the original image size, but it must be enabled in the ACP.typestring-onthe name of the datastore key. eg: profile_image, action_image, audio_image.item_idint-onthe item_id of the datastore item to which this image belongs.modulestring-onthe module that owns the datastore where the image is locatedcropstring-offcrop values are: auto, square, height, width, portraitAs explained above jrImage_display function is for user uploaded content.
Since the site administrators don't have as much control over what the user uploads as they do what they themselves upload, this function can use all of the parmeters defined above and also these extra parameters.
This function is commonly wrapped int the {jrCore_module_function function to first check that it exits before running it. If the image module was disabled doing it like this prevents errors and allows the skin to show.
{jrCore_module_function function="jrImage_display" .... -
The 'original' image option is an ACP setting found at:
ACP -> CORE -> IMAGE SUPPORT -> GLOBAL CONFIG -> BLOCK ORIGINAL SIZE
So skin designers need to be aware that it may not be available as an option.