altering a module's template
Table of Contents:
Overview
override a modules template
Example: add a lightbox to the Gallery modules detail page.
Example: First steps
Example: Code Before
Example: Code After
Example: Result
Alternative method
Alternative Method: Via the ACP
Alternative Method: Code Before
Alternative Method: Code After
Alternative Method: Save and Activate
-
You don't like the way the item details page for a module looks and you want to change it.
Overview
For example, you want to add a lightbox to the main image in a gallery, there isn't one there right now.
So use this method. Copy the item_detail.tpl from the module to your skin and give it the correct filename as outlined below. Then adjust it as necessary.
You can make it display however you like and that will be safe from being overwritten when the module updates come out. -
Skins have the ability to control how the site looks. This also includes how modules display their data too.
override a modules template
If you want to change how a modules template displays its data, you can add in a skin template that will override the modules.
eg:
So if you wanted to change:
/modules/jrAudio/item_detail.tpl
You could create:
/skins/(YOUR SKIN NAME)/jrAudio_item_detail.tpl
and it would override the jrAudio modules version. -
If you only want to change the way the output of a single {jrCore_list} is displayed, check out this howto:
https://www.jamroom.net/the-jamroom-network/documentation/howto/1551/howto-change-the-way-a-list-item-looks-in-a-skin -
On my site I want to add a lightbox to the gallery modules detail page to change the default behaviour. Currently when the image is clicked it goes to the next image. I want to change that behaviour to show the same image in a lightbox.
Example: add a lightbox to the Gallery modules detail page.
The url for the item detail on my site is:
my-site.com/some-user/gallery/2/picture-of-bark
The template that controls that location is:
/modules/jrGallery/templates/item_detail.tpl
To take control of it, im going to copy it to
/skins/(MY SKIN)/jrGallery_item_detail.tpl
Then my version of the skin will be used instead of the modules version of that .tpl file. -
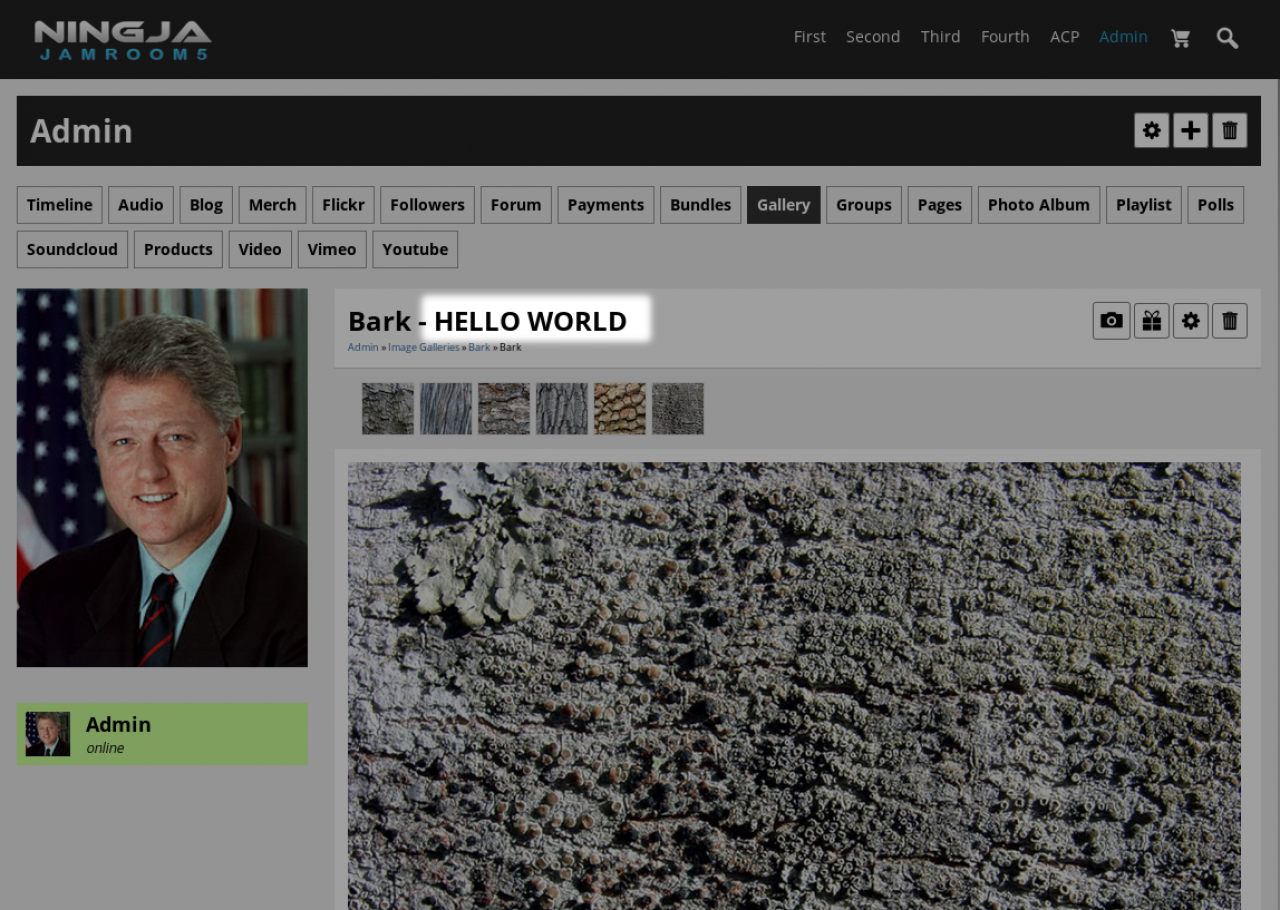
The first thing I do after copying the item_detail.tpl file to my skins jrGallery_item_detail.tpl file is to put some text in it and upload the file to my site.
Example: First steps
This way I know that that changes I'm making to the file are taking effect on the site. In this case I use "HELLO WORLD". -
screenshot of the alterations coming out on the details page.
-
If the changes are not immediately apparent, then you probably need to clear the caches. You can do this from the SYSTEM CORE -> TOOLS -> RESET CACHES. Or turn on developer mode in the developer tools module.
-
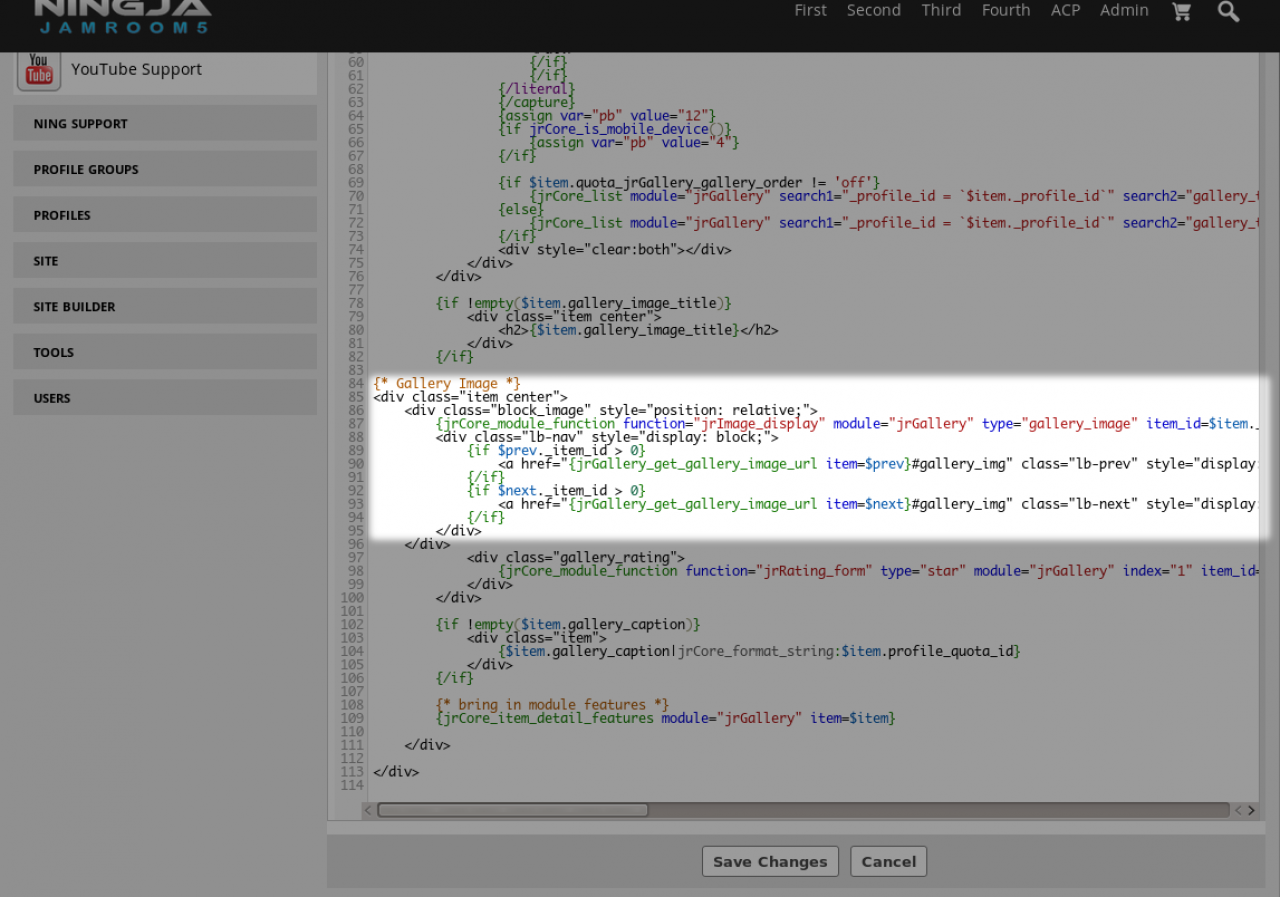
The default template code had some left/right buttons to go to the next image, it looked like this: (around line 86 ish)
Example: Code Before
{* Gallery Image *} <div class="item center"> <div class="block_image" style="position: relative;"> {jrCore_module_function function="jrImage_display" module="jrGallery" type="gallery_image" item_id=$item._item_id size="1280" id="gallery_img_src" class="img_scale img_shadow" alt=$item.gallery_alt_text width=false height=false} <div class="lb-nav" style="display: block;"> {if $prev._item_id > 0} <a href="{jrGallery_get_gallery_image_url item=$prev}#gallery_img" class="lb-prev" style="display:block"></a> {/if} {if $next._item_id > 0} <a href="{jrGallery_get_gallery_image_url item=$next}#gallery_img" class="lb-next" style="display:block"></a> {/if} </div> </div> -
We want to remove those buttons and replace them with a lightbox. There is already lightbox code used in other locations like the forum file upload, so I just went to see how that code was structured and copied the structure to here.
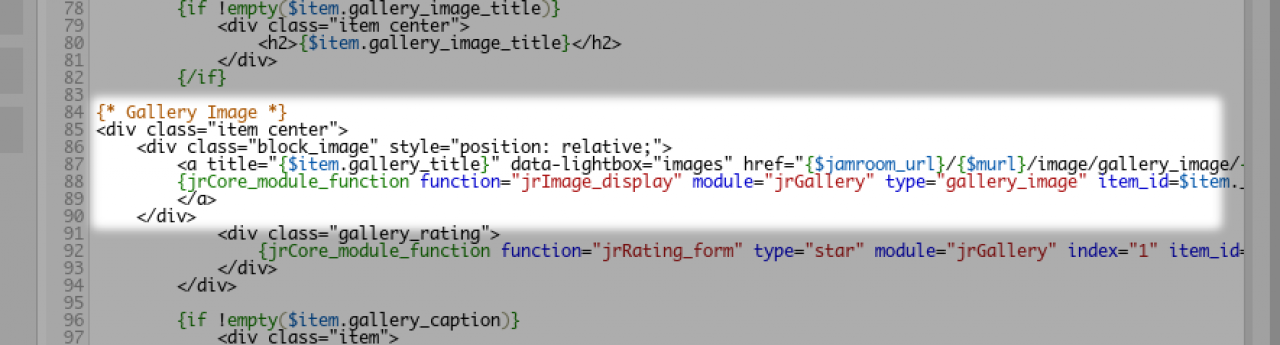
Example: Code After
{* Gallery Image *} <div class="item center"> <div class="block_image" style="position: relative;"> <a title="{$item.gallery_title}" data-lightbox="images" href="{$jamroom_url}/{$murl}/image/gallery_image/{$item._item_id}/1280"> {jrCore_module_function function="jrImage_display" module="jrGallery" type="gallery_image" item_id=$item._item_id size="1280" id="gallery_img_src" class="img_scale img_shadow" alt=$item.gallery_alt_text width=false height=false} </a> </div> -
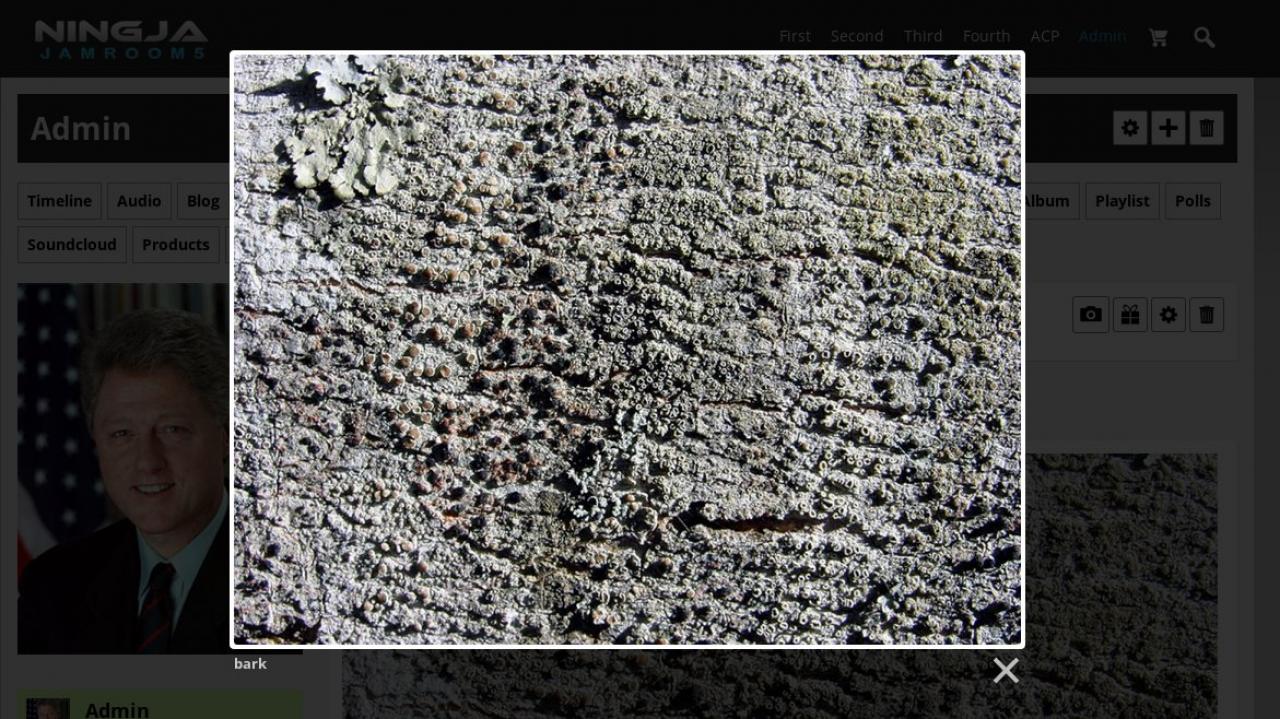
The result of that exercise is now when the item gets clicked on, instead of going to the next item, it displays the current image in a lightbox.
Example: Result
-
screenshot of the item detail page showing the image in a lightbox instead.
-
If you don't want to copy files around on your file system, there is another way to do this. That's via the ACP. I'll outline that method below.
-
You can do exactly the same thing as was done in the above example without copying files around via the Templates Editor in the ACP of Jamroom.
Alternative Method: Via the ACP
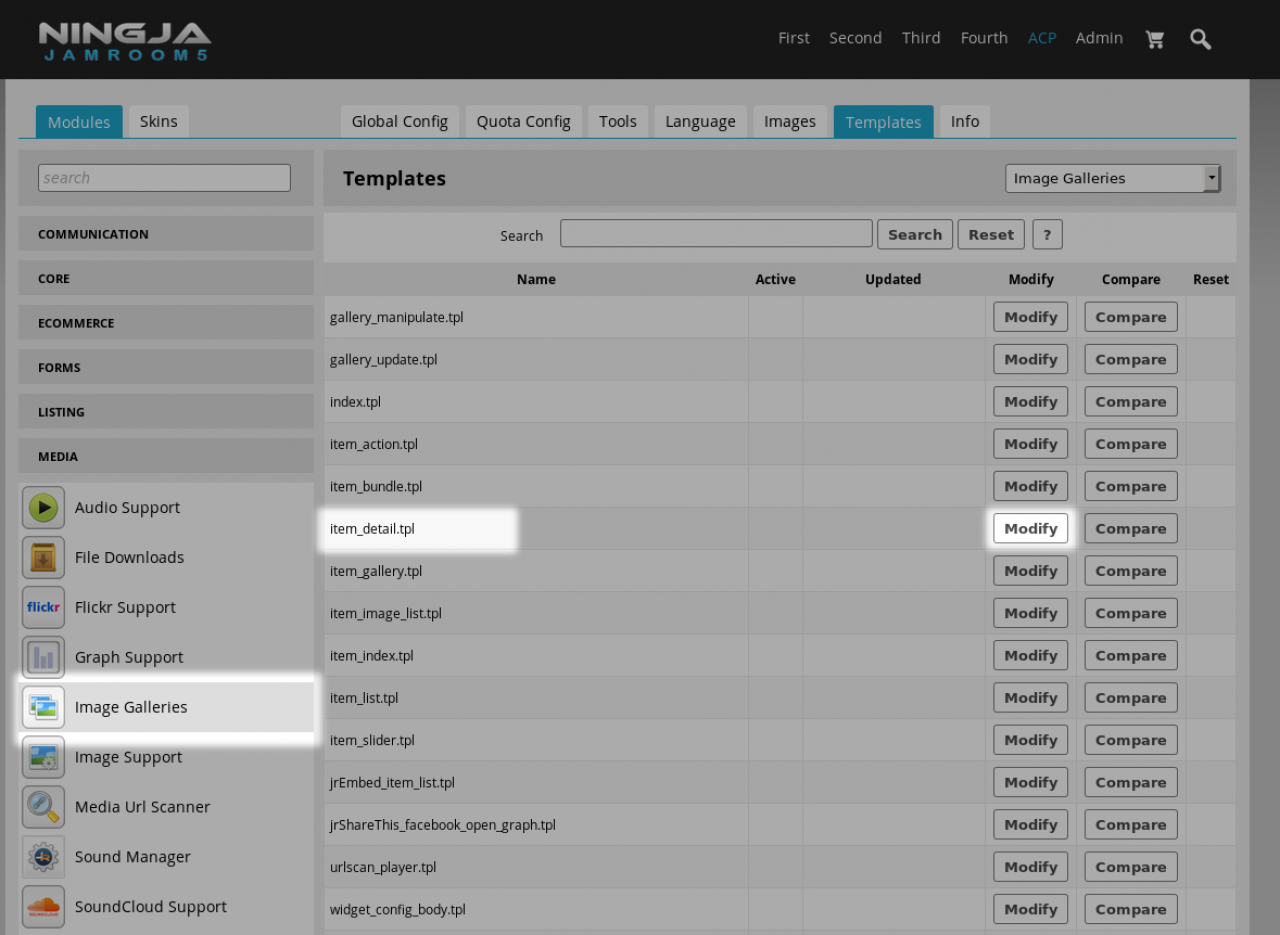
First go to:
ACP -> MEDIA -> IMAGE GALLERIES -> TEMPLATES -> item_detail.tpl -> MODIFY -
screenshot of the TEMPLATES tab of the image galleries module with the item_detail.tpl highlighted.
-
Do the same code alterations as was done in the previous example, but this time we're doing it in the template editor rather than the file system.
Alternative Method: Code Before
-
screenshot of the template editor adjusting the code in the item_detail.tpl file for the image galleries
-
Adjust the code in the template editor so it matches the desired code found in the previous example.
Alternative Method: Code After
-
screenshot of the adjusted code.
-
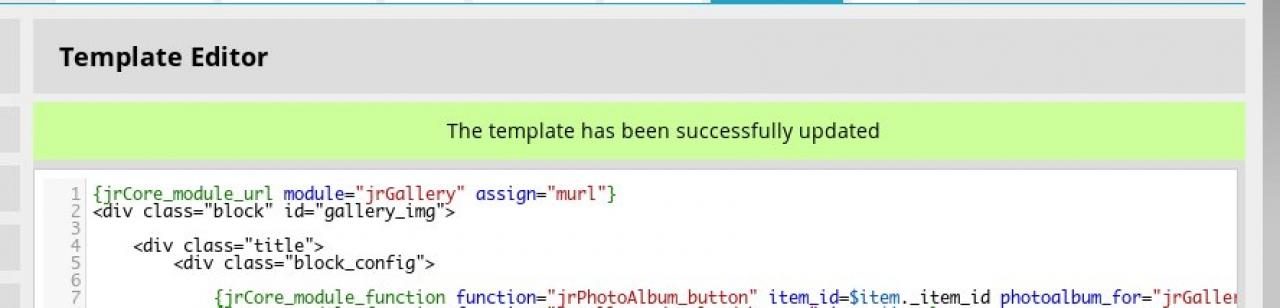
Saving is a 2 step process. After adjusting the code in the editor, click the SAVE CHANGES button.
Alternative Method: Save and Activate
You will still be on the editor page but will see:
-
screenshot of the template being successfully updated.
-
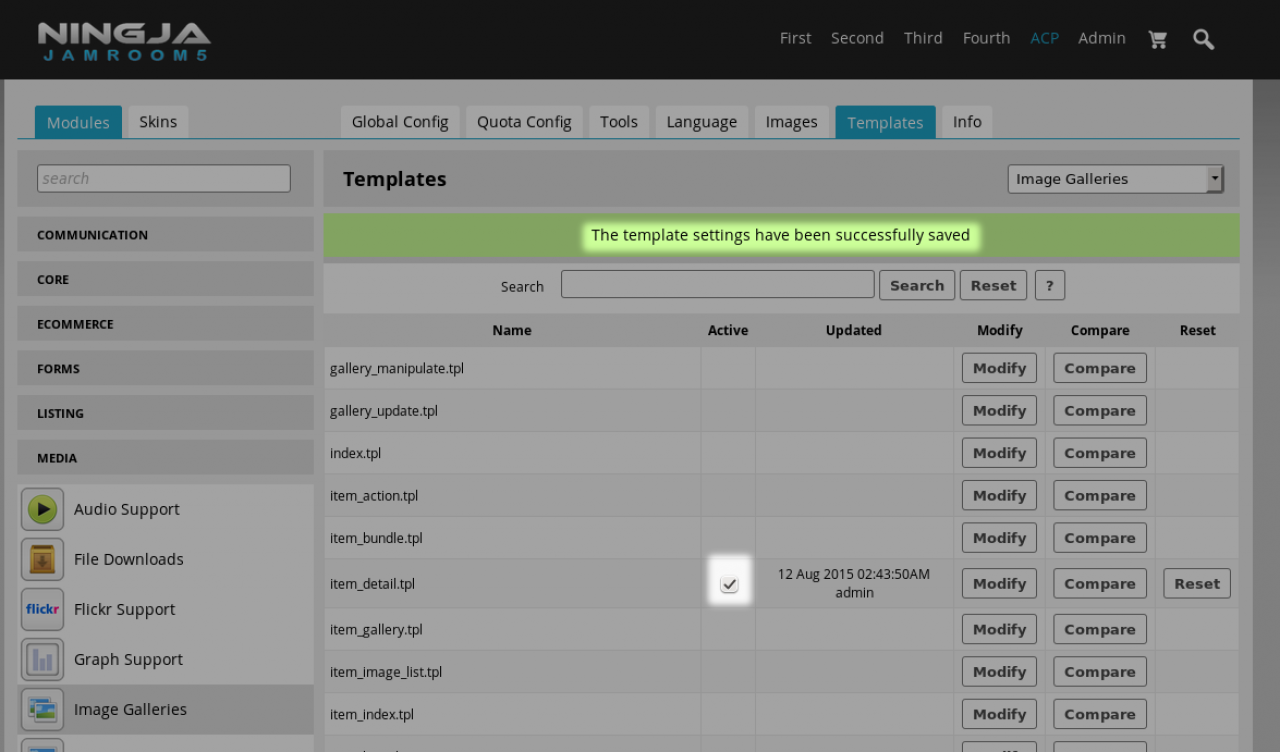
But that's only the first part. Scroll to the bottom of the screen and click CANCEL, or click the TEMPLATES tab. Either way you will get back to the list of templates screen.
This time there will be a checkbox in the "Active" column but it will not be checked.
We need to activate the changes we just did.
Check the checkbox then scroll to the bottom of the screen and click SAVE CHANGES. -
screenshot of the template changes being successfully activated
-
Now that the template has been activated, the changes will take effect.
If a new version of the module comes out you can use the COMPARE button to compare the differences in your over-ridden template to the newer version, or use the RESET button to use the newer versions template and discard your alterations.