HowTo: Setting up a debugging environment
Table of Contents:
The finished product
What is a debugger?
An overview
Step1: Download Ubuntu Server
Step2: Installing Ubuntu Server
Step3: Setting up ehcp on ubuntu server
Step4: Adding some test accounts to your new server
Step5: Installing xDebug into your server
Step6: Making the domain work in your web browser
Step7: Get setup to edit it with PhpStorm
Step8: Get the debugger talking to PhpStorm
Step9: Testing the Debugger stops on Breakpoints
Step10: Using the debugger
Screencast: using xdebug to help development
-
If you don't have a separate server to use, then check out http://www.ampps.com/ as it has softaculous which allows 1-click install of Jamroom.
-
The goal of this page is to set you up with a development environment complete with a full debugging system.
The finished product
The tools we will use are:
* PhpStorm, an IDE created by JetBrains
* Ubuntu Server
* ehcp.net's control panel
What you will need:
* 1 pc for development
* 1 pc for a server
* a router to connect the two.
Lets get cookin'. -
A debugger is a useful tool to help understand code and locate errors in code.
What is a debugger?
If you have never seen a debugger in action, watch this video. That is what we are setting up here. -
 a debugger working on a simple php script to illustrate what a debugger does.
 -
That video was just a quick one on a very simple script to see what a debugger is useful for. Its useful for stopping the web page at any point you want in the code in order to see the values of the variables at that section.
A lot of times during development you need to know what the values of things are. One common piece of code is
print '<pre>'; print_r($some_varable); print '</pre>'; -
Which will give you the value of '$some_variable' or if you want to know all the variables available to you in a php file:
print '<pre>'; print_r($some_varable); print '</pre>'; -
will give you ALL the available variables.
Both of these techniques work, but mean that you have to change the code just to see what the values are. With a debugger setup you don't need to change anything.
SO..... lets get this system setup. The ingredients your going to need are:
* a spare computer connected to a router in the same local network (most old pc's will be fine.)
* a cd rom drive -
We are going to use an old pc that is connected in the same network as your development machine. If your router has 4 slots for computers to plug into it, make sure your main pc is plugged into one slot, and this new box we are about to setup is plugged into another in that same router.
An overview
An old pc is good because we are going to replace the operating system with the 'Ubuntu Server' operating system, so make sure there is nothing on that old pc that you are using. -
The version I choose is 10.04 LTS (even though 12.04 is available at the time of writing this.)
Step1: Download Ubuntu Server
download 10.04 LTS
(the reason for 10.04 instead of 12.04 is because we are going to install ehcp and it doesn't like 12.04 right now. )
Once you have downloaded the .ISO file, burn it to a cd-rom. We are going to use this cd-rom in the old pc you have to setup a server.
Just to be clear, from now on, the box which will be this server will be called 'the server box' and the pc you use for development will be referred to as 'your development box' . It is your development box that runs PhpStorm. This is where you do all your work. Once work is done it is uploaded to the server.
Your development box can be running any OS you like. Mac, Windows, or Linux. (I use Kubuntu 12.04 Linux, but its just personal preference.)
-
(caution this step will wipe-out whatever is on the hard drive of the server box.)
Step2: Installing Ubuntu Server
Put the cd-rom that you burn in the last step into the cd-rom drive of the server box and turn it on. The cd-rom should start up and give you step-by-step instructions on getting Ubuntu Server 10.04 LTS installed into that machine.
It will take a while, so just follow along and answer the questions as they pop up.
During the install, one of the questions is 'what type of server do you want to install?' with a long list (mail, samba, dns etc.) that might confuse people. Choose the LAMP option. You want an apache server. L.A.M.P stands for Linux Apache Mysql Php.
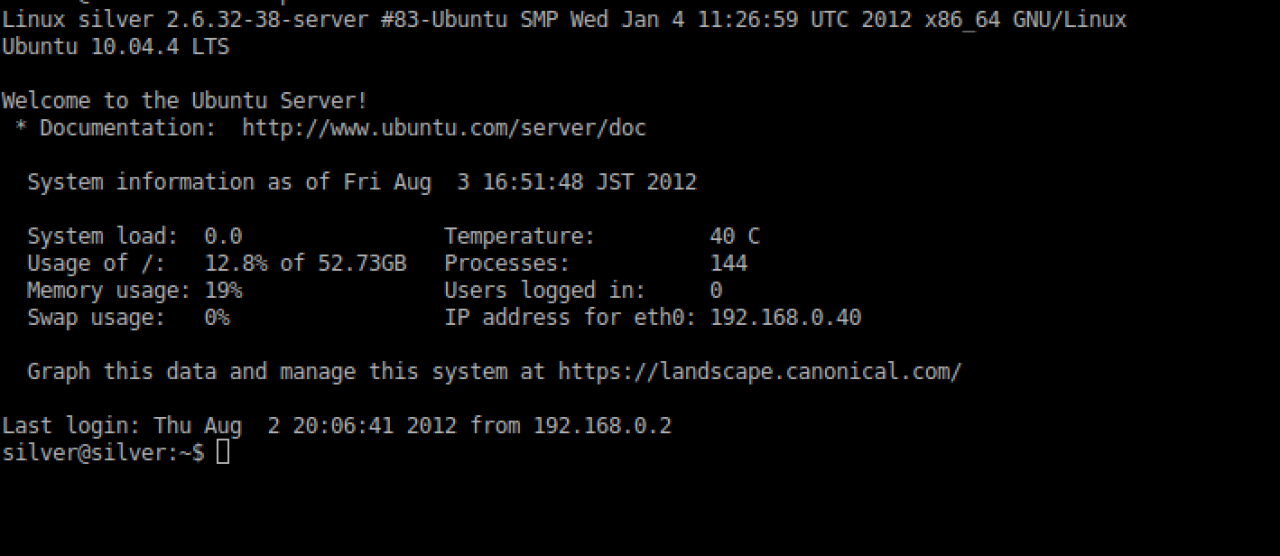
Once you finish the installation and remove the cd-rom, reboot. The screen you will be taken to will look like this: -
First time logging in to your server
-
It will show your-user-name@your-server-name:~$
This is called the terminal or the the command line and is a place to input commands for your server to do.
Don't worry, it wont all be done from here. In the next step we are going to setup ehcp (Easy Hosting Control Panel) Which is like cpanel, but a free version.
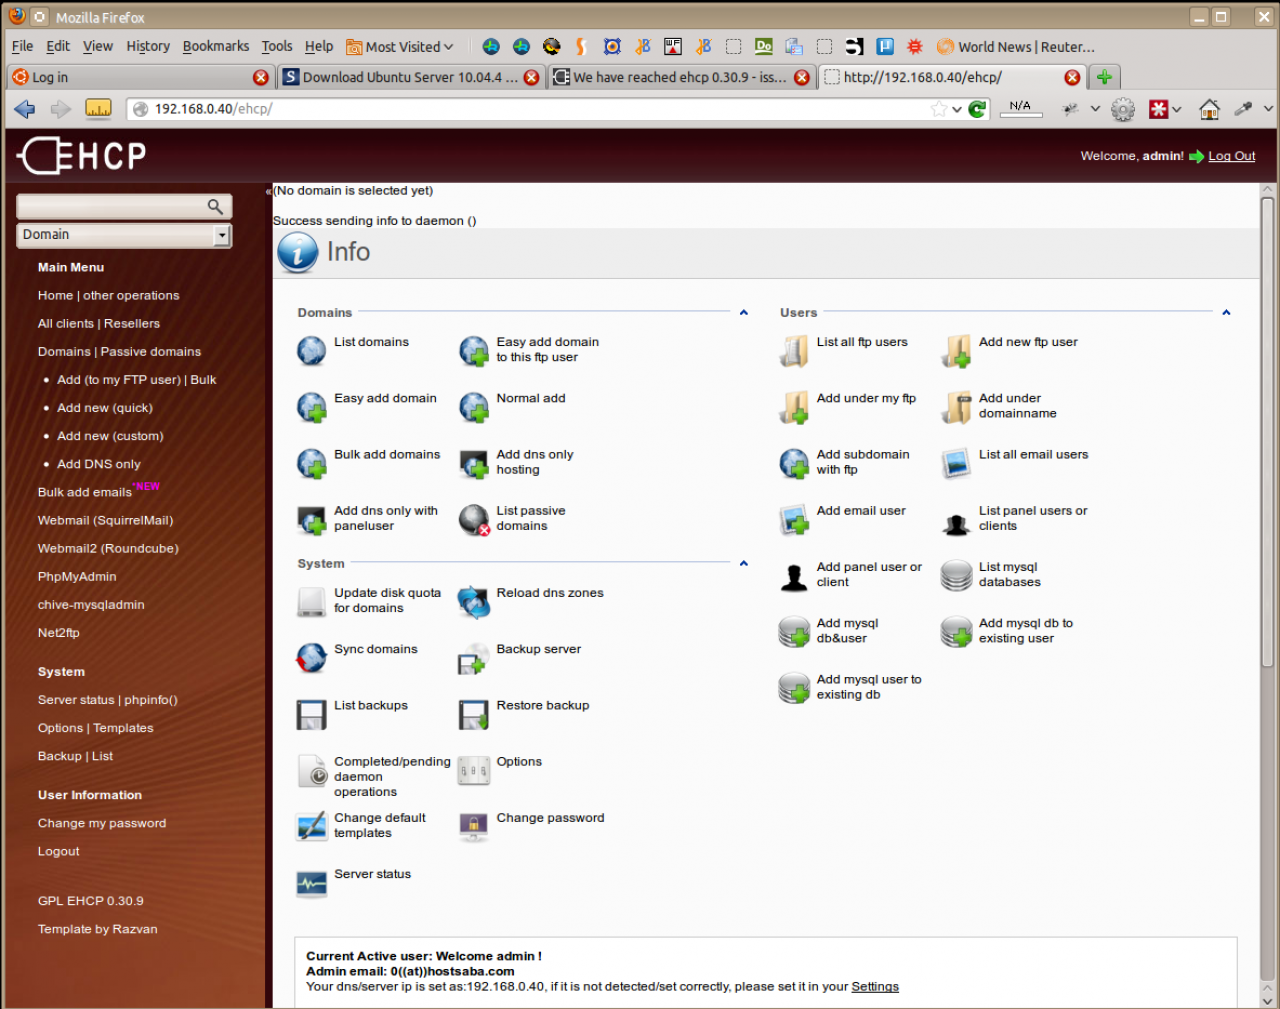
Here is a screenshot of ehcp in the browser once its installed. That is going to be the next step 'Setting up ehcp on ubuntu server' -
screenshot of ehcp control panel
-
Check here to see if the install instructions have changed, but as of writing this, the instructions were. From the command line copy+paste these lines one at a time pressing return after each one.
Step3: Setting up ehcp on ubuntu server
wget www.ehcp.net/ehcp_latest.tgz
tar -zxvf ehcp_latest.tgz
cd ehcp
./install.sh
-
After hitting return on that last line, you will see some more questions, a few places to choose a password and some configuration options. Usually it is just a question of hitting return which selects the default option. Keep going until you get to the end of them.
then type
ifconfig
That will give you the IP address of the server box. It is probably something starting with 192.168.(something). Paste that into your browser:
http://192.168.0.40/
and that will bring you to the login screen for the control panel, it looks like this:
-
screenshot of the login screen for ehcp control panel
-
If you find that your router is changing your server IP address whenever you start it up, its a good idea to fix that address to a static ip address so you KNOW that your servers ip address wont change. Here is how to do that: make ubuntu server use a static ip address
-
Log in. (If you want it to look like the screenshot above, change the 'template' to the ubuntu0.4.2 template from the options. I like this one the best.

-
What you have here in this new server is a way to setup as many different test accounts as you like.
Step4: Adding some test accounts to your new server
Now that you have EHCP installed on your server and can access it, we need to start adding some domains. The way I like to do it is to have a base URL that is live on the net that I can use for DNS redirection when i want to. For me this domain is http://iixxii.cc You can use any domain you like.
That doesnt need to be setup now, but later on, if you want to allow access to these sites on your local server it can be useful to register them as subdomains of a live domain. SOOO, for me if I wanted to work on a live domain called "some-jamroom-site.com" I would have my local server use the domian name:
some-jamroom-site.iixxii.cc
Or if I just wanted to do a test install of jamroom 4.3.0 I would add a domain name that did not exist. I would add the domain name:
jr430.iixxii.cc
This is how I like to do it and its just a convention so I know that any site that has the URL (something).iixxii.cc is actually on my local server.
What we are going to do is setup a local path alias and redirect any local traffic to our local server so you can use any domain name you want. You could even use jamroom.net or google.com or yahoo.com because we are going to tell our development pc NOT to go look-up that domain names actual server but rather just use our local server for that address.
Now you can go ahead and add all your domains onto this same FTP user account.
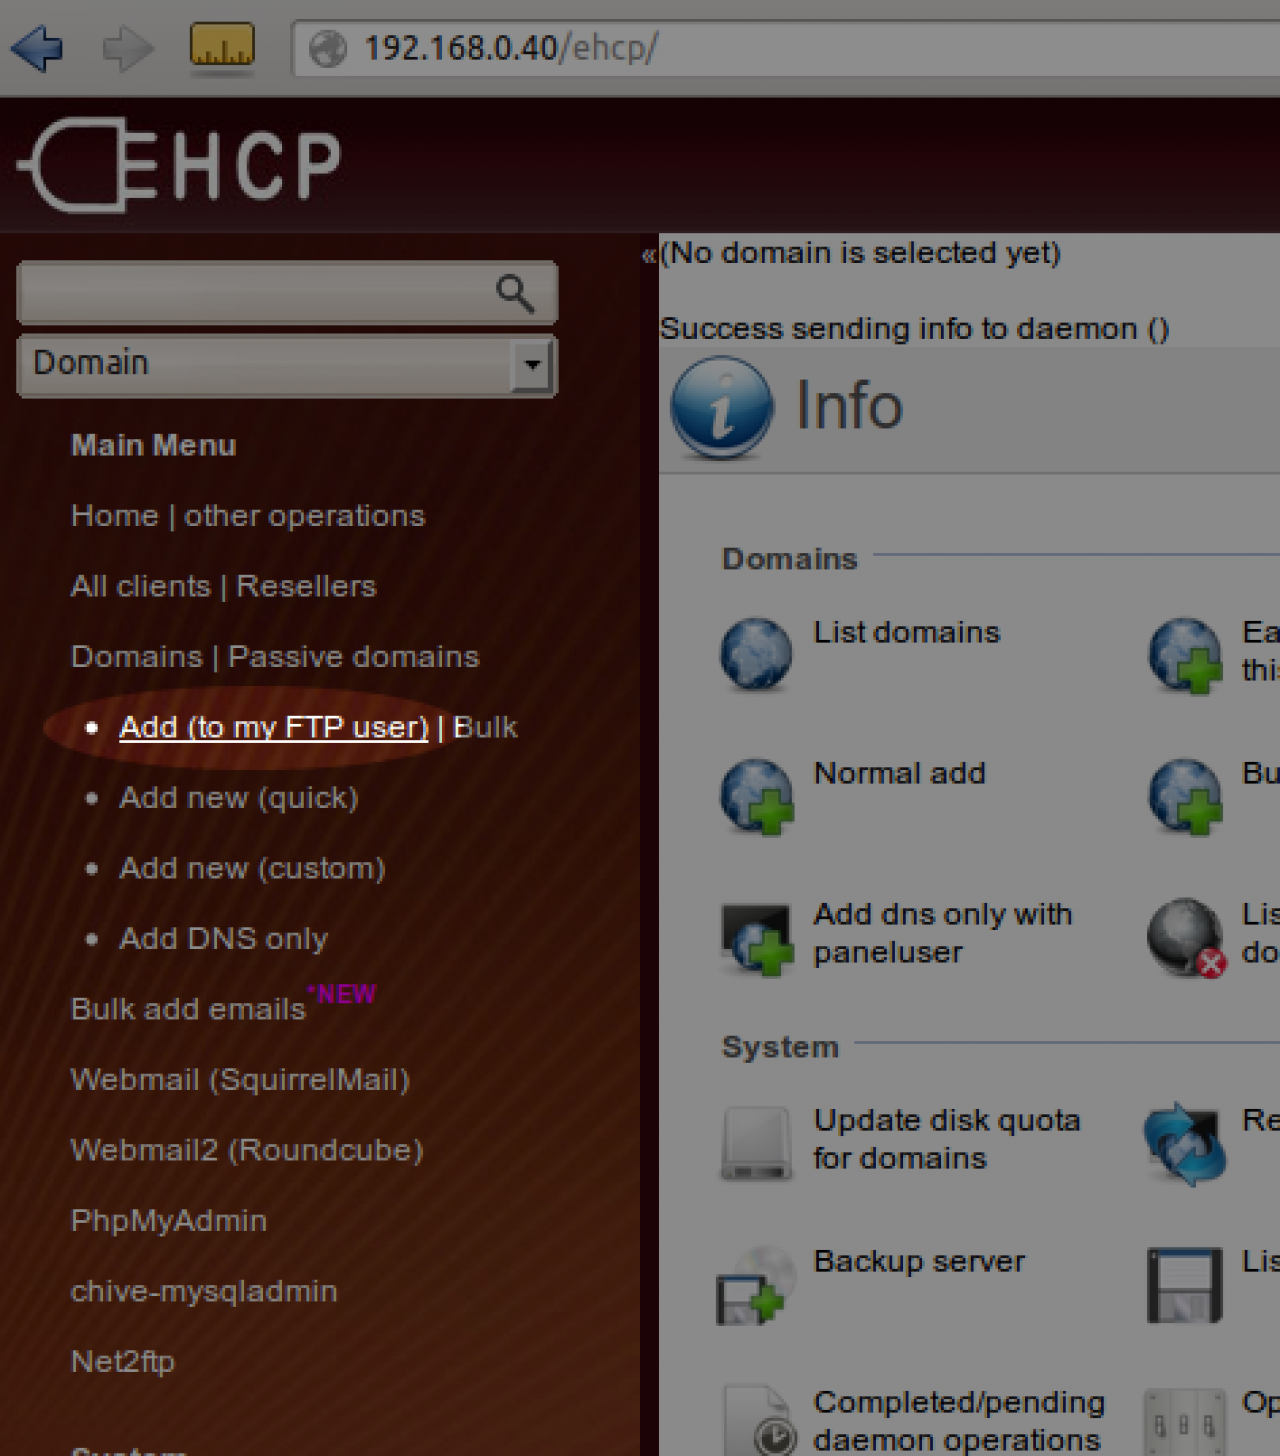
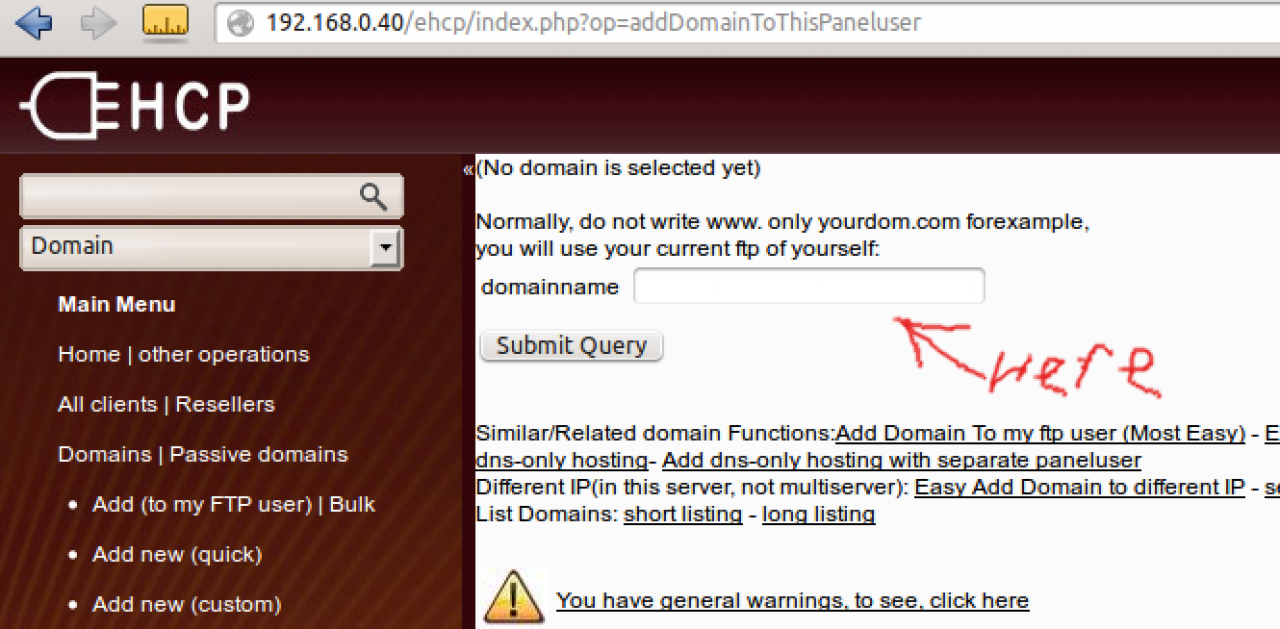
So lets add our first account. Click the "Add (to my FTP user)" button. (screenshot below.) -
screenshot of the "Add (to my FTP user)" button in ehcp control panel.
-
The first time you do this you will be prompted to create an FTP user account:
"You don't have a default ftp account. Will setup a new one now (will do this only once):Enter your new default ftp info:"
Then enter your domain. (whatever domian name you chose. for this i will use 'jr431.iixxii.cc' just to as an example) -
choose a domain name for your site and enter it to create that domain on your server.
-
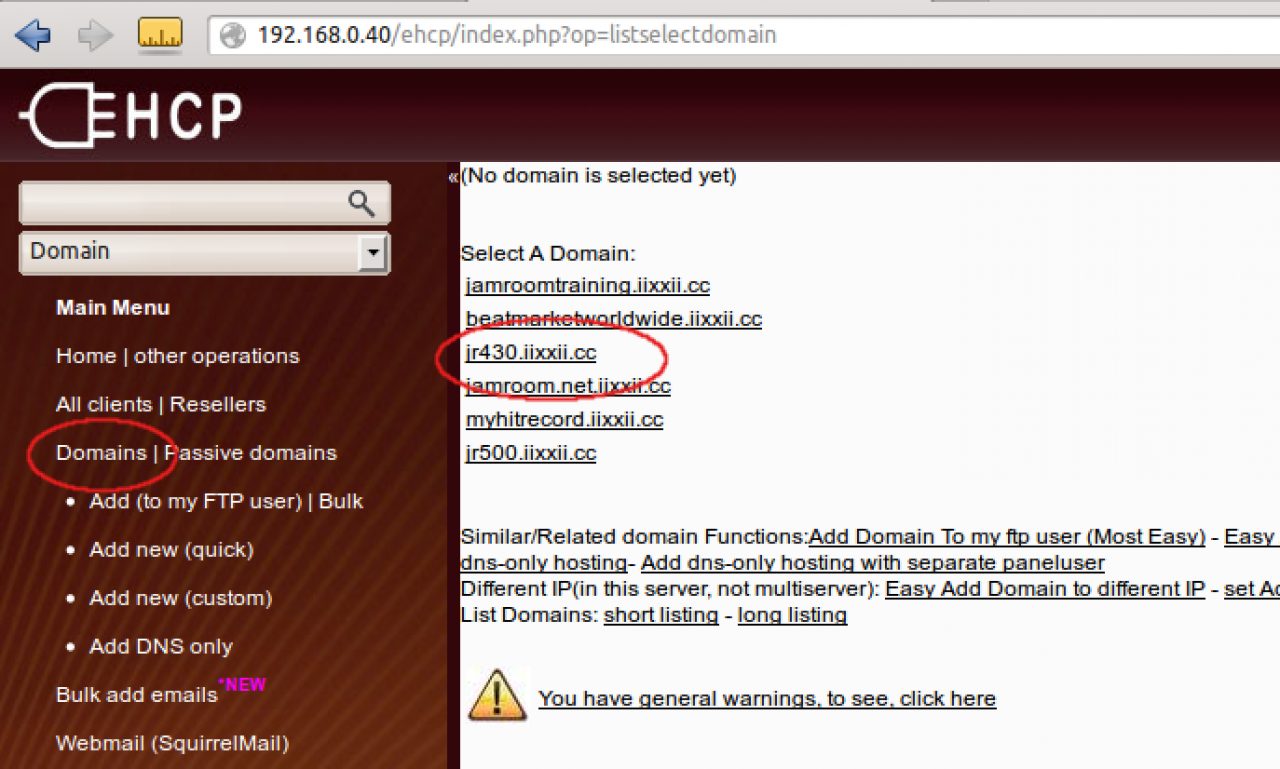
Next click on the 'domain' link, then the domain name to go to that domains control panel.
-
screenshot of the ehcp control panel with the domains links circled
-
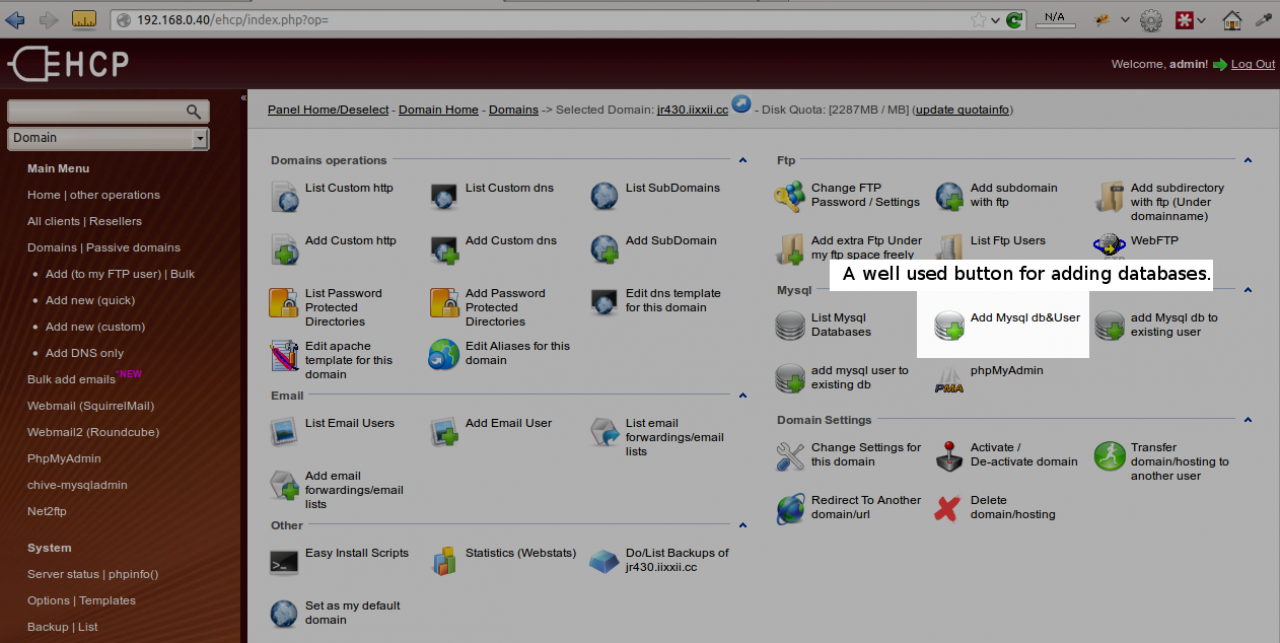
Whenever we setup a jamroom installation, we are always going to need a database. You can set this up from your control panel for the domain.
-
screenshot of ehcp control panel with the 'add a database' button highlighted.
-
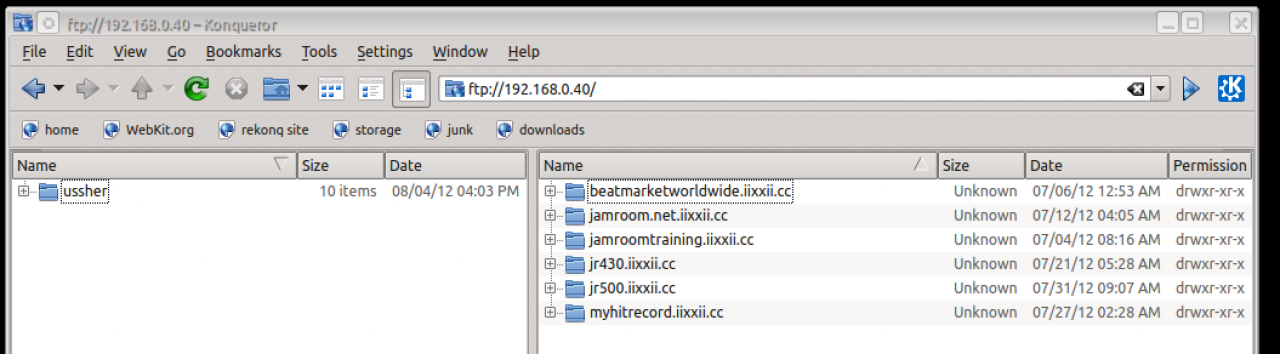
Now that you have an FTP user set-up and a domain set-up, login to your server via your favorite FTP client with the credentials you just created. Since we haven't yet setup the DNS, use the ip address of the server as the location and the username you just created as the username.
You should see all of the domains that are available on your server so far. -
screenshot of an FTP client program with the local files on the left and the server files on the right.
-
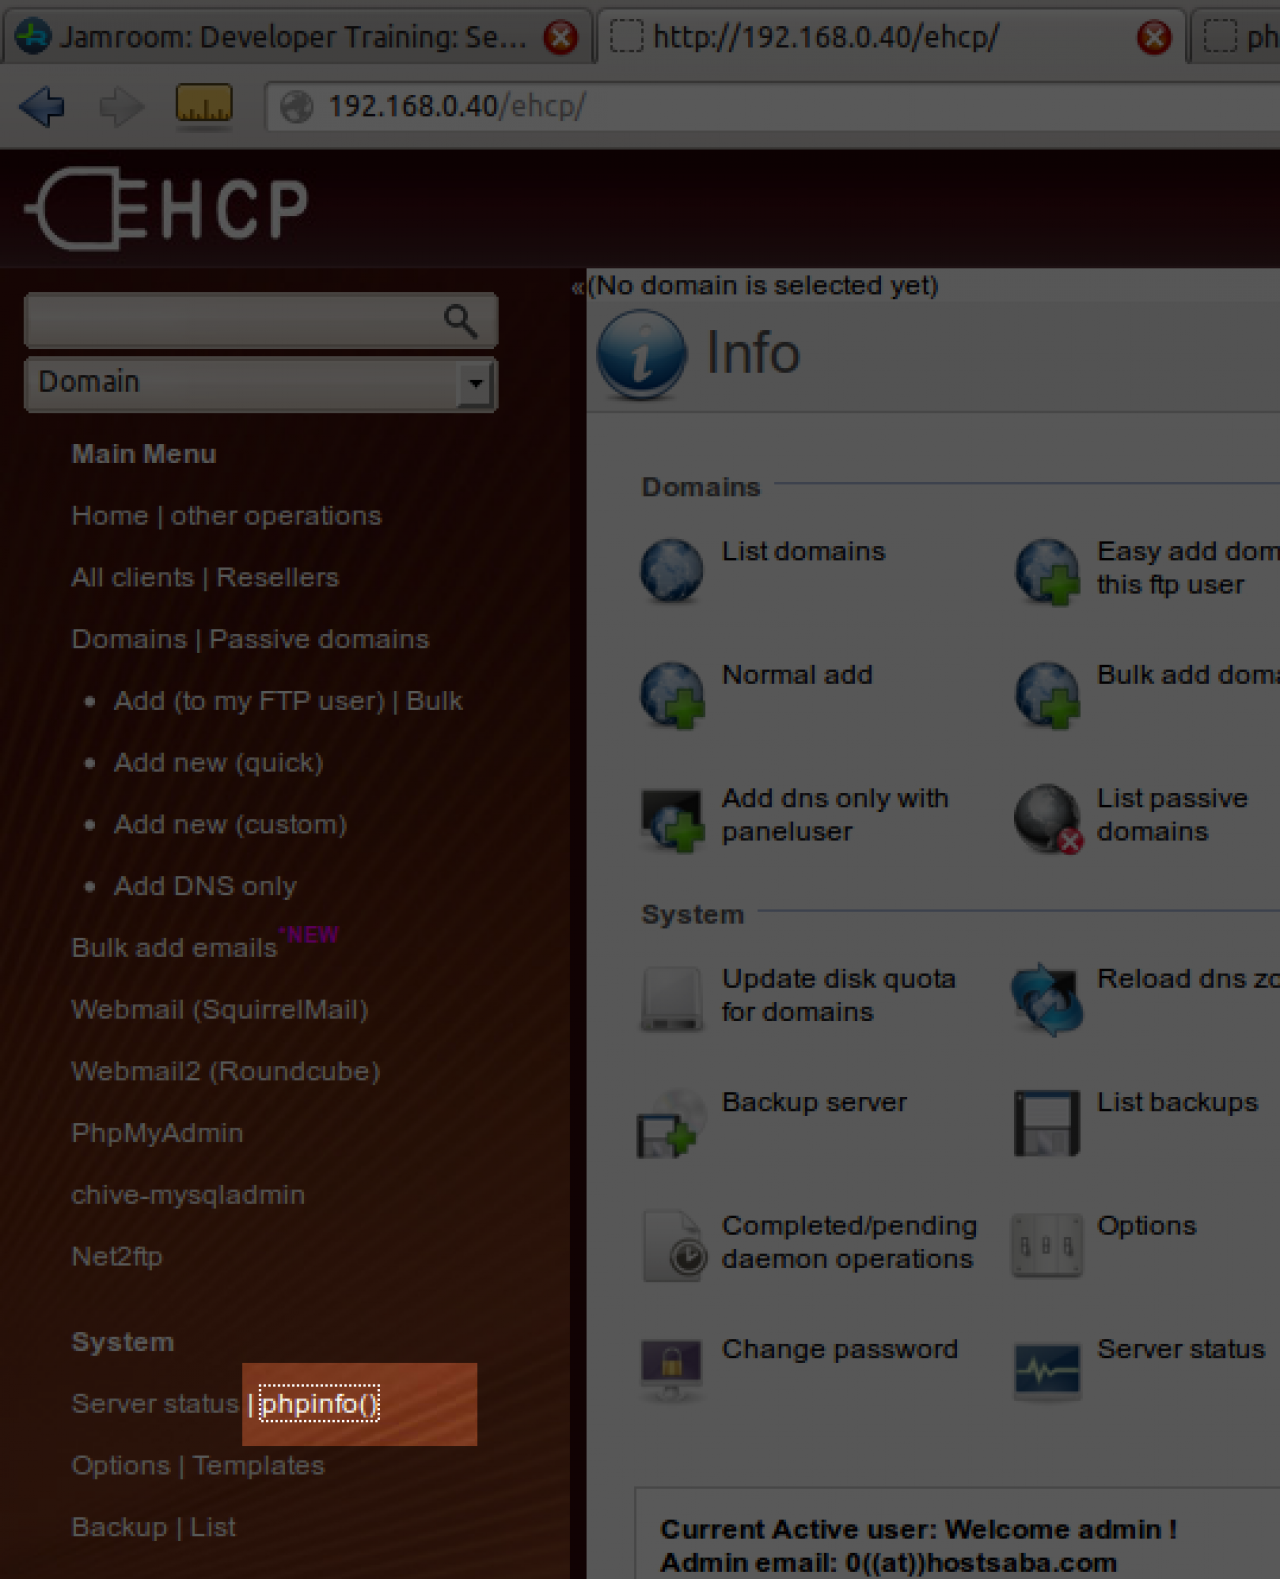
screenshot of where the button is to show phpinfo() for your server.
-
What we want to do now is add in a debugger to the server. Its this debugger that tells the server to stop and wait for commands instead of just running through the script as fast as it can. The debugger we are going to install is xdebug .
Step5: Installing xDebug into your server
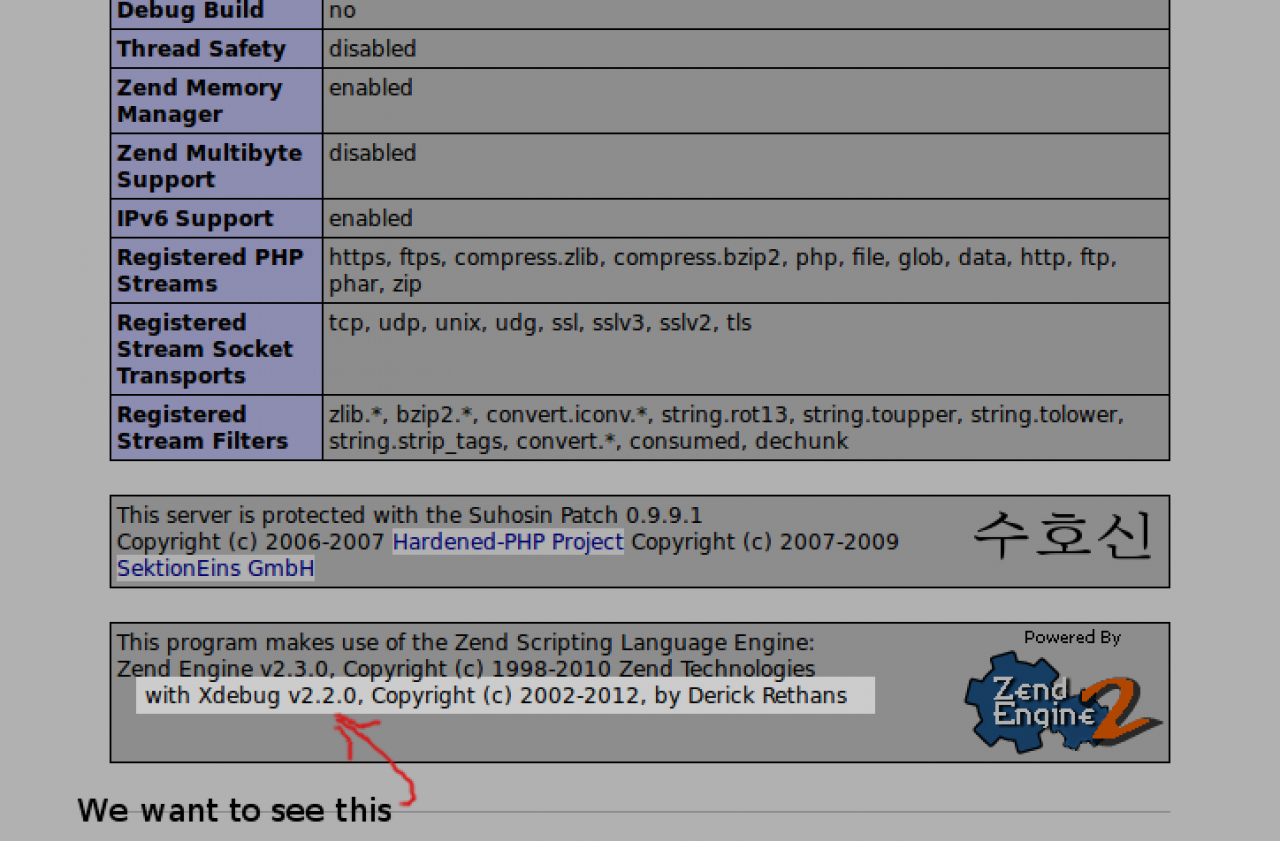
When xdebug is installed it will be visible in our phpinfo(), so open phpinfo from this button in the control panel. -
scroll down until you see this box.
-
screenshot of the xdebug section of phpinfo() confirming that xdebug is active.
-
It is NOT there yet, but we are going to get it there. That is the goal of this step. To get xdebug working on our server.
The official xdebug install docs are here or if you just want the quick version it's.....
sudo apt-get install php5-dev
sudo pecl install xdebug
You will need to put in your password.
Now we are going to add xdebug into php.ini
sudo updatedb
which will update the search database for the system. now we can search for files:
locate xdebug.so
it should prompt you with something like /usr/lib/php5/20090626/xdebug.so copy that location, we are going to need it in a sec.
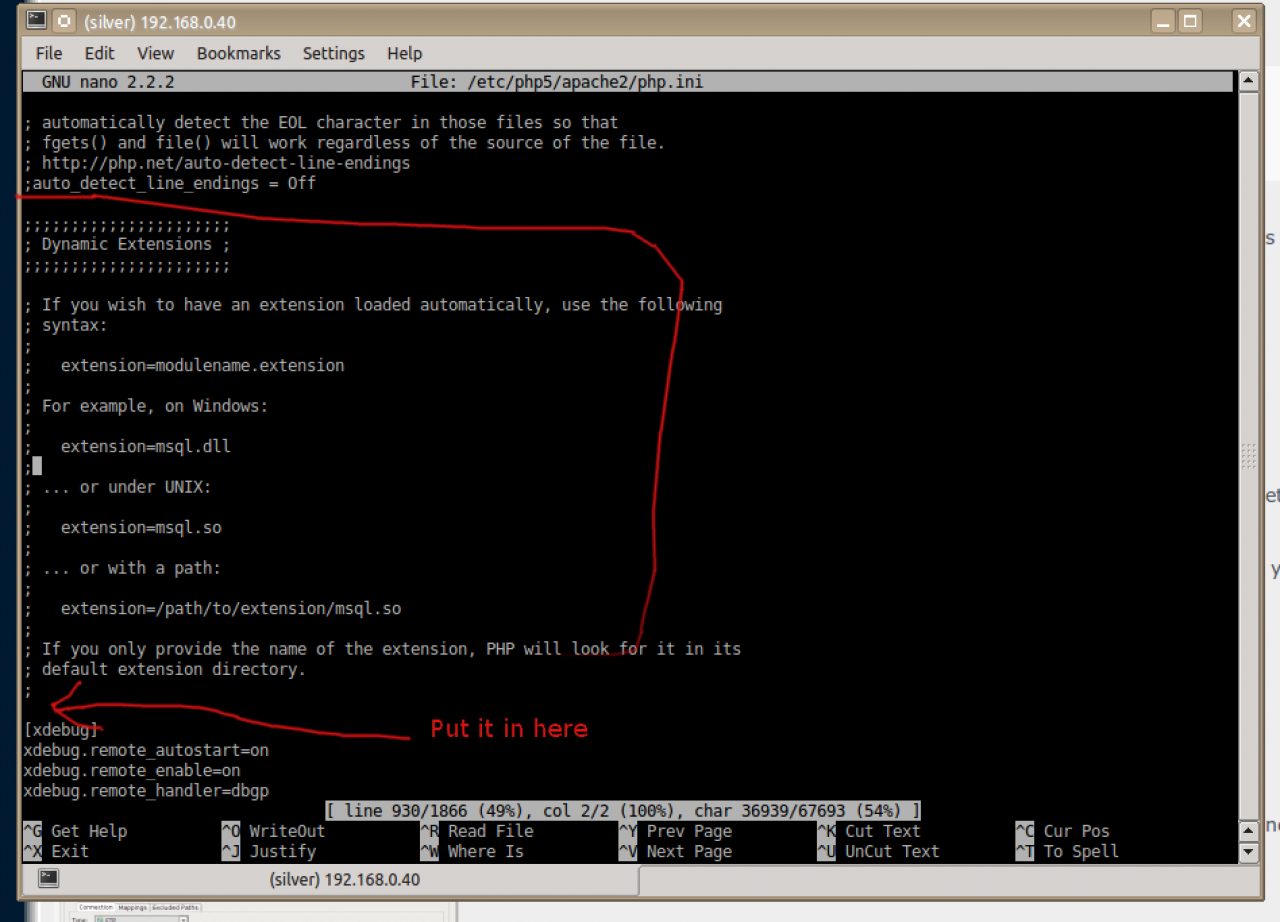
This will open an editor to edit your php.ini file
sudo nano /etc/php5/apache2/php.ini
do
ctrl+w
type 'dynamic extensions' and hit enter.
At the bottom of that section after all the lines that start with a ; add this code
zend_extension="/usr/local/php/modules/xdebug.so"
but change the path to the one you located a couple of minutes ago.
in here: -
screenshot of the nano editor, currently editing php.ini on the server
-
ctrl+o to write the file
ctrl+x to exit the editor
Next restart the apache server. copy+paste this line into your terminal
sudo /etc/init.d/apache2 restart
Log in to ehcp admin again and check phpinfo again and see if you have that extra line that says that xdebug is installed. -
(this step is done on your main pc, not the server)
Step6: Making the domain work in your web browser
When we type a URL into the address bar of a web browser the first thing it does is try to figure out where we want to go. The usual way it does that is it goes and asks other servers on the web if they know where that address is. There are a bunch of servers on the web whos job it is to point the way. These are known as DNS servers and one thing that happens when you register a domain is that all of these DNS server get informed of what server your domain is hosted on.
What we are going to do now is to intercept that request before our browser tries to go find out where to go and tell it that instead of going to ask those all knowing DNS servers where to go, instead just go to our local server.
On Linux and Mac the place where we can do this is in the /etc/hosts file. The ip address of my server is 192.168.0.40, you will need to know YOUR servers ip address for this step.
Open your /etc/hosts file on your development machine with a text editor. It should look something like this:
127.0.0.1       localhost

127.0.1.1       ussher
We are going to add in the server ip-address along with the name of the domain we just created.
127.0.0.1       localhost

127.0.1.1       ussher


192.168.0.40       jr430.iixxii.cc

192.168.0.40       www.jr430.iixxii.cc
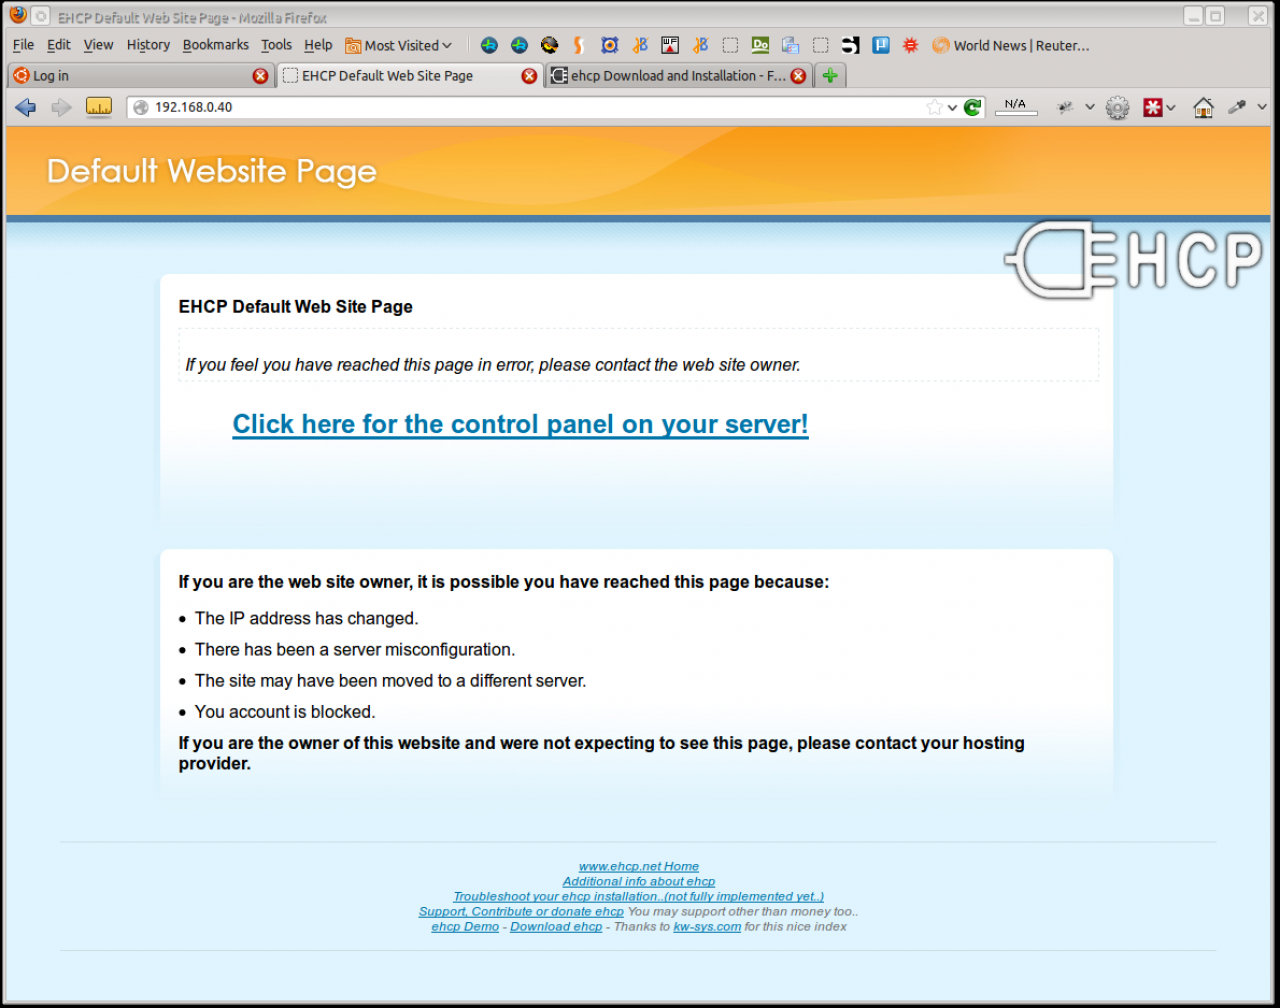
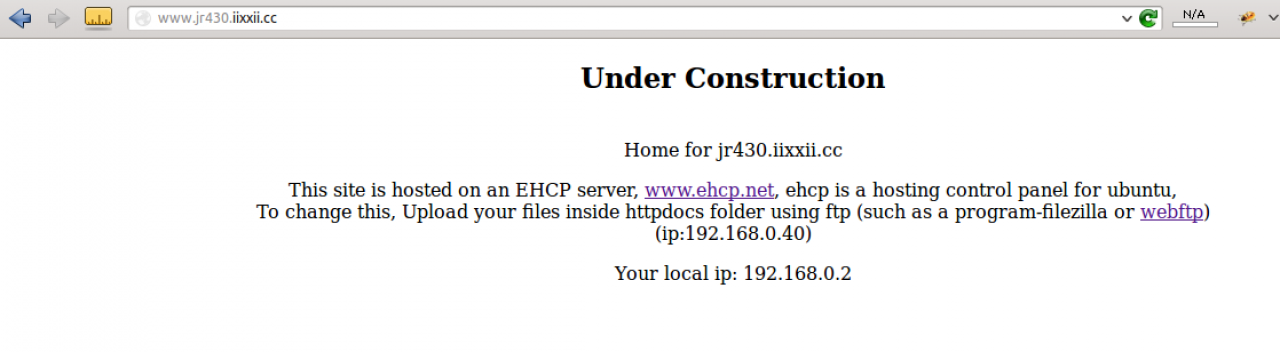
Save it. now go look at that domain 'jr430.iixxii.cc' in your web browser and it should point you to your local server. If all goes well you should see the holding page for the domain that looks like this: -
screenshot of the default screen put in place by ehcp when a new domain is created.
-
Now that we have a local server setup, and a domain on that server, its time to come back to our development machine and get the development machine ready to build stuff on that server.
Step7: Get setup to edit it with PhpStorm
Fire up PhpStorm. There are a few ways to make a new project, but for right now I will go over how I do it and you can refine your methods later.
The first thing we are going to do is to create a directory to hold our files on our local pc. I like to keep all of my phpstorm projects in the same directory, so i have one directory called 'PhpStorm_projects' and all the domains under that.
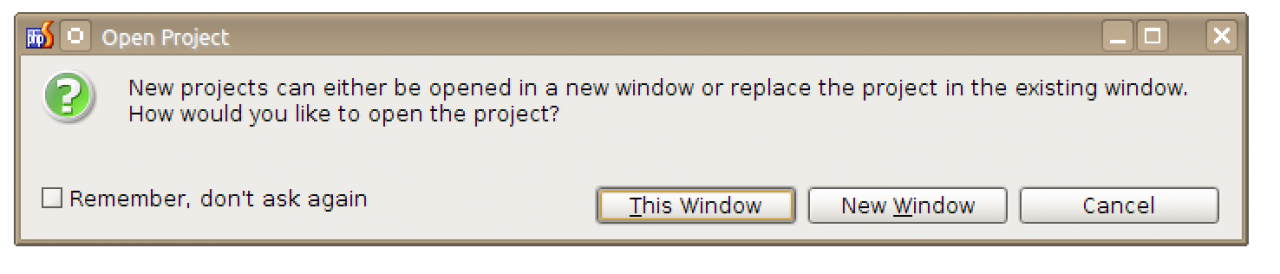
so click on FILE -> OPEN DIRECTORY -> (click on 'PhpStorm_projects') -> (create a new folder) jr430.iixxii.cc -> click OK -
screenshot of a popup in PhpStorm. currently a question dialog about new windows.
-
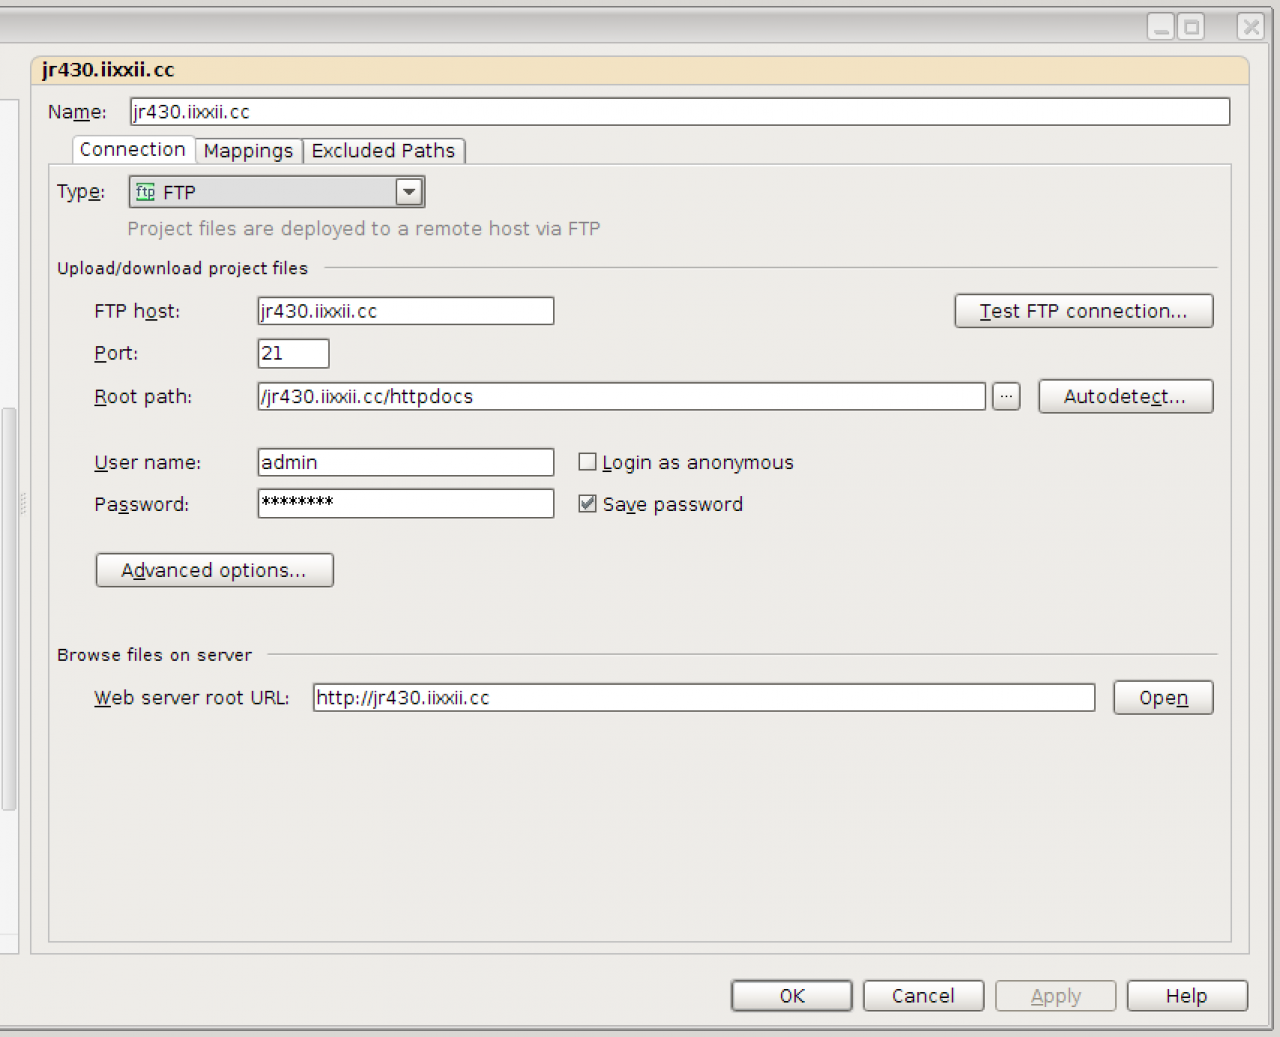
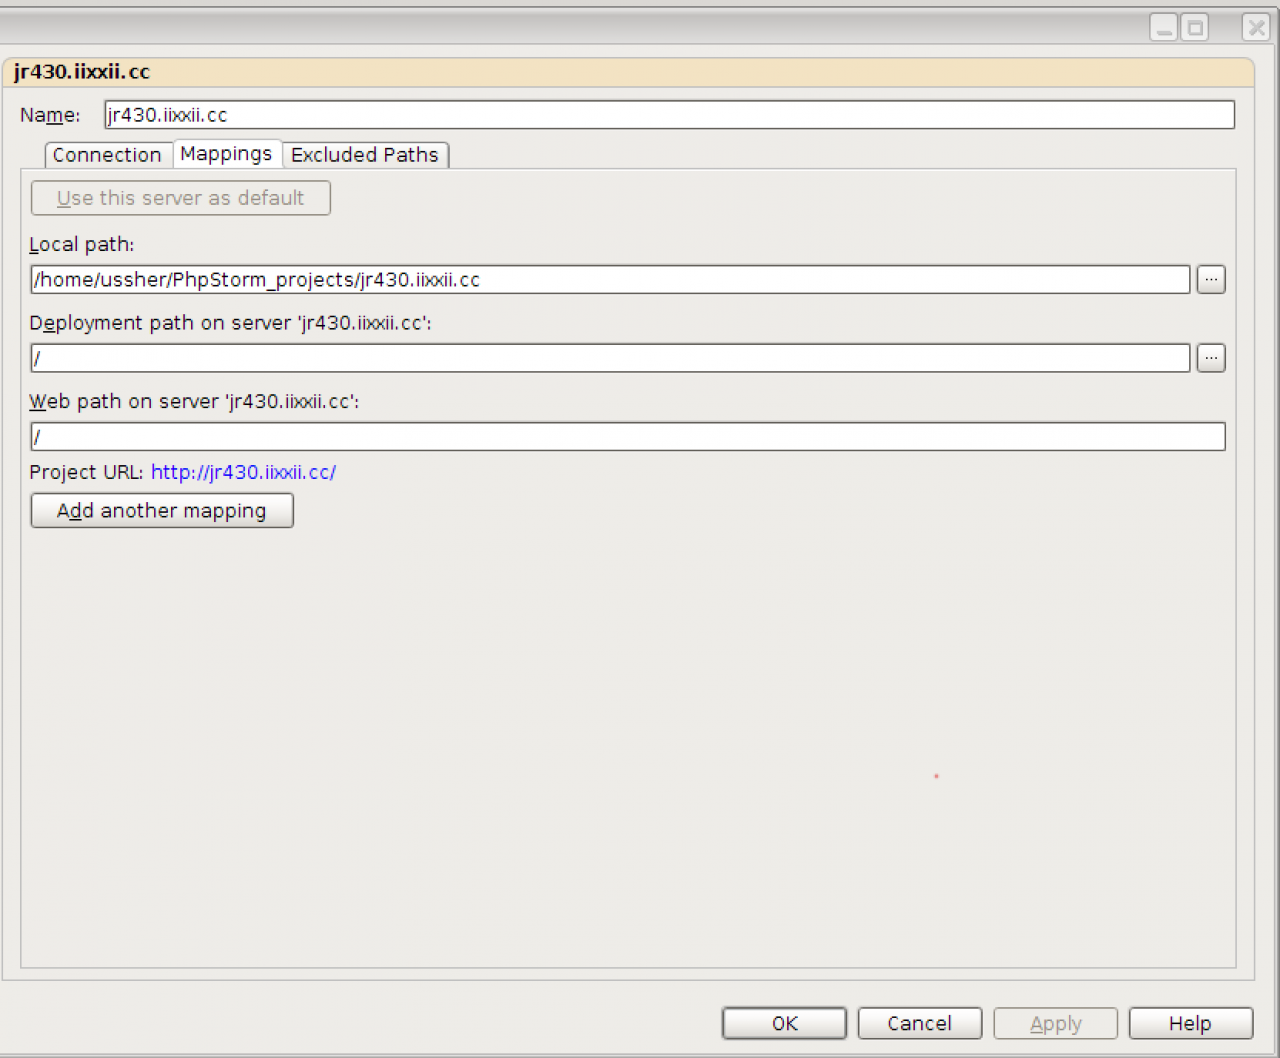
This window is fine. You are now in that project. next go to TOOLS -> DEPLOYMENT -> CONFIGURATION. click the + button and add in the FTP details to your server
-
screenshot of the deployment connection dialog in phpstorm
-
screenshot of the deployment mapping dialog in phpstorm
-
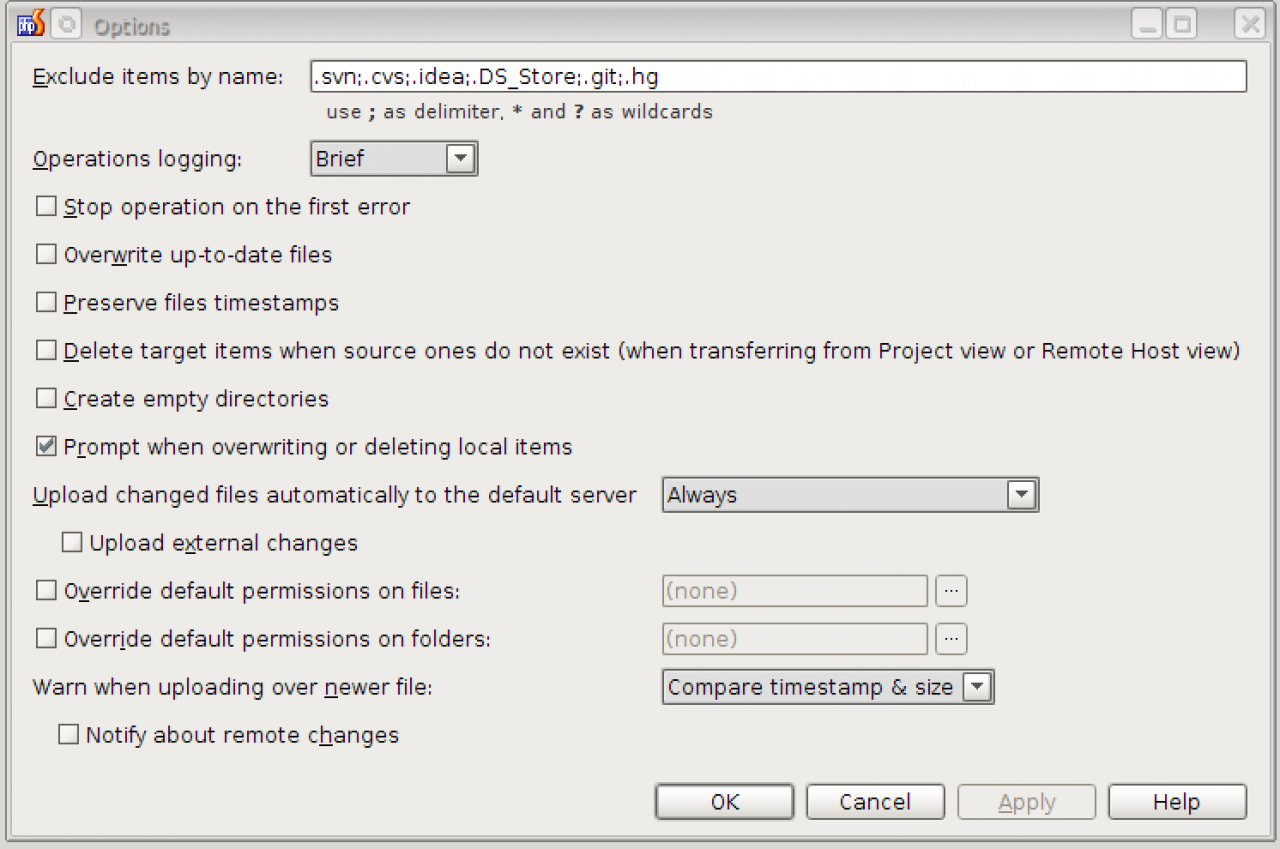
click OK and go back to TOOLS again, but this time TOOLS -> DEPLOYMENT -> OPTIONS
-
screenshot of the deployment options dialog in phpstorm
-
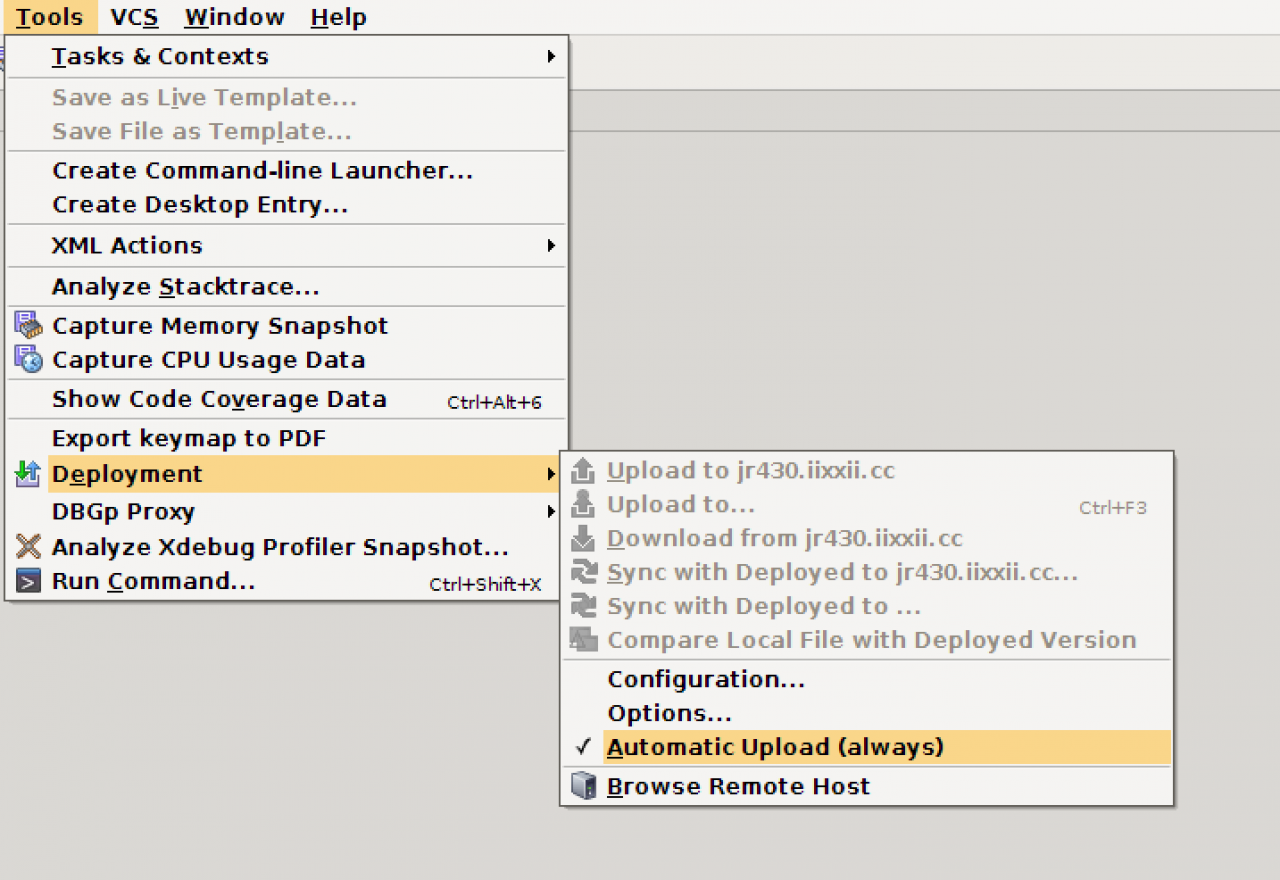
and finally TOOLS -> DEPLOYMENT -> Auto Upload
-
screenshot of activating auto upload from the menus in phpstorm
-
click on the REMOTE HOST button on the far right of PhpStorm. select your server that you just setup, right click the top folder and download all the files.
-
screenshot of the remote hosts files inside phpstorms interface
-
Next we want to add some more settings to the php.ini file on the server to let it know where our development machine is. For this you need the ip address of the machine running PhpStorm.
Step8: Get the debugger talking to PhpStorm
On a PC -
Click the Start button, select Run
Type CMD and press Enter.
A Command prompt window will open.
Type ipconfig and press Enter.
Several lines of information will be displayed, one of which will be the PC's IP address.
On a Mac -
From the Apple menu pull down "System Preferences".
Click on the "Network" preference pane.
The Mac's IP address will be visible to the right.
On linux, type
ifconfig
at the command line to get your IP address.
Once you have that, copy this block of code but use your IP address
[xdebug]

xdebug.remote_autostart=on

xdebug.remote_enable=on

xdebug.remote_handler=dbgp

xdebug.remote_mode=req

xdebug.remote_port=9000

xdebug.remote_host=192.168.0.2

xdebug.idekey=webide
we want to put that block of code directly below the zend_extension= line that we added before in php.ini on the server. -
Thats it. You now have a local copy of the files on the server and automatic uploads turned on. So if you open index.html and make a change to it, then refresh your browser, PhpStorm will save the file automatically, upload the file automatically.
Development is "change something, refresh to see how it looks, change something else, refresh to see how it looks. Rinse and repeat until it looks right." -
screenshot of php.ini on the server with the xdebug info added
-
on the server use this command to open the editor
sudo nano /etc/php5/apache2/php.ini
add that block of code in, then
ctrl+o to write the file to disk (save)

ctrl+x to exit the editor.
then restart apache.
sudo /etc/init.d/apache2 restart
that should be it. Lets go test to see if its working. -
In PhpStorm, create a file called junk.php copy+paste this code in it:
Step9: Testing the Debugger stops on Breakpoints
<?php $i = 1; while ($i <= 10) { $total = $i; $i++; echo 'Total: ' . $total . '<br>'; } echo 'finished'; ?> -
Now if you click in the margin of the code next to the first 'echo' line a big red dot should appear. This is a break point.
Click the little red telephone icon in the menu bar and it should turn green.
Go to your browser and open that url (automatic upload should have uploaded it automatically to the server for you.)
http://jr430.iixxii.cc/junk.php
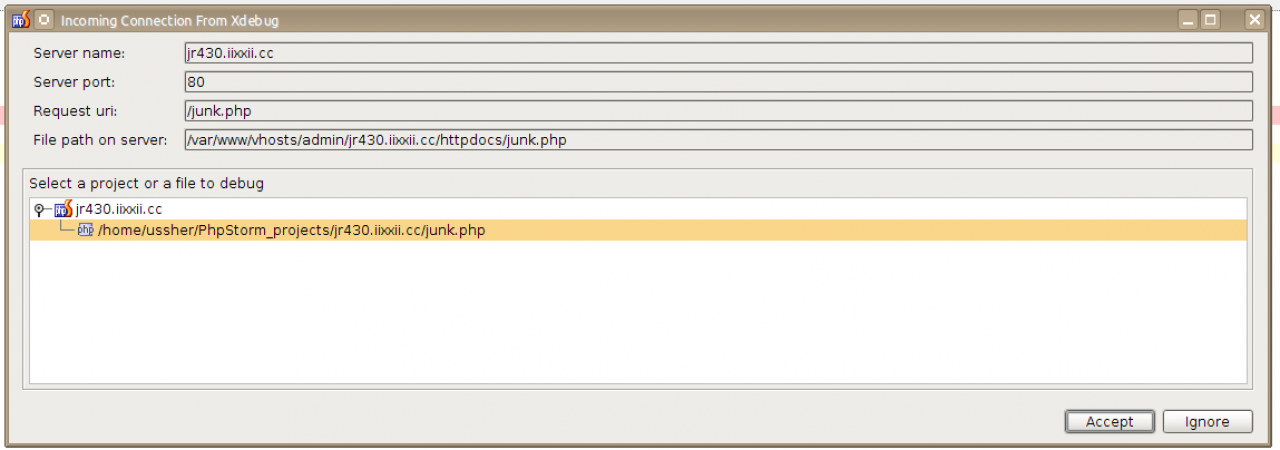
If all has gone well you should see this: -
screenshot of phpstorm dialog alerting you there is an incoming debugging connection.
-
Click ACCEPT and you should now be stopped on your breakpoint in phpstorm.
-
screenshot of phpstorm stopped on a breakpoint
-
Done!
-
A good first step in using the debugger is to go put a break point on somewhere near the beginning of /modules/jrCore/router.php as this fires on every page load of jamroom, then use the keys
Step10: Using the debugger
* F7 to go into a function
* F8 to step to the next line
* F9 to run to the next break point
to navigate through the code as it progresses.
You will quickly find that this debugger becomes an indispensable tool in creating modules. You will find your self setting break points in module code to see what the exact output of an sql query is after the table names have been replace from the variables. And again to see what output is returned from the database.
It is an extremely useful setup. -
Screencast: using xdebug to help development
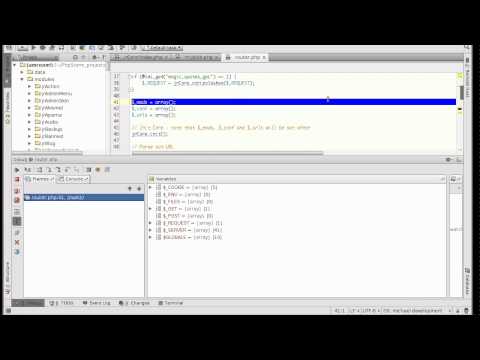 Screencast showing how to use xdebug to aid with module code understanding via phpstorm