Quick Install Guide
Table of Contents:
Step 1: Download Jamroom Open Source or Premium
Step 2: Upload the files to your web hosting account
Step 3: Run the Jamroom Installer
Step 4: Create the Master Admin account
-
TIP: This guide is designed for the user that is familiar with installing scripts via FTP or SFTP and already has a Web Hosting account with a hosting provider.
Make sure and check out Jamroom Hosted to get up and running without having to manually install Jamroom:
https://www.jamroom.net/hosting -
The first step is to make sure you have downloaded the latest release of either the Jamroom Open Source Core:
Step 1: Download Jamroom Open Source or Premium
https://www.jamroom.net/networkmarket/core_download/jamroom-open-source.zip
or a trial version of Jamroom Premium:
https://www.jamroom.net/start
either way the installation is the same. Download the package to your local PC/Mac and unzip the downloaded ZIP package if your computer didn't already do it for you. -
The next step is to fire up your FTP (or SFTP) client and connect to your web hosting account.
Step 2: Upload the files to your web hosting account
Upload the files from the Jamroom product you downloaded into the location on your hosting server you want to run Jamroom from. -
TIP: The Jamroom files are going to be located in a directory with a name like "jamroom-open-source-latest" - you want to upload the files WITHIN that directory to your hosting account - don't upload the directory itself.
-
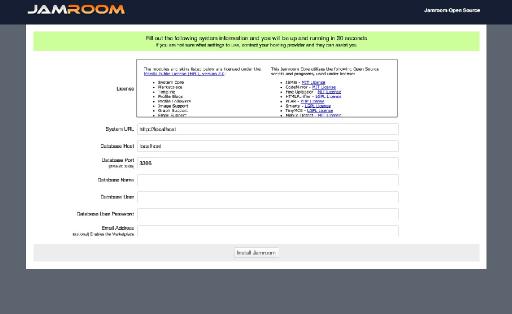
Step 3: Run the Jamroom Installer
Now load up the location you installed Jamroom to in your favorite browser - you should see the install screen (see image to the right).
Enter the required install information, press the "Install Jamroom" button and in a few seconds Jamroom will be installed and ready to run on your site.
NOTE: If you are not sure what to enter, your hosting provider should be able to assist you in creating the Database needed for Jamroom to function. -
TIP: Make sure and enter an email address during the installation - that way the Jamroom Marketplace will be automatically setup for you after install.
-
Step 4: Create the Master Admin account
After successfully installing Jamroom the next step is to the create the FIRST account on the system - this will become the MASTER ADMIN account, which grants unrestricted access to the system.
After you've created your Master Admin account, head on to the next section - the First Steps after Installation. -
Next Up: First Steps After Installation