HowTo: Cpanel Installation using Softaculous
Table of Contents:
Hosting Recommendation
Easy Install: 1 click into CPanel via Softaculous
First Steps
Download the Jamroom Core
Server System Requirements
Upload the Jamroom files to your server
Uploading via FTP
Creating a Database
Installing Jamroom
Creating the Admin user
System Check
-
For the best Jamroom experience, Click Here (Hosting provided by The Jamroom Network).
Hosting Recommendation
OR If you want to install it on your own server, or a server rented from another hosting company, keep reading below......
-
Easy Install: 1 click into CPanel via Softaculous
Jamroom can be installed in 1 click on any CPanel server that includes the Softaculous script installer. -
If your not using a CPanel server, no worries. Softaculous is also available on these server control panels too: Direct Admin | H-Sphere | Plesk | Interworx | ISP Systems | ISPConfig
-
Getting Jamroom installed and working on your server requires a few things:
First Steps
* A Linux based server or hosting account to upload the Jamroom files to.
* An FTP program to transfer the files to the server.
* A MySQL Database Server with a created database for Jamroom to use.
* a domain name pointing to your server. -
Download the Jamroom core from here:
Download the Jamroom Core
https://www.jamroom.net
Its a free download and you don't even need to create an account to get it.
The file you will get will be in .zip format so you will need an un-zipping program to extract all the files contained in the package.
I believe all operating systems will have a free unzip program of some sort, you will need to locate the one that works for you. -
The system requirements of your server:
Server System Requirements
PHP 5.3+
MySQL 5.1+
The following PHP extensions are required:
- MySQLi (mysql improved) extension
- GD and FreeType
- Multibyte string extension (-enable-mbstring)
The following PHP extensions are recommended:
- APC (op code caching - speeds up PHP requests)
Jamroom works with "Suhosin", which is a security related PHP module, so if your server is running Suhosin that should not be a problem.
-
After downloading the Jamroom core and extracting it, you now need to upload it to your web server, which means you need to have a web server (or web hosting account with a hosting provider).
Upload the Jamroom files to your server
There are many web hosting companies offering hosting services - make sure whoever you are hosting with meets Jamroom's System Requirements.
-
Uploading to your server is done with the help of an FTP program. Again, which program you use will depend on the operating system you use.
Uploading via FTP
The FTP program in the video is called 'Konqueror' and it is part of the Linux operating system using the KDE window manager.
If you use Windows or Mac you will need to find an FTP program that works for you. -
Jamroom needs a MySQL database to function. This database is something you would usually create in the control panel of the server that you have rented from the server rental company.
Creating a Database
When you create a database you will select 3 pieces of information.
#1: a database name
#2: a database user name
#3: a password
Make note of what these are because you will need them in the next step, "Installing Jamroom" -
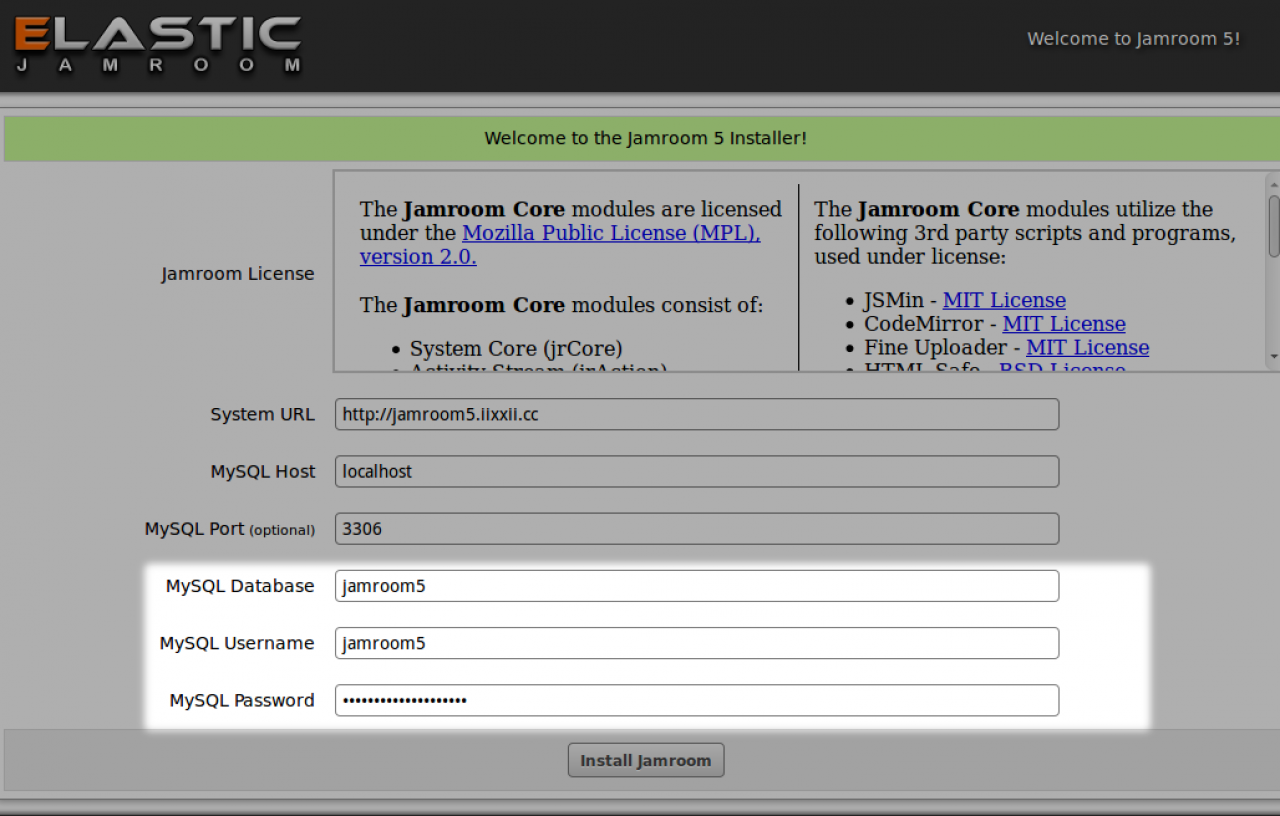
Now that you have all the pieces in place, its time to install.
Installing Jamroom
For this step you will need the 3 pieces of information you used to create the database in the last step.
You will need:
- the name of the database
- the database user name
- the password for the database user
Enter these into the fields provided on the install form. -
screenshot of the location to enter your database name, username and password during install.
-
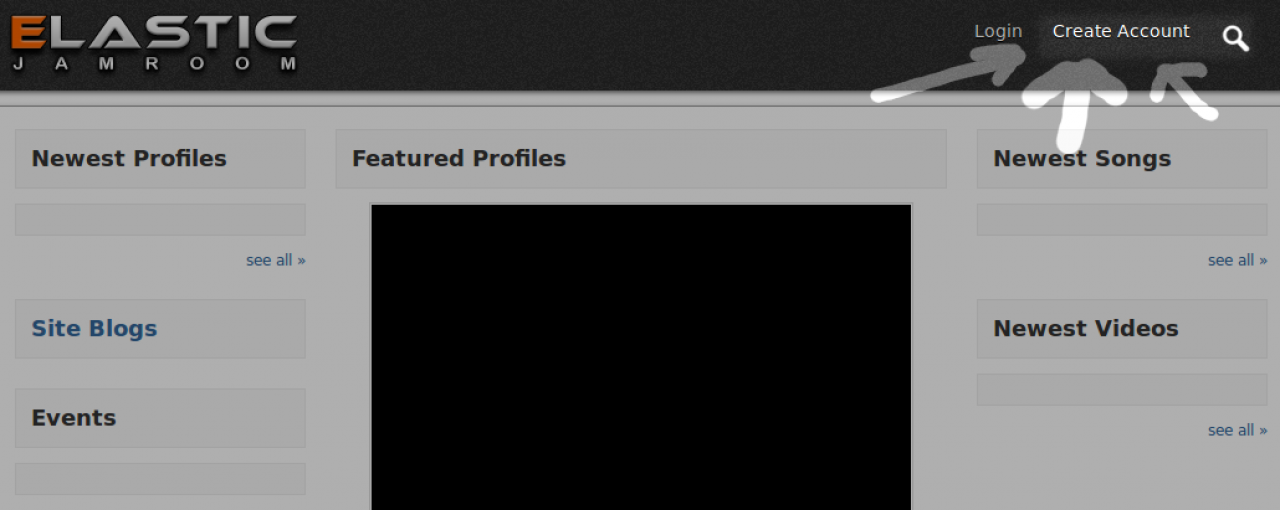
Once installed you will see the forward facing home page of your jamroom site.
Creating the Admin user
It will be installed with the jrElastic skin by default.
The first user you create will be the Admin user. Click the Create Account button to go to the create account page. -
screenshot of the create account button.
-
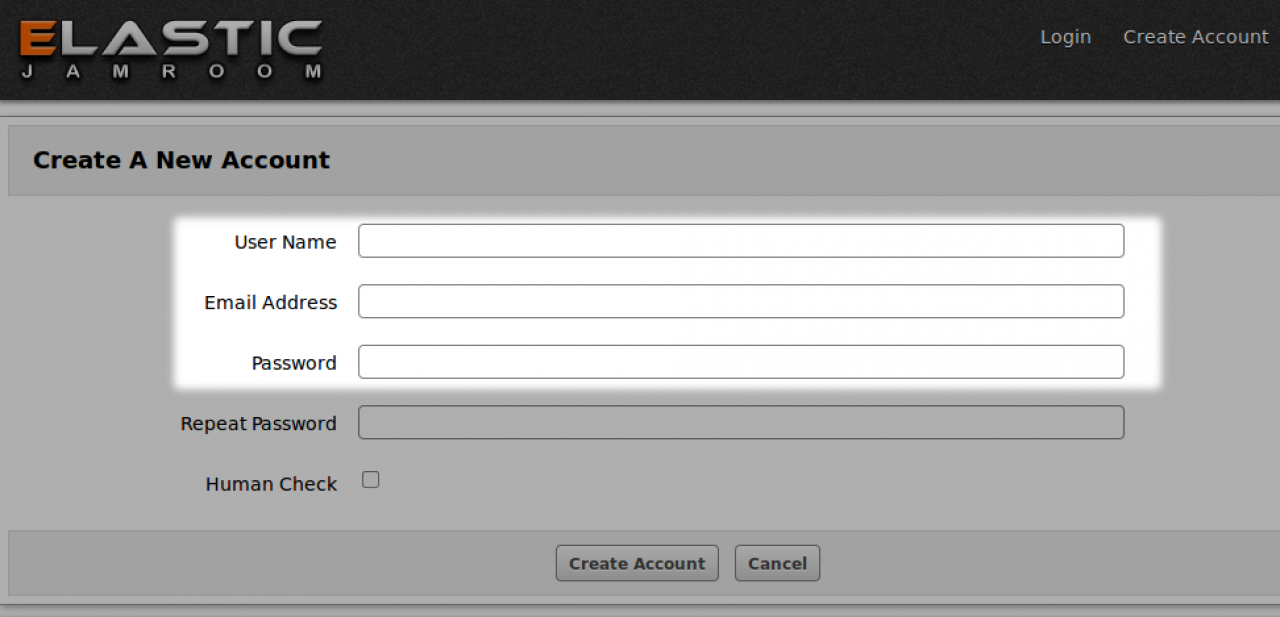
The first account created after site install will be the admin user account.
-
Make sure you have an email address ready to enter, because your going to want to create an account immediately after finishing the install.
Don't want someone else wandering along and creating that first account. -
screenshot of the 'create account' page.
-
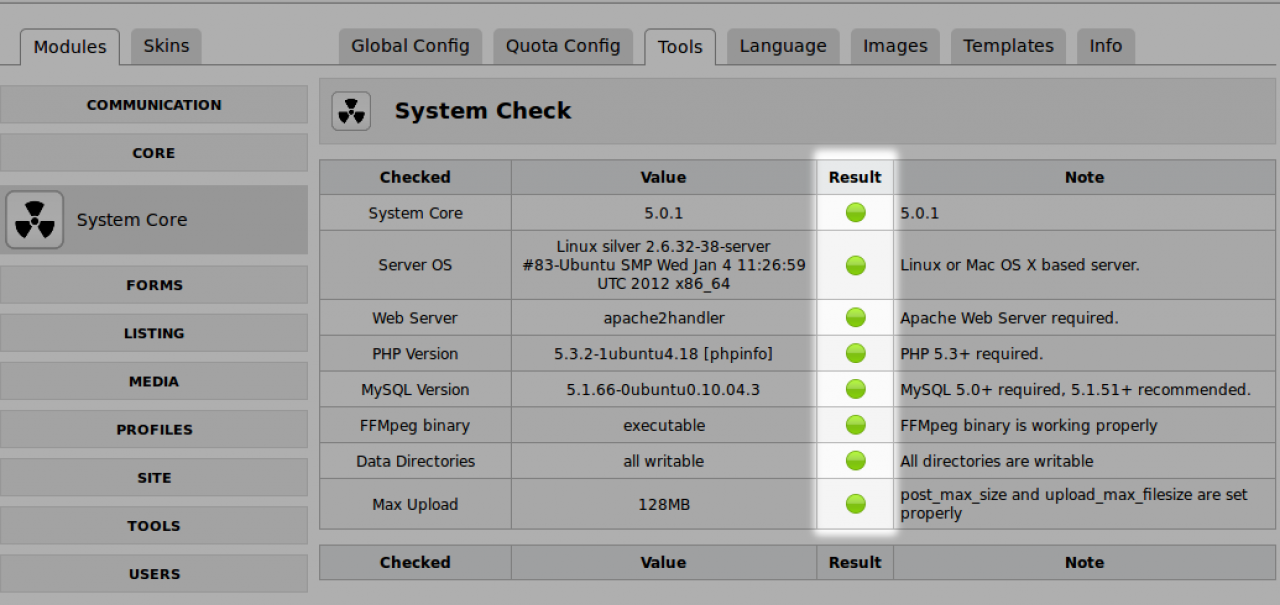
After the login is complete and the admin user has been created, you will be directed to the 'System Check' page to show you the status of the server.
System Check
If anything needs configuring or fixing it will show up as a red light on this page.
You can get back here any time you need to by going to the Admin Control Panel ( ACP ).
ACP -> SYSTEM CORE -> TOOLS -> SYSTEM CHECK -
screenshot of green lights in the system check.