Using The Form Designer
Table of Contents:
Overview
The flow
Adding Fields
Using the information stored by the Form Designer
An output example
Finding out the format that the info is stored in
Warnings
-
The Form Designer is a powerful tool for constructing and altering forms.
Overview
It allows Master admin users to customize the forms that are provided by modules.
The Form Designer allows additional fields to be added to existing forms so that each site can accept additional information that may be specific to their needs.
Using the Form Designer, new fields can be added to forms to collect extra information at item creation time (as well as when updated) and customize the way modules work in your system to make it unique.
As well as altering the 'CREATE' and 'UPDATE' forms of things like the Audio and Video module, the Form Designer can be used on forms created by the Simple Custom Forms module. -
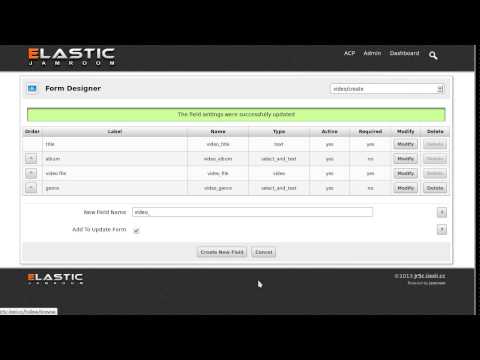 A look at adding a new field to a module via the Form Designer
 -
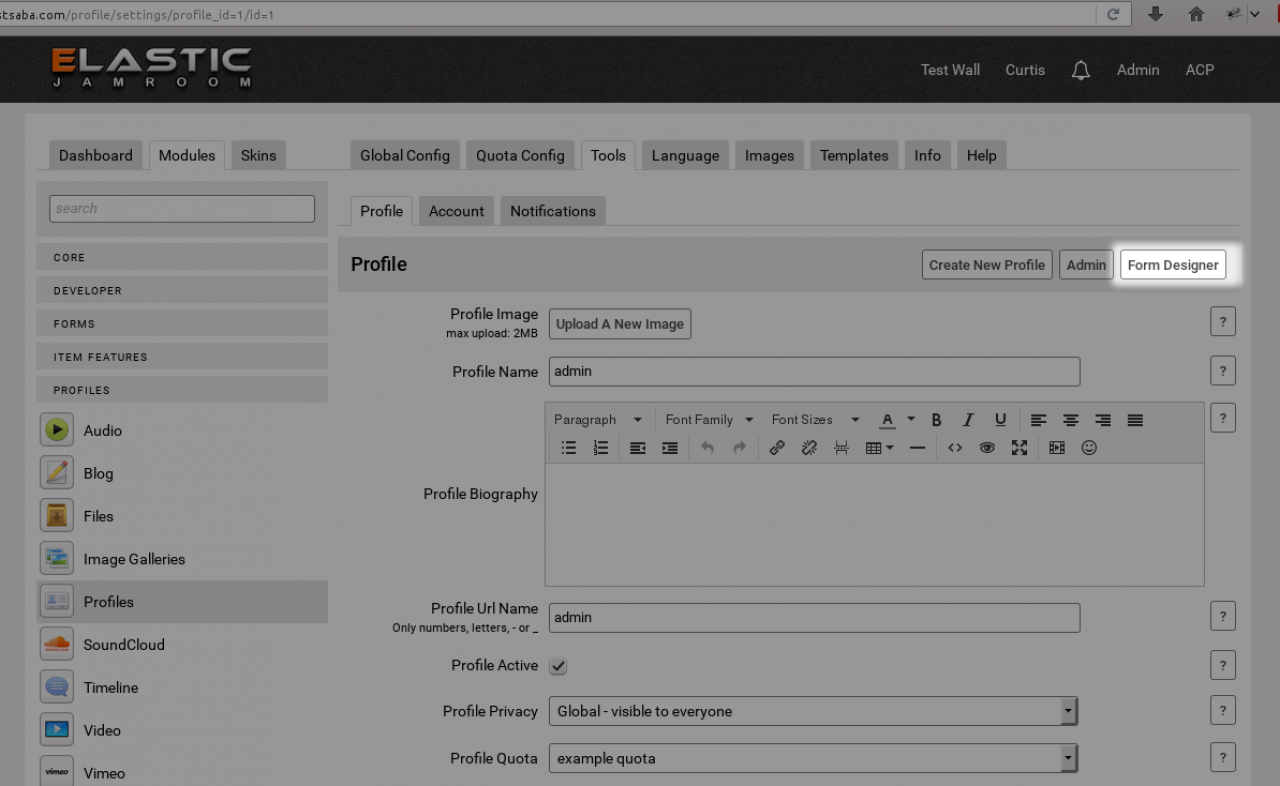
Wherever there is a form provided by a module, there is likely to also be a button for the Form Designer.
The flow
-
screenshot of the Form Designer button on the Profile update form.
-
The Form Designer is for adding fields to forms. By adding a field to a form, it increases the amount of information that is collected by that form.
Adding Fields
All of this information is stored in the datastore. -
Its important to note that just adding a field to the form is not enough to get that information displayed anywhere. You must alter the templates to get that information displayed.
-
After you have added a field to any form, and the user has used that field to add some information, you then have to decide how and where that information is displayed.
Using the information stored by the Form Designer
For instance, if you added a field to the audio module and the field was a text field named 'audio_lyrics', that will only allow the user using the form to input the lyrics.
The lyrics will be stored with the rest of the information that was collected by that form.
So now wherever you see that information output, you will also be able to output 'audio_lyrics'. -
The user has added an audio file and also included the lyrics in the lyrics field.
An output example
So the data is stored now in the datastore. One location where we can see audio items displayed is on the AUDIO tab of a profile.
There are multiple locations that show us the audio that has been uploaded to a profile, there is the list of audio tracks, then there is also the tracks main details page.
Either of these locations is a possible choice to display the lyrics. The list page is controlled by the Audio modules item_list.tpl page, while the detail page is controlled by the item_detail.tpl page.
If we were wanting the lyrics to come out on the detail page, we could use the name we gave the form field to output the recorded information.
This is what the audio files item_detail.tpl page currently looks like:
ACP -> MODULES -> PROFILES -> AUDIO -> TEMPLATES -> item_detail.tpl
{jrCore_module_url module="jrAudio" assign="murl"} <div class="block"> <div class="title"> <div class="block_config"> {jrCore_item_detail_buttons module="jrAudio" field="audio_file" item=$item} </div> <h1>{$item.audio_title}</h1> <div class="breadcrumbs"> <a href="{$jamroom_url}/{$item.profile_url}/">{$item.profile_name}</a> » {if jrCore_module_is_active('jrCombinedAudio') && $item.quota_jrCombinedAudio_allowed == 'on'} <a href="{$jamroom_url}/{$item.profile_url}/{jrCore_module_url module="jrCombinedAudio"}">{jrCore_lang module="jrCombinedAudio" id=1 default="Audio"}</a> {else} <a href="{$jamroom_url}/{$item.profile_url}/{$murl}">{jrCore_lang module="jrAudio" id="41" default="Audio"}</a> {/if} » {$item.audio_title} </div> </div> ......... -
See "Altering a Module's Template" for template altering options and alternative methods
-
We can see that the structure to output the information in this template looks like this:
{$item.audio_title} -
So if we want to output our 'lyrics' to this page, we would use the same structure:
{$item.audio_lyrics} -
A very useful tool for finding out the format of available data is the {debug} tool. See that link for more info.
-
If you see the message:
Warnings
Quote: The following designer forms have not been setup yet for this module:That means that you're trying to edit something like the audio CREATE form, but have yet to visit the UPDATE screen, so the Form Designer is not initialized on that form yet. Its asking you to visit the UPDATE form at least once (by creating something, then updating it) before using the Form Designer to change things.
audio/update
These forms will be initialized the first time they are viewed. It is recommended that you view all forms for this module before using the Form Designer.