Meta Tag Manager
Table of Contents:
Overview
User Tip
Global Config
Meta Tag Browser
Setting up for Facebook
Facebook Debugger
og:title
og:description
og:image
Finished Facebook snipit
-
The Meta Tag Manager module is designed to allow you to add meta tags to pages that need more than is provided by default.
Overview
Its only useable by the master admin user and is accessed via the ACP. -
A User Tip posted in the forums for the Meta Tag Manager by @the-patria-company
https://www.jamroom.net/the-jamroom-network/forum/new_posts/37458/meta-tag-manager-is-awesome -
On the Global Config tab of the meta tag manager in the ACP you can add any meta tag elements that you plan to use.
Global Config
-
screenshot of the GLOBAL CONFIG tab of the meta tag manager
-
The meta tag browser allows the master admin user to select from the configured meta tags that are set up in the GLOBAL CONFIG section and add that meta tag to a page with a value.
Meta Tag Browser
-
screenshot of the meta tag browser with one meta tag created for a site builder page
-
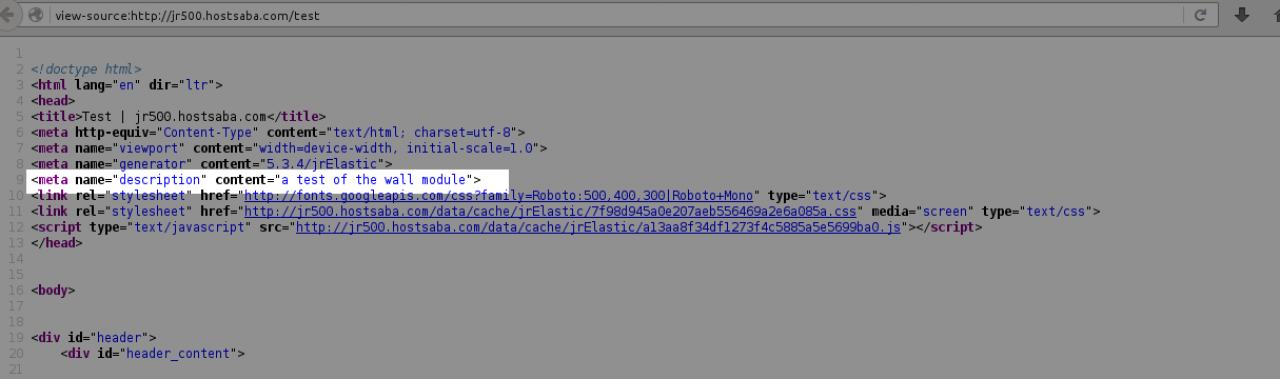
screenshot of the meta tag being output in the source code.
-
Facebook checks your page for tags to determine how the snipit looks on their timeline.
Setting up for Facebook
Its a popular thing to do, so lets look at how to setup the top page of your site so it looks how you want it to look in facebook.
The tags we want to add are:
og: title
og: description
og: image
-
Before we add the tags, we can see what our site is going to look like in a facebook post by adding the url into the facebook debugger. You can find the facebook debugger here:
Facebook Debugger
https://developers.facebook.com/tools/debug/
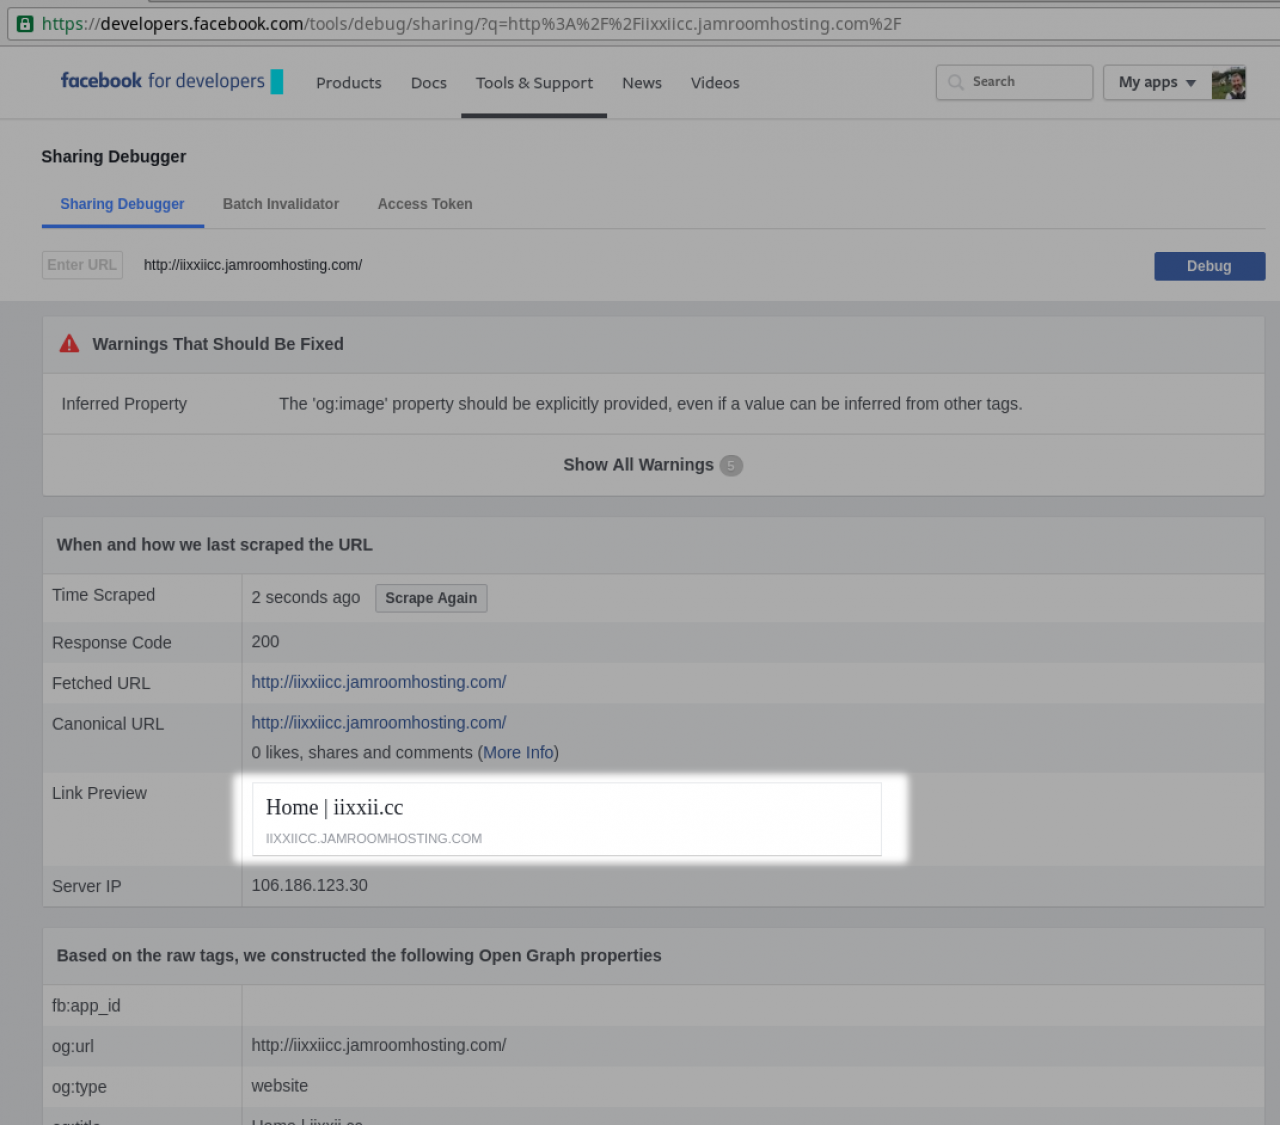
When you add in your site you will see something like this: -
screenshot of the facebook debugger with a preview of the default site highlighted
-
Next we will use the meta tag module to add an og:title tag to our page so that Facebook knows the title of our page and check again.
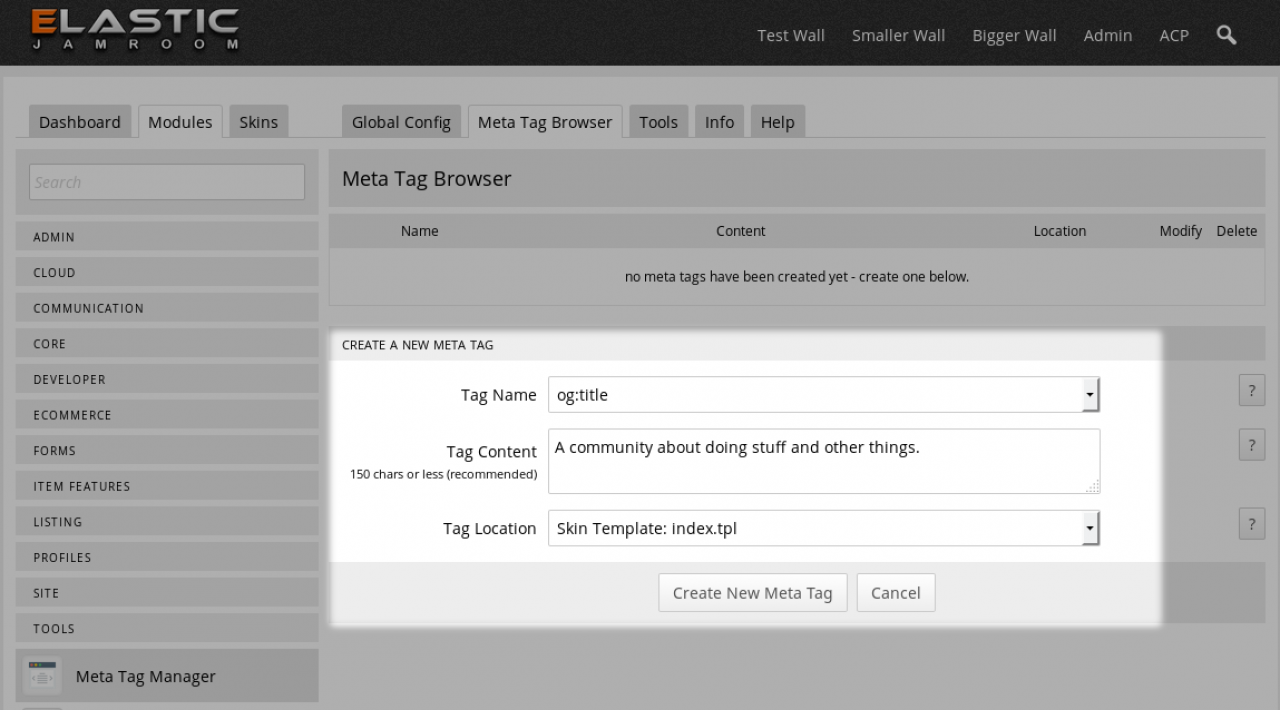
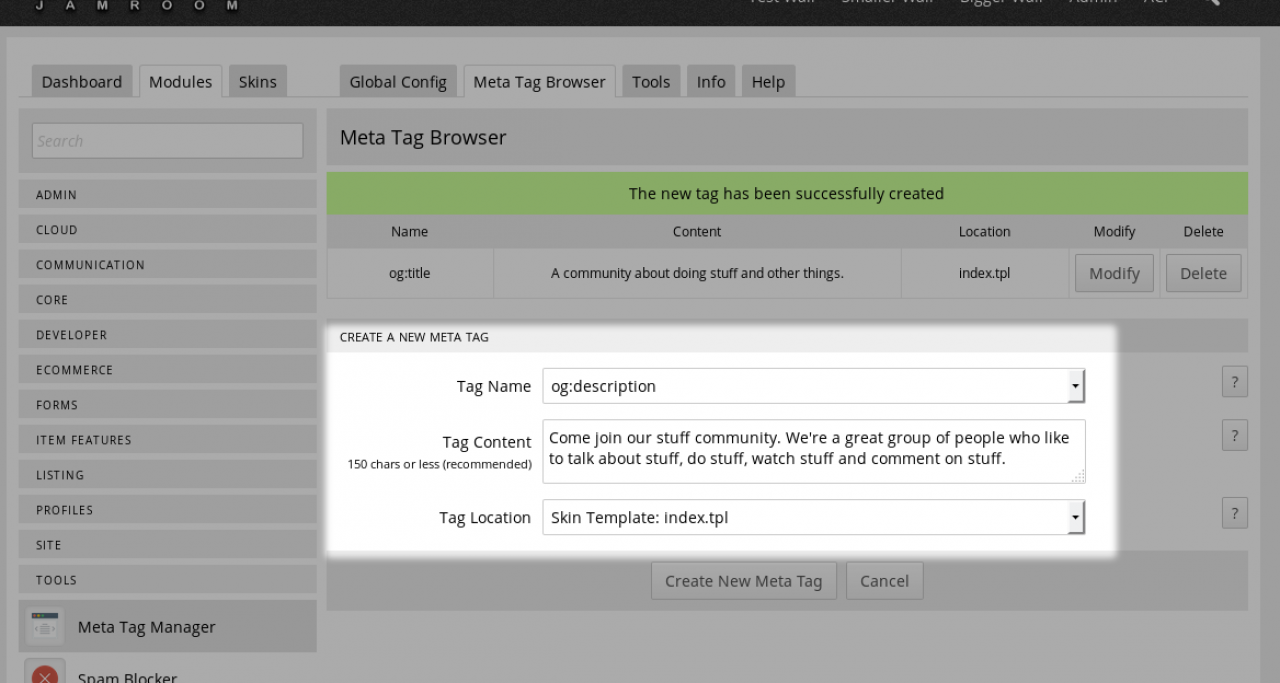
og:title
We are adding the og:title to the index.tpl file. The index.tpl file is the top page of the site. If you wanted to use it for all pages, then select that in the "Tag Location" option. -
screenshot of the Meta Tag manager creating a new og:title metatag
-
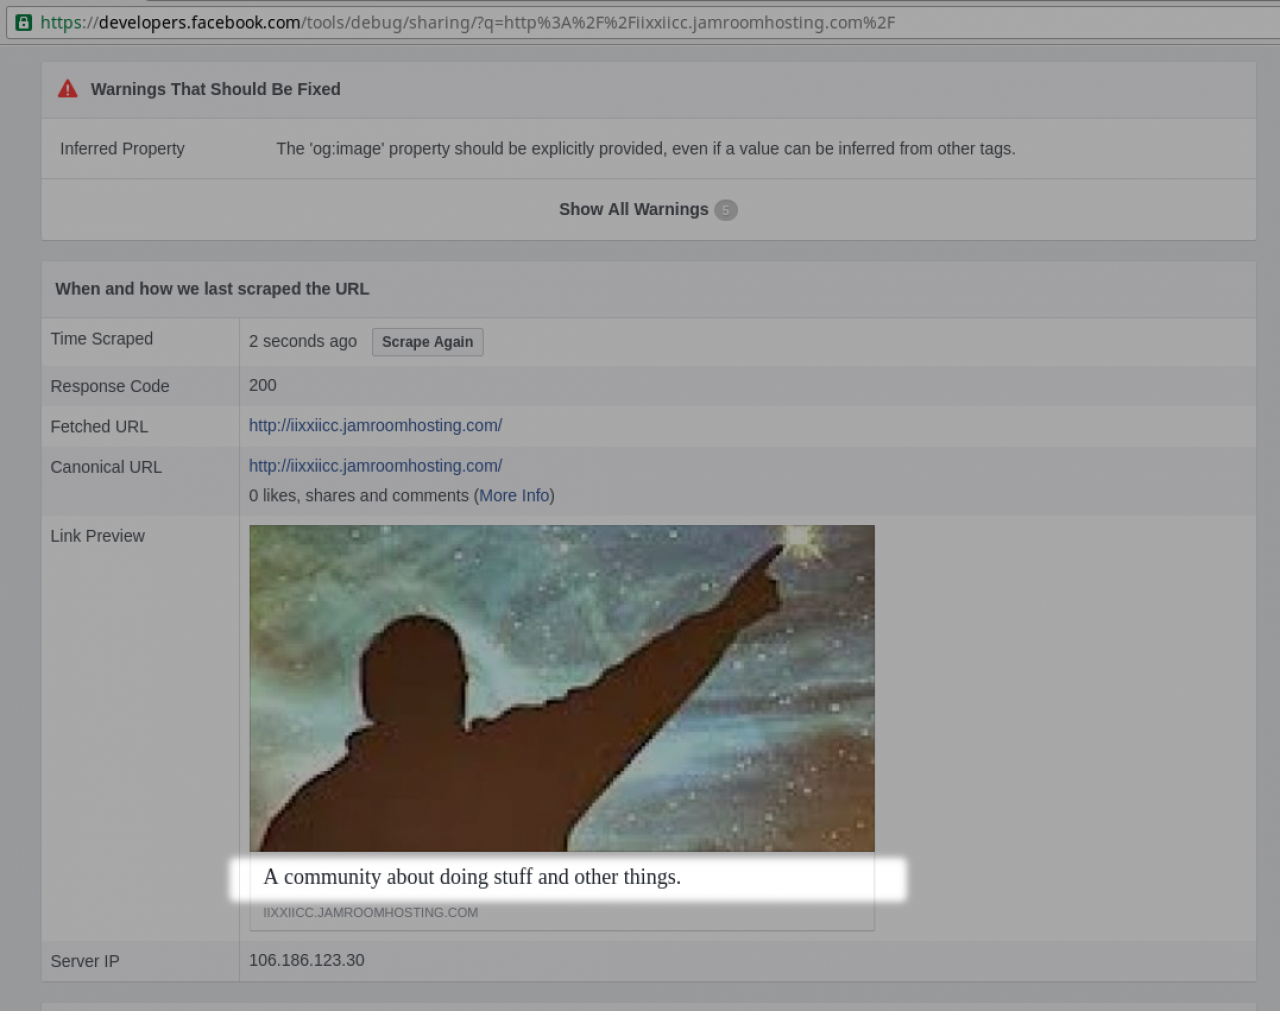
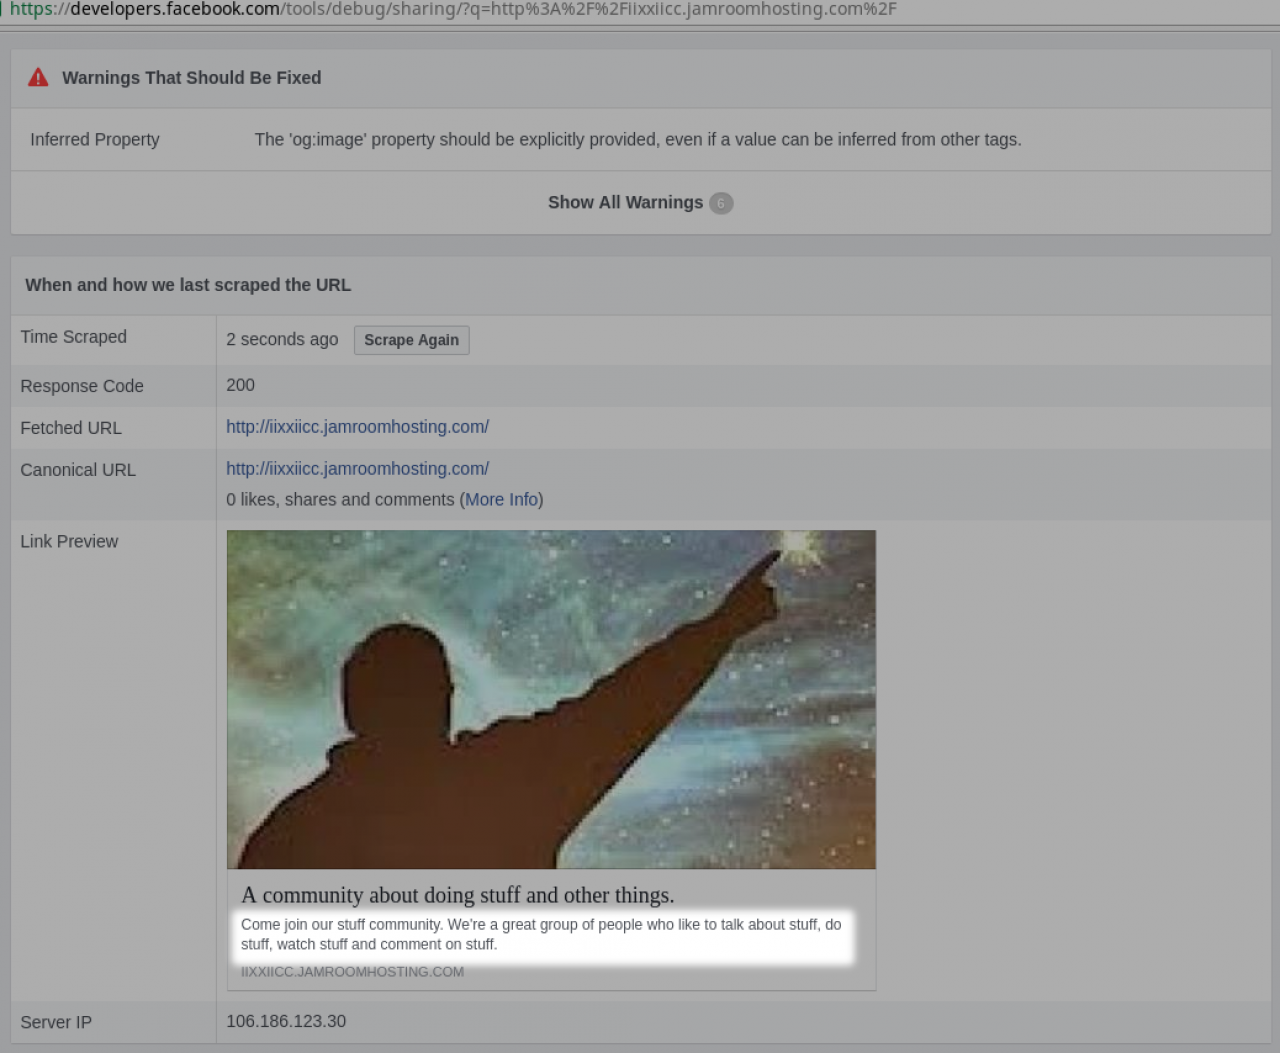
screenshot of the og:title meta tag working in the facebook debugger
-
HINT: If nothing changes on the Facebook debugger you either need to reset your caches from the ACP, or click the "Scrape Again" button on the facebook page, or maybe both.
-
The og:description meta tag tells facebook the description you want to use with your site.
og:description
Repeat the process above to add a description to your site. -
screenshot of the og:description tag being added to the top page of the site
-
screenshot of the og:description tag for our community appearing on the facebook snipit
-
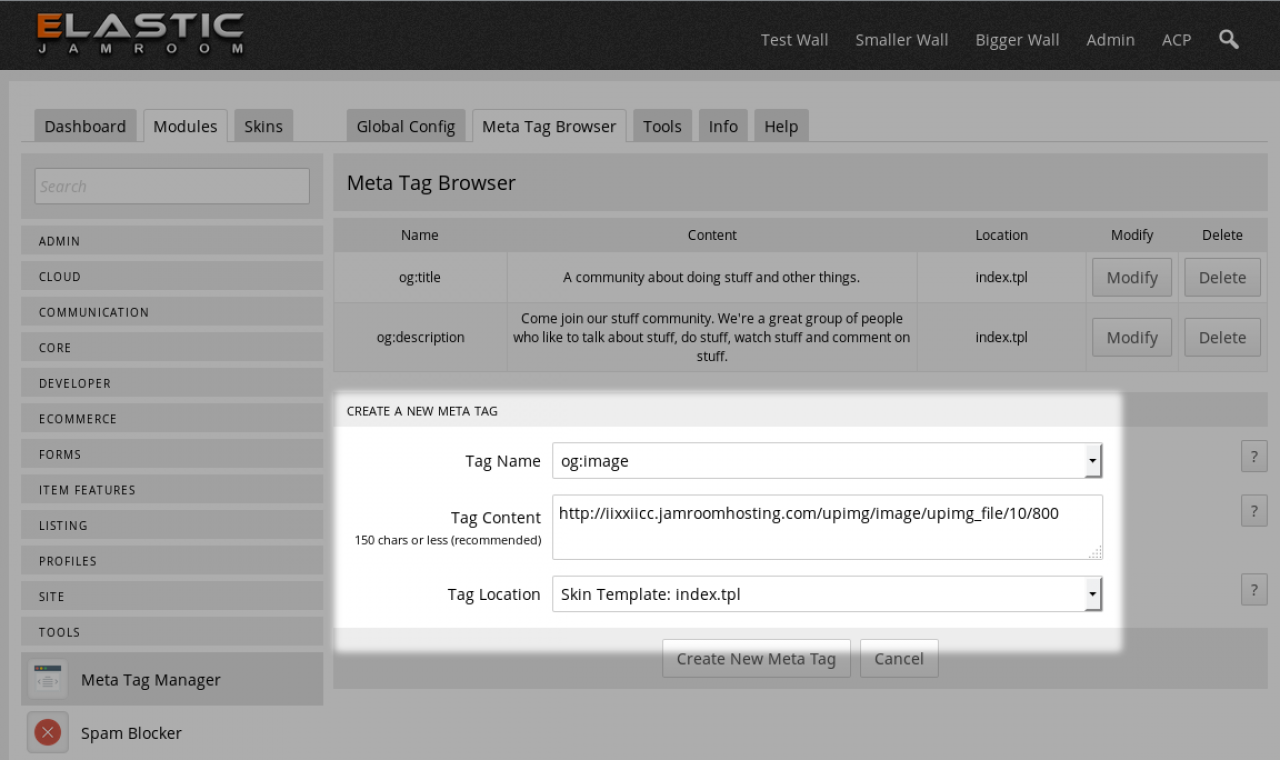
The og:image tag tells Facebook which image to use on your card.
og:image
It requires the URL to an image, so it may be best to use one of the image modules to upload an image first so that you have a good one to provide for facebook.
So upload an image somewhere and copy that images url for use in the Facebook snipit.
An easy way:
* open the blog editor
* add an image to the blog post via the editor image upload module
* set the image to something quite large, maybe 800px
* upload
* open the editor source code tab that looks like < >
* copy the image url:
http://YOUR-SITE.com/upimg/image/upimg_file/10/800
We need that URL to use in the meta tag module.
You can close the blog post now, don't need to save it, the image is uploaded. -
screenshot of the og:image tag being added to the Meta Tag Manager
-
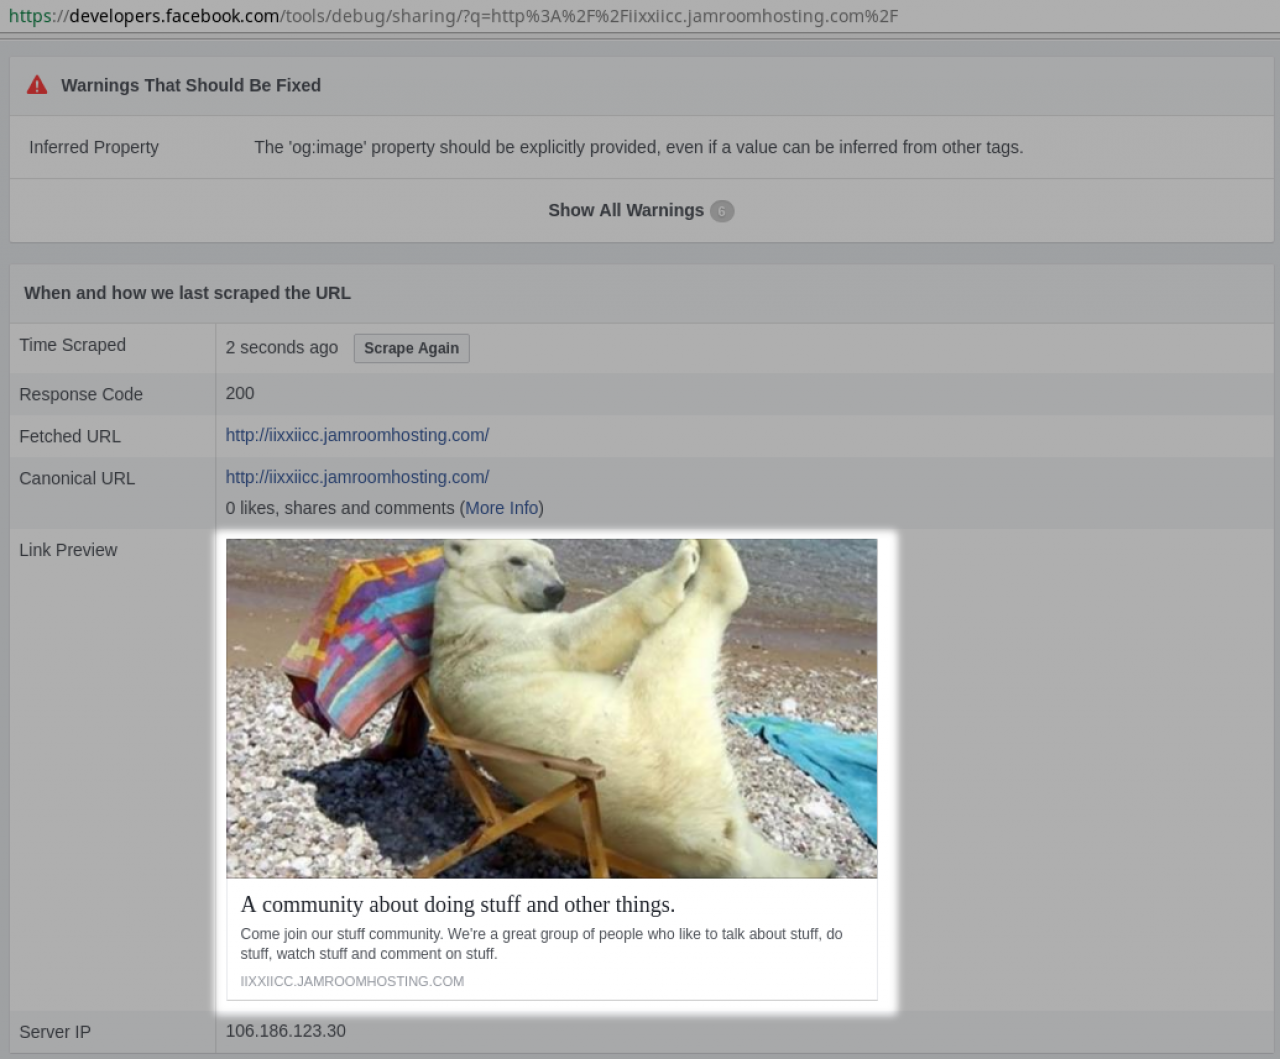
Finished Facebook snipit
screenshot of the all 3 meta tags being used by facebook